
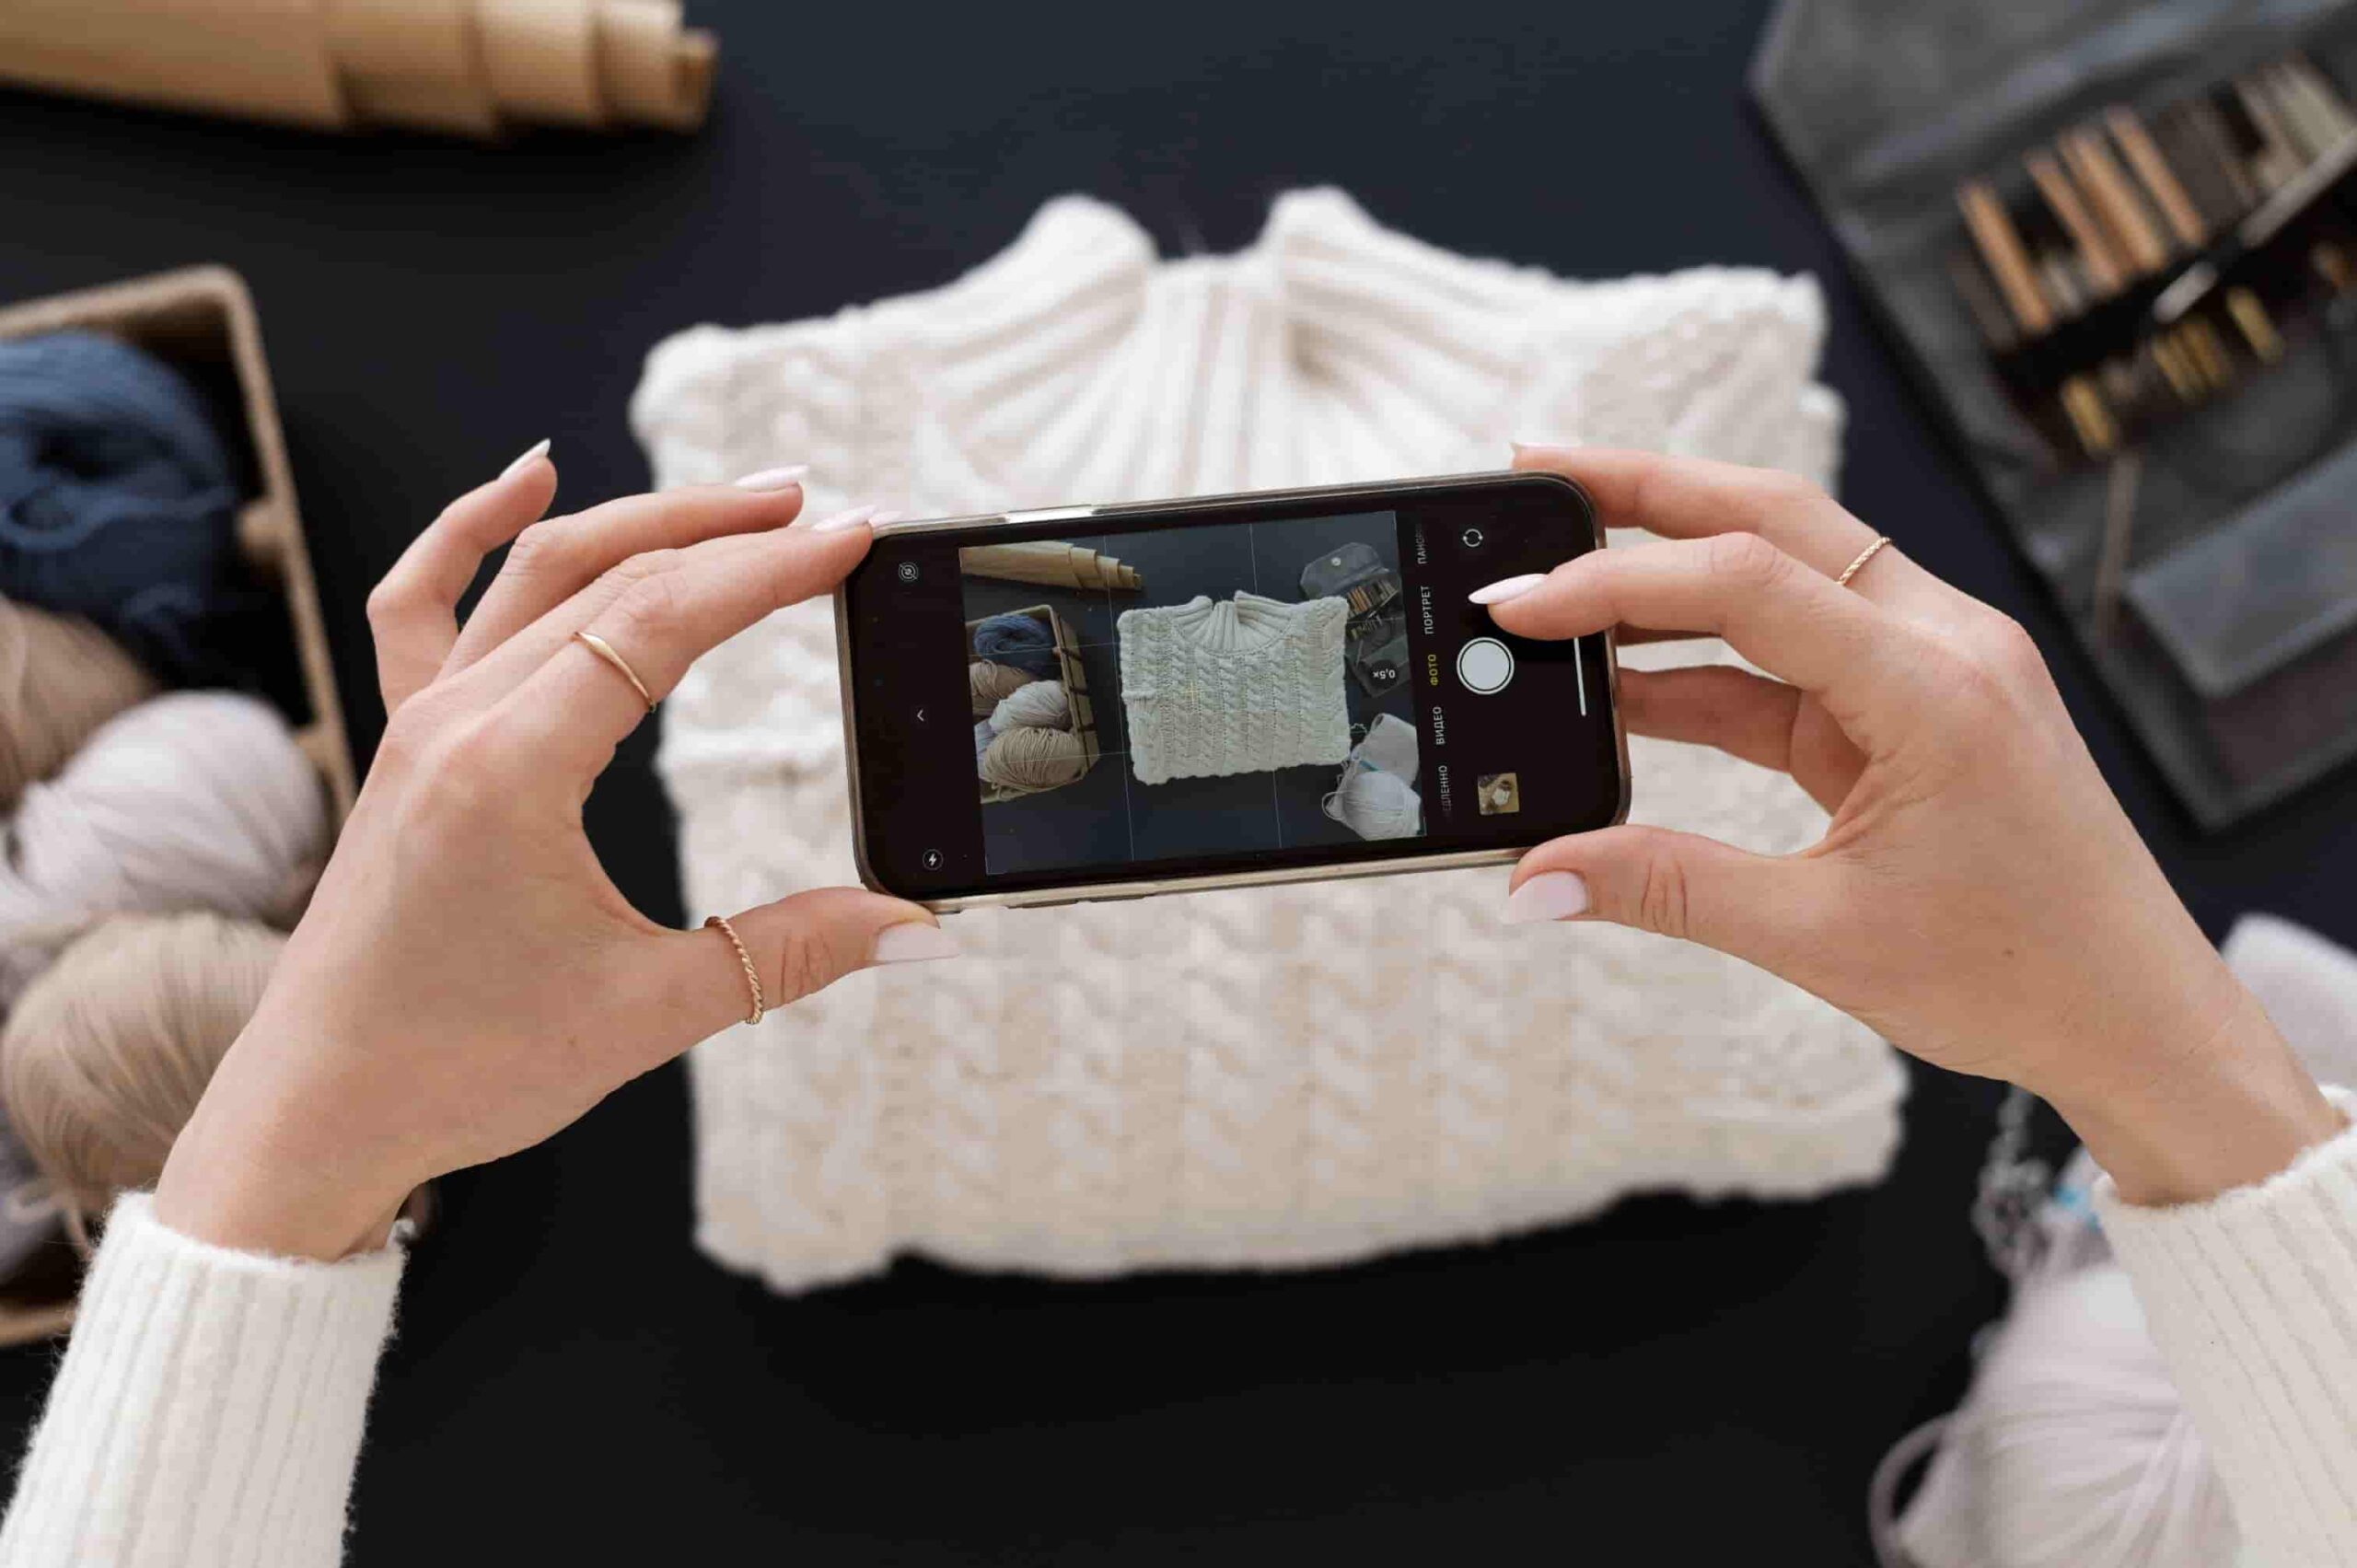
If you happen to own an iPhone and plan to learn how to take product photos with iPhone, then this article is for you.
A visually appealing and striking image is necessary to get the attention of your potential customers. Most of your product photos are good enough if taken with an iPhone. It all comes down to practice and experimentation to get the perfect shot.
In this article, follow through to see how to take product photos with an iPhone, which will ramp up your eCommerce sales.
Equipment Needed to know how to take product photos with iPhone
Several are the tools and accessories that give added beauty to your product shots and make them an attention-seeking photographic marvel.
Let’s see how to take product photos with the iPhone, by assuring the mentioned equipment.
Your iPhone
Your iPhone is the major key to taking snaps of your product. The new versions of iPhones click top-class images.
Don’t stress! Even if yours is older, you can properly click great pictures.
Camera App
The iPhone has easy default camera settings, which is perfectly okay to start capturing your products. For advanced features, you can try Camera+ or ProCam.
A Tripod
A tripod is a must if you want to avoid unwanted shaking and capture sharp images; creative freedom in shooting angles is needed, holding securely the iPhone for stability.
Where possible, use a tripod that has phone mount capability.
You can click the perfect shot using Manfrotto MTPIXIMII-B to capture the perfect shot. It will cost you around $30.
Lens
This added lens will provide more creative effects and develop your shooting options while shooting with an iPhone. You can get a Xenvo clip-on camera lens for your iPhone during your product photos.
Also, the telephoto lens, fish-eye lens, and angle lenses might help you click on your desired photos in different styles.
However, the default macro modes are available in the iPhone 13 and later versions.
A Flat Surface
First and foremost, you will want to set up a stable surface on which you can place your product. The flat surface will let you be in control of the composition. You can shoot a perfect photo on a flat surface with a tripod.
A White Background
Backgrounds can therefore assist an individual in narrating a story about the product. A pure white background can create a clean and minimalistic view of an image.
It would enable you to focus on the main object by showing the details and features transparently. It is important to note that white contains no distractions; hence, you gain maximum focus on your objects.
Lighting Setup
Proper product photography lighting setup is necessary to capture desired images.
When trying to capture the most natural look of your products, natural light has no alternative. The product photography setup should be in front of a north-facing window so that it captures the natural light.
However, it is not possible to get natural light 24/7. During that condition, you have to take the help of artificial light. You can shoot your iPhone product photography with a softbox, tungsten bulbs, and LED light.
Softbox
A soft box ensures that when you do not have enough light for your product photography, you get enough light. It makes sure the image comes out shadow-free.
You can either purchase a softbox from Amazon or you can make one. Just manage a white box and place lights inside it. Now place your product inside the box.
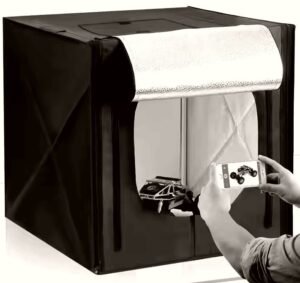
And, Shoot!
Reflector
The studio light reflector is quite pricey. But for a compressed budget, the white foam board will do.
It bounces soft light onto your subject so that it may focus on the detail and soften the shadow.
Set Up DIY iPhone Product Photography Studio

Knowing how to take product photos with an iPhone means setting up a studio. The studio setup can be costly; however, you can set up an iPhone product photography studio on a low budget.
DIY product photography setup ensures portability and flexibility. You can easily set up your home studio in two steps.
Step 1: Gather Your Equipment
First, invest in the essential equipment to set up a DIY iPhone product photo studio. Gather the following equipment:
- iPhone
- Tripod
- Light
- White foam board
- Thin curtain
Step 2: Setup the Photography Setup
- First of all, find an ideal table that will provide a solid and even surface for your photo shoot.
- Bring your product and other accessories onto the table.
- Take a tape and clamp to avoid any unwanted movement or wrinkles on your products.
- Try using a perfect background that would make the product pop. Use props that can be used to depict the story of your product.
Almost everything can be found at home to make a DIY iPhone product photography studio, which is one of the best examples of how to take product photos with an iPhone.
Learn how to take product photos with iPhone: Tips and Hacks in 2024
Now, let’s explore tips and hacks for capturing great product photography ideas that will convert your potential customer into a loyal consumer.
Prepare Your Products
Clean products surely catch the attention of customers. A spotless and dust-free product is best for showcasing and creating a flawless impression on the target audience.
First, gather all your products in one place. The viewer must be shown the details and features of the products from which she decides to buy.
Tags, stickers, fingerprints, or anything unwanted on products are a complete no for minimal distraction.
Sync the Best iPhone Camera Settings
The default camera setting works for most situations. In the case of product photography for iPhones, however, you need to set your camera manually.
Sharp focus is a must to depict the details of the product. You need to accurately get the focus by tapping on the screen. Accurate color attracts the target audience.
The white balance needs to be adjusted according to your lighting condition to show the actual color.
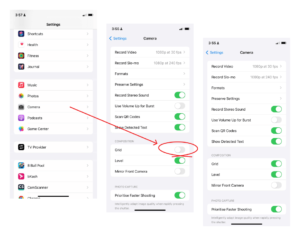
The turn-on grid option on your camera settings will help you follow the rule of thirds. To enable grid, go to settings > camera > enable grid, like the screenshot given below.
Learn the Basic Rules of Composition
There are no standard rules for composition. It is an art that will help you to showcase your products more appealingly. It reveals the aesthetics of the items and presents the details or features much better.
However, the rule of thirds is the most basic in the composition of photography.
Rule of thirds: The subject of the composition in the left or right third of an image and leaving two-thirds open.

The leading line is very helpful in drawing the viewer’s attention to your products.
When you place your products, maintaining proper space, you create negative space. This way, the image will not be overcrowded, and it will create a sense of focus and detail.

The foreground is another type of composition that frames the product and adds depth.

You may use the rule of odds to enhance visual storytelling in product photography.

Applying these compositions will make your iPhone product photography look visually balanced and attractive.
Use Props As a Compliment
Props would add complements and aesthetics to your product presentation. It adds value to the products by showing their key features and functionality.
Using proper props in the image will help customers get connected with the product.
Be Consistent with Each Photography
- Branding your identity: It needs consistency in designing and presentation of your product. You need to be consistent with each image by following four techniques.
- Maintain a style: What defines your brand, and what emotion should you evoke by showing your products? Also, what color represents your brand? After knowing the answer to the previous questions, choose your style, which ensures your brand identity.
- Light: Always try to get the main source from natural light. Check also if there is a Softbox or any artificial lighting so that the best iPhone photography can be captured.
- Background: Select a background that can complement or enhance your products.
- Editing: Preset editing style on the image.
Consistency in style helps you maintain a proper branding strategy. It makes a visual story of your product, and your potential customers will relate to it and make a purchase.
Shot From Multiple Angles
The eye-level shot is the conventional way of shooting product photography. However, you can experiment with multiple angles for the same product.
This way, you can find the optimum way of displaying your product’s details, textures, and craftsmanship. It helps in adding depth and versatility to the image.
Low angles effectively may suggest a sense of power, while high angles can create a sense of focus. Dutch angles can also add a sense of movement.
Take Flat Lay Shots for Social Media Campaigns
Flat-lay product photography is important to be able to showcase the polished, professional look of a product in a bird’s eye view.
This is great for storytelling of the product and engages the potential customer through it.
Use your flat-lay shots for social media campaigns. This will catch the eye of potential customers in no time.
Experiment with Reflectors for a Natural Look
The reflector will bounce the light directly onto your product. It minimizes harsh shadows and keeps the picture natural.
You can even make your DIY reflector, say, a foam board, for your photography setup. Place the foam board opposite the product photography setup.
Use Defuser for Artificial Lights
A diffuser is necessary to diminish the harsh lights and allow soft lights to reach the main object of an image. It can put your excessive lighting in control and keep the color tone of your photo intact.
Flip the iPhone Upside Down for Small Products
Shots of small products need to be at eye level. For small products, try holding your iPhone upside down to capture your small product.
This way, you can shoot your product straight and draw the attention of the audience.
Try Creating 360 Images Using Your iPhone
Open your iPhone camera and tap Pano. Then, steadily capture one after one image by following the arrow sign. You will get the whole scene you wanted to show.
Also, you can try Teleport: 360° Camera. This app allows you to experiment with creating 360-degree images.
Common Mistakes to Avoid in iPhone Product Photography
You have an iPhone, a solid tripod, and trying to know how to take product photos with iPhone perfectly then try to avoid several mistakes.
However, it is in the little things that mistakes can easily creep in and destroy your photos, such as:
Don’t Zoom in to Shoot Your Products
Yeah, it’s not such a good idea to shoot your product photos with an iPhone by zooming because this decreases the quality of the image, therefore resulting in a grainy and pixelated mess.
If you want to shoot a close-up view, you must simply walk closer to the photography setup. And, yes, it is better to crop rather than to zoom.
Don’t Use the Front-Facing Camera to Shoot
The front-side camera of the iPhone is excellent for taking selfies, but in terms of shooting products, it’s better to use the back camera of your iPhone.
It has more megapixels, which in turn leads to super image quality.
Don’t Use the iPhone Flash
The Flash of the iPhone can produce jarring light that gives birth to darker shades in the image. It creates imperfections and blocks details.
Considering natural light source is the best solution here. In case natural light isn’t enough, try using a larger artificial light. Make sure lighting will not overexpose the product picture.
Use a diffuser to remove extra lighting from the image.
How to Edit Your Product Photos with iPhone
Capturing the products is just an initiation; giving it a finishing is the editing stage. Editing is important for your mesmerizing product images; editing empowers the quality of your image.
By following the basic edit rule, you can show the true beauty of your items.
Most of the photos should be ready to use without further editing with the iPhone default edit. Its features include Adjust, Filter, and Crop editing.
You can easily increase or decrease exposure, contrast, brightness, sharpness, highlight shadows, and saturation.
Additionally, you can crop and straighten the photo with the default option on the iPhone.
Also, try to avoid too much editing, as this will make your products look unreal. Product photos are supposed to be real and accurate to bring the best conversion rates.
You can also consider a preset style of editing on the image to ensure it looks consistent. You can download Snapseed and VSCO free for iPhone or Lightroom on any smartphone.
Hire Professional Editors for the Perfection
Editing exclusive products at a tight deadline is exhausting for any human being. Some images require expertise and software usage, which a professional editor can ensure.
They are efficient and make consistent best quality that will help in branding strategy.
The DIY editing is cost-effective but time-consuming and can bring simple enhancement to the image.
Although professional product image editors will provide flawless finishing, some advanced techniques require an expert hand for the best conversion rates.
If you need help with product photo editing services, reach out to us!
FAQ
How to lower ISO on iPhone?
You can adjust the ISO to get the picture you want. Open the camera of your iPhone. Then, focus on your shot by setting it.
You can notice, that after setting your focus, a sun icon will appear. Swiping down will lower the ISO while swiping it up increases the ISO.
Is there a black light app for iPhone?
Yes, there are black light apps for iPhones. They are Black Light Vision and Black Light – Codebreaker.
Is there a blue light filter for iPhone?
Yes, there is a blue light filter for iPhones.
Go to settings > Display & Brightness. Tap the night shift settings at the bottom of the screen. Press it to turn on the blue light filter.
You can also see there is a slider from less warm to more warm, which means from more blue light to less.
How do you turn on the LED light for iPhone?
Go to settings > Accessibility > Audio & visual > LED Flash for Alerts
Turn on the LED flash for Alerts.
Turn on Flash while unlocked. Turn on Flash in silent mode.
Now, check if it works or not.
How to turn grid on iPhone camera?
Go to Settings > Camera > Turn on Grid.
How to get glare out of pictures iPhone?
Clean your lens before taking a shot. A picture taken with natural light is perfect. Try to have a white background while taking a picture so you can get a detailed photo.
If your lighting is high, you will develop glare on the picture.
Soften overly harsh light and get rid of shadows by using a diffuser. Hold still for a long exposure in low light and get a sharp image in return.