
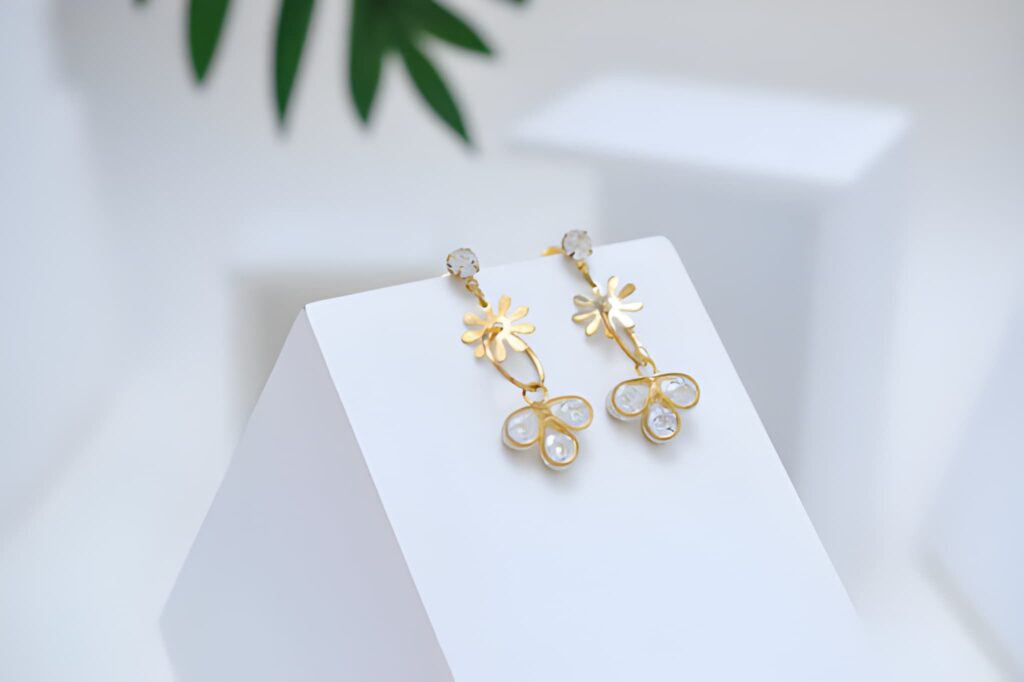
High-quality product photos are synonymous with customer conversion.
Whether you are showcasing your product in online stores or in a brick-and-mortar store, you need professional product photos to highlight the details of the product.
This blog post is a comprehensive guide where I’ll discuss how to take product photos like a pro.
I will cover the equipment you need, camera and light setup, some secret tips, and a few post-processing techniques.
Items you need to take good product photos
Increasing your product sales or decreasing them depends on your product image. A high-quality product can increase your sales up to 70%. With the proper equipment and studio setup, you can do stunning product image photography.
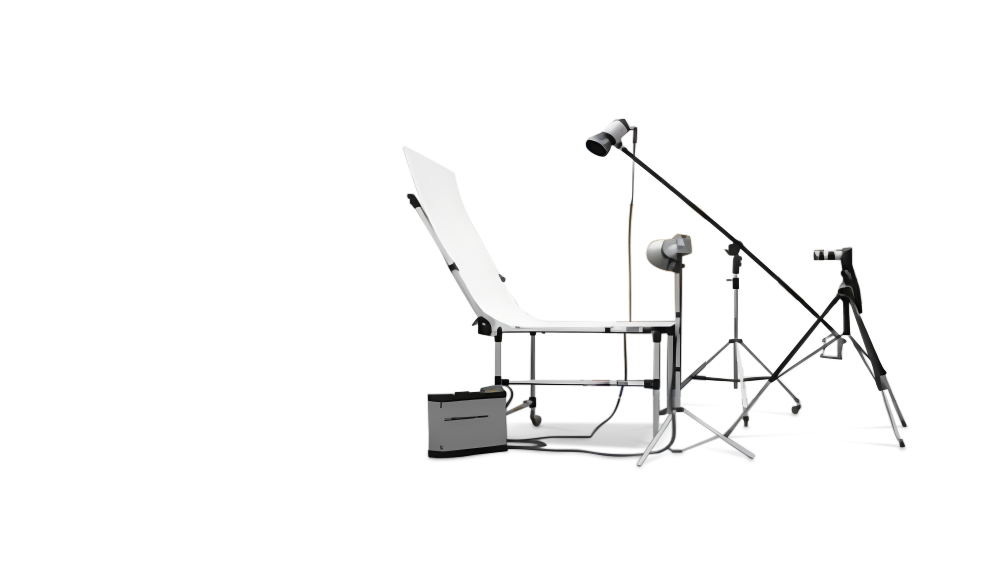
Taking the best product photography is not always about having highly-priced equipment. But you need some essential items even if your shooting space is a room or a studio. Also It is more about having the right skills and tools.
Let’s discuss the requirement items for high-quality product photography.
Camera
You can take your product photos with a digital camera or your smartphone. Both these devices have their own advantages.
If you require the highest image quality, control, and plan to do extensive post-processing, a digital camera may be the better choice.
On the other hand, if you prioritize convenience, portability, and quick sharing, a smartphone can be a great tool for capturing product photos.
Digital Camera
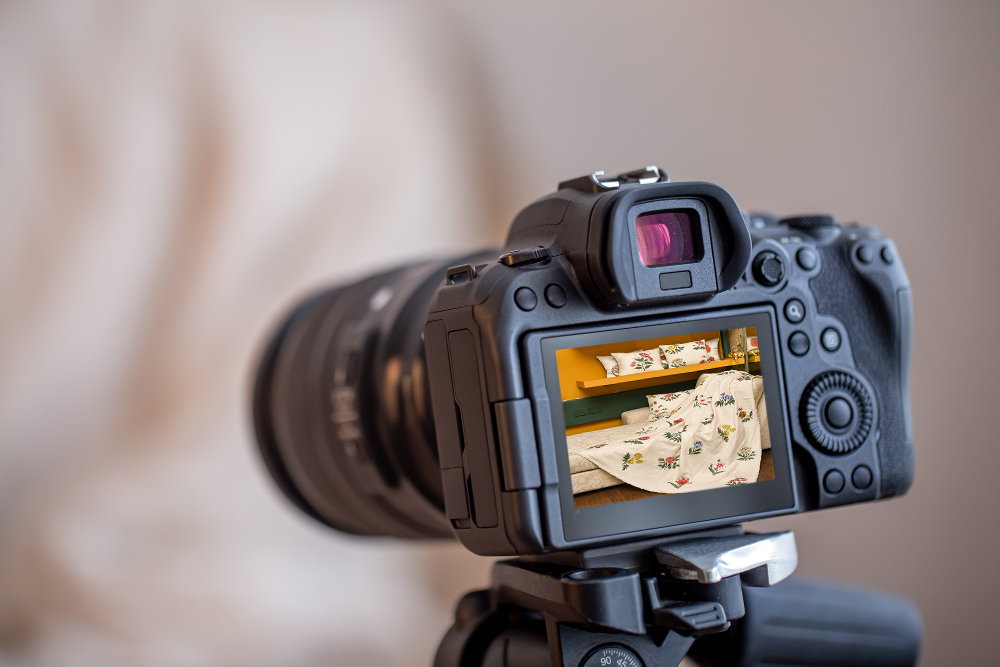
Having a digital camera is highly recommended for professional product photography.
With a digital single-lens reflex ( DSLR) camera, you will have more control over different aspects of the photos, including aperture, shutter speed, and optical zoom capabilities.
If you are serious about your business, try investing a few bucks in a DSLR.
A digital camera may cost a few hundred to a few thousand dollars. A mid-range digital camera is quite good enough for your product photography job.
For example, the Canon EOS M50 Mark 2 will cost you around 500 dollars. A DSLR with this budget and specification will work fine for our e-commerce photography project.
Smartphone
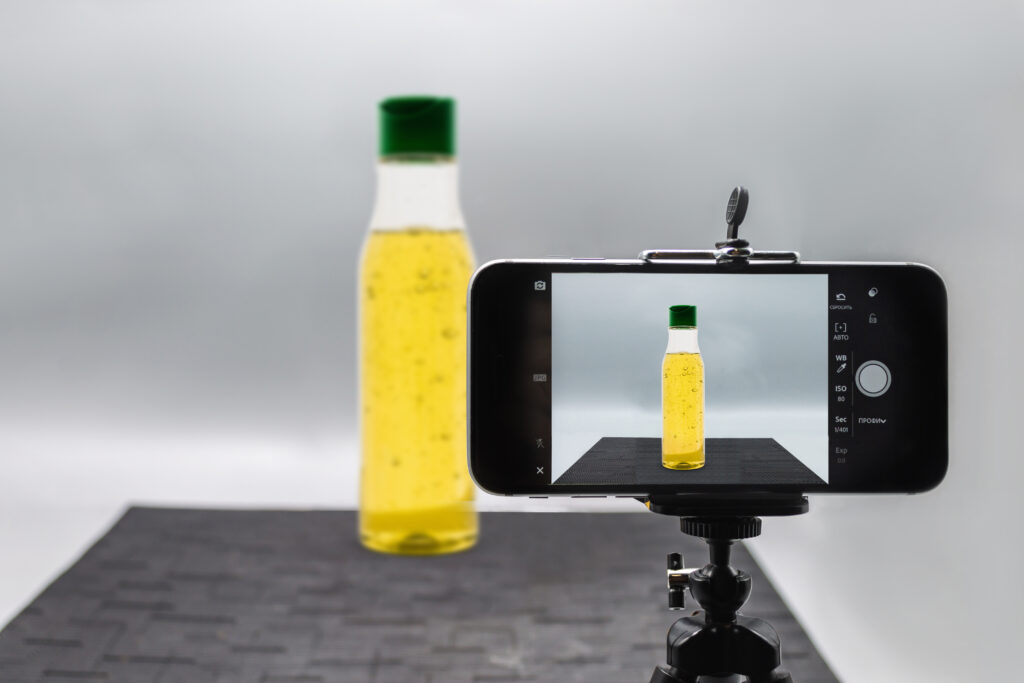
Smartphones are not the best options for photography. However, there are smartphones with advanced camera technologies that are capable of capturing professional-grade images.
Smartphones are lightweight, convenient to use, and cost nothing compared with a digital camera.
But you have to compromise the image quality and control over the adjustment in post-production.
- iPhone: IPhones are famous for their advanced camera. You can take the photo in RAW format, have more control over the final image, and adjust it as you need. Which iPhone model is the best for product photography? iPhone 17, Pro, or Pro Max is the latest iPhone model with the most sophisticated camera, having a 48 megapixels of primary sensor. I suggest you get any of these latest iPhones. If you do not have a newer model, do not go below the iPhone 12. Otherwise, the picture quality might not make you happy.
- Android: Android phones are not as good as iPhones, but there are a few models of Android phones that are good for product photography. Google Pixel 10 Pro and Samsung Galaxy S24 Ultra are some popular names of Android-operated phones with advanced camera functionalities. If you want to capture product photos using an Android phone, you need to spend at least $500 to get a phone with a high-quality camera.
Tripod
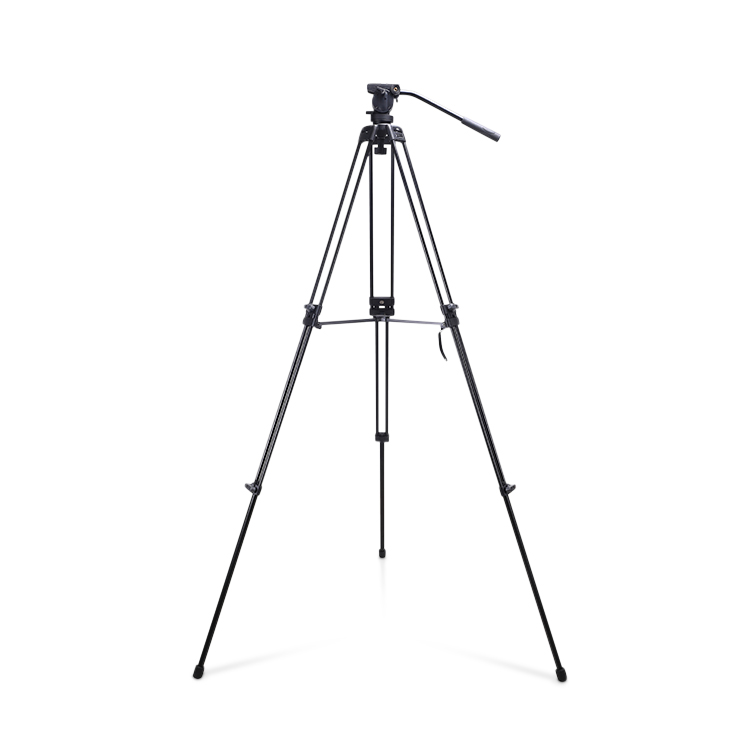
Product shots are usually taken with a slow shutter so that more light can go through the camera to capture more detail of the product.
In situations like this, you need to hold the camera carefully to avoid motion blur. Therefore, product photographs with high details are almost impossible without a tripod that can stabilize the camera, especially in long exposure situations.
What kind of tripod is good for product photography? Well, you do not need a super professional tripod to take good product photos.
A tripod that is compact and lightweight has adjustable legs and ball head mounts is good enough for product photographers. You do not need to spend more than $30 for a basic tripod.
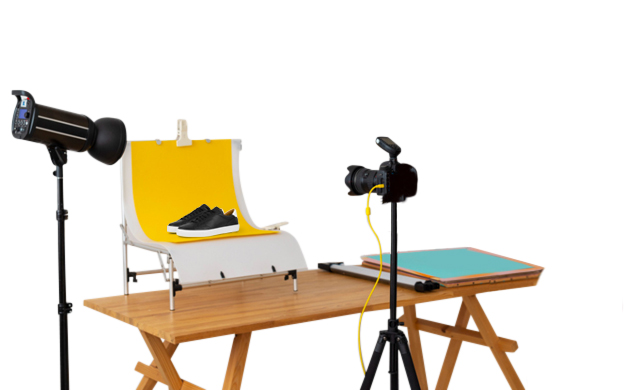
White sweep background
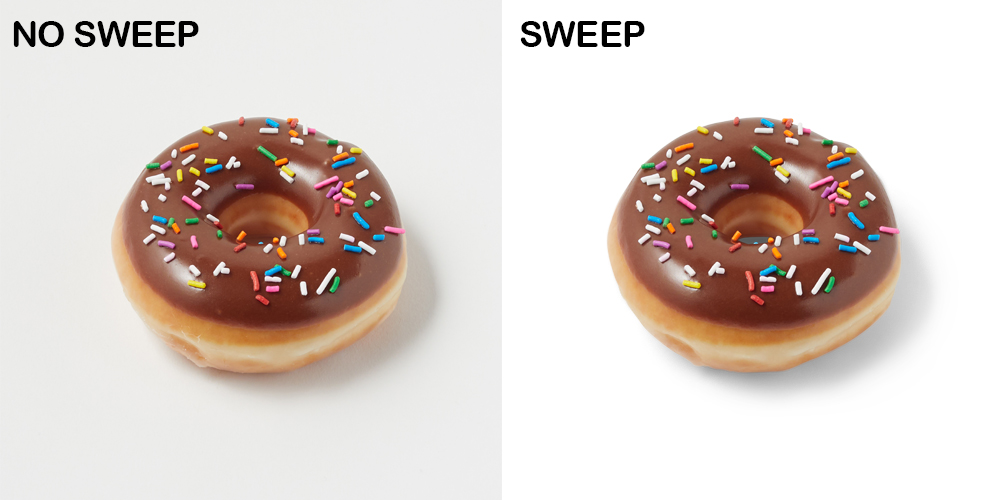
White background photography is great for eliminating distractions. It ensures consistency across your product images.
A sweep background, on the other hand, gives you flexibility while you are setting up the background. It eliminates the shadow and provides a seamless image background.
Therefore, it helps the image editors a lot in the post-processing to highlight the product and make it vibrant.
White paper or poster board can be a great, affordable option for your white background. You may buy it from a local stationery shop for around 10 dollars.
The paper should be pure white and free of wrinkles. Check it carefully before you buy.
Background support
Anything that you use for hanging and holding the background in position is the background support.
The type of support you use for your background will vary based on the size of the product and the lighting conditions.
Chair
Using a chair and a pair of clamps can be a simple and easy solution for supporting your background. This kind of setup is suitable for smaller products.
The clamps will hold the background firmly and resist wrinkling, while the chair will act as a base for the product.
Chairs are easily movable and adjustable. They are the cheapest background support, costing you almost nothing.
Table
You can use a table adjacent to a wall for your product shoot.
The table can be used as the base ground of the product, where you can set up the sweep background on the wall with the use of tape.
The wall and table setup are perfect for capturing smaller products. It will save you some money on buying background stands and clips.
Backdrop stand

Background support stand systems are usually adjustable. When your products are relatively larger, you can take professional photos on a smaller ground.
Whereas an average backdrop stand can have a width of 7 feet, which is suitable for products of almost any size.
A background stand may cost you around 50 dollars. However, they usually come with all useful accessories, including clamps, crossbars, sandbags, and carry bags.
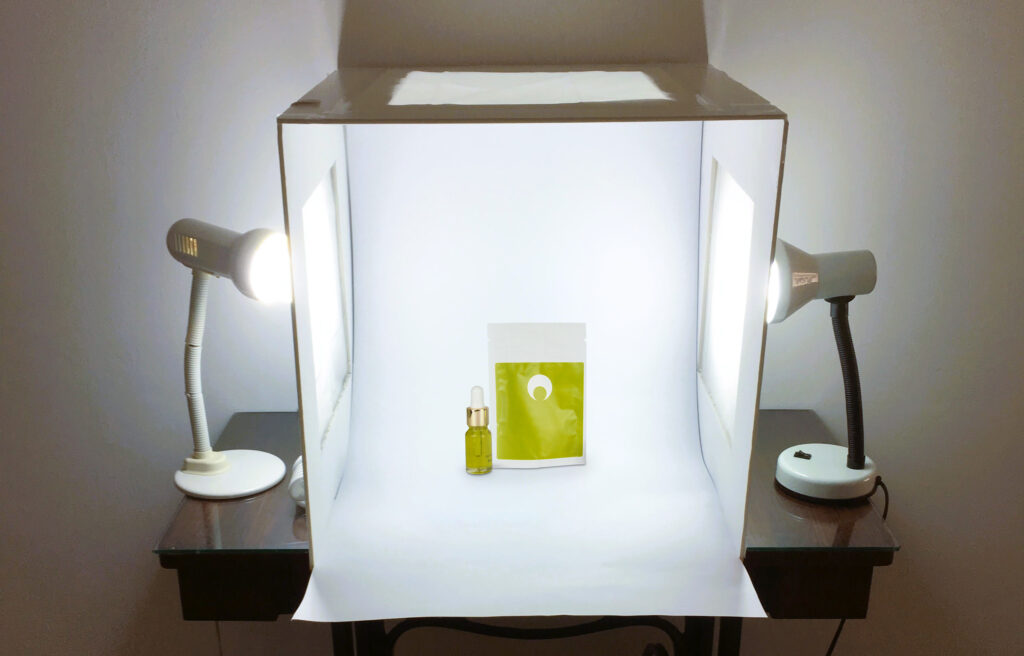
Lightbox (optional)

Lightboxes are portable studios for product photography. They are usually small, box-shaped arrangements with light and white backgrounds inside.
You may make your own DIY lightbox with some simple accessories, most of which may already be available in your home.
However, if you do not have enough time for that, you may purchase it for around 70 to 100 dollars.
Lightboxes are usually smaller, having a width of around 2 feet. Therefore, they are good for products with smaller sizes. Some advantages of using a lightbox include –
- Controlled reflection for the white surface of it.
- Effective illumination system.
- Controlled and adjustable shadow as per needs.
- An even lighting system comes out from all angles.
- Suitable for sweep background.
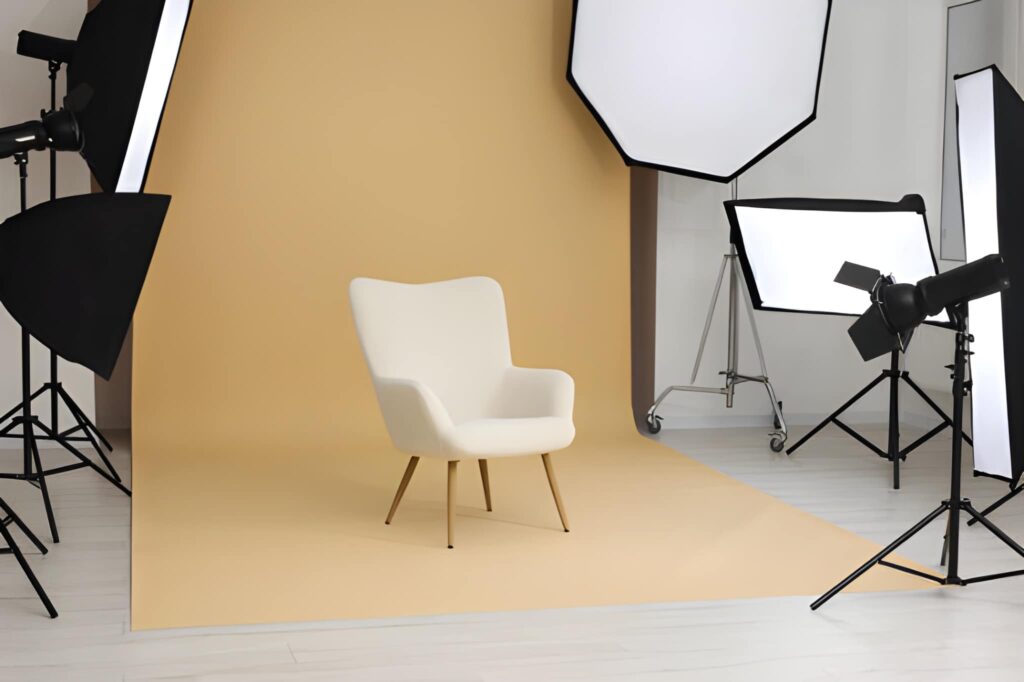
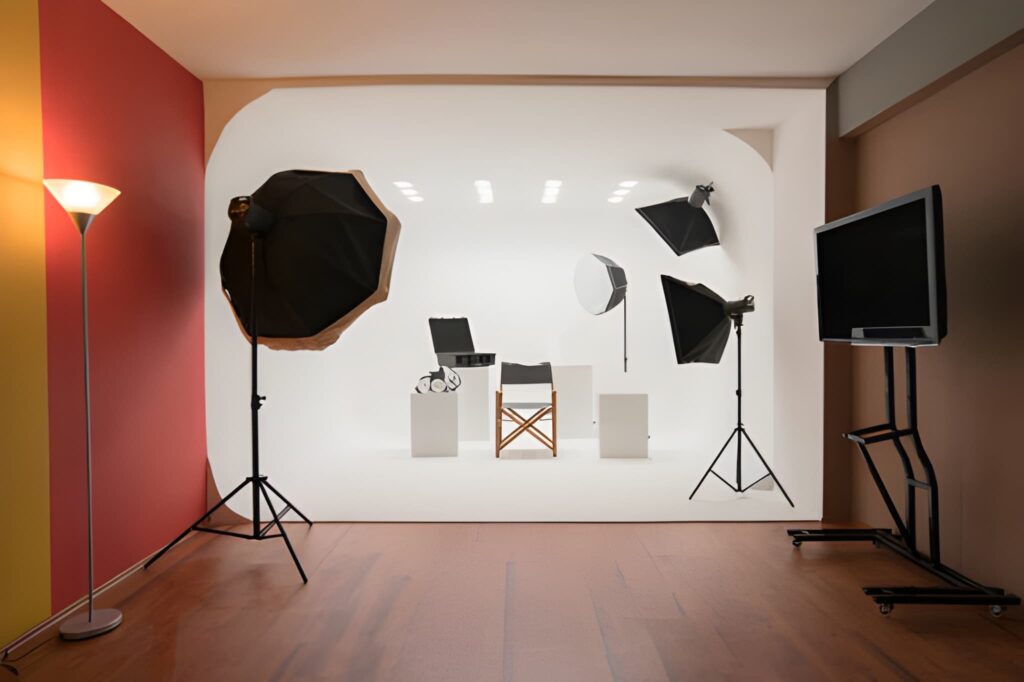
Lighting equipment
Proper illumination is a must for product photography to highlight the product properly and avoid unwanted shadows.
A simple and basic lighting arrangement includes continuous light, modifiers, diffusers, reflectors, and light stands.
However, if you can get softboxes, they come up as a package of all these lighting accessories.
Softbox
Softboxes are usually light modifiers. They can produce soft, natural, and dramatic light effects. They are usually attached to a light source and a stand.
The box has a white or reflective interior for better illumination. The front of the box can also be covered with a white or colorful cloth that acts as a diffusion panel.
Softboxes with all these accessories may cost you around 70 to 100 dollars.
Some advantages of using softboxes while capturing great product photos include –
- You can adjust the intensity of the light.
- Easy to control the angle and direction of light.
- It can minimize reflection and glare.
- The lighting effect can be adjusted as needed.
- They diffuse the light perfectly to produce an even glow.
Props (Optional)
Props are not mandatory for product photoshoots. However, they can add dimension, context, and depth to your photo and make it more appealing to the end customer.
In the end, props help to create more sales by attracting potential buyers. The type of props you need for your product depends on the product itself.
Below are some common props that are used in product photography.
- Ring holder or jewelry stand ( for jewelry photoshoot)
- Plats or dried flowers
- Books or magazines
- Candles
- Colorful backdrops
- Product with packaging
- Geometric blocks
White reflector
White reflectors are necessary for ensuring natural light on the product by reflecting the natural or artificial light source.
Reflectors enhance the color and texture of the product by eliminating shadows. They help create a uniform and balanced lighting situation.
The size of the reflector can vary based on your lighting and background setup, costing you around 20 dollars.
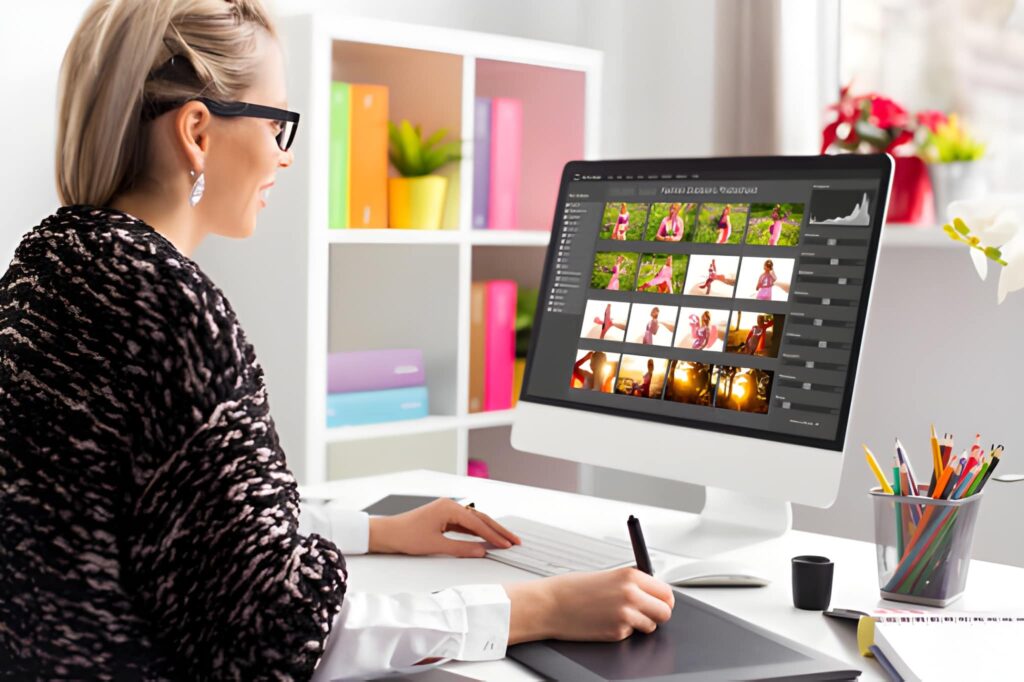
Image editing software for post-processing
No matter how much effort you give to capture your product photo, there will be some areas of improvement.
Even the best photographers need to adjust the exposure, color, and shadow.
Therefore, you need to have photo editing software to enhance and retouch your photos to make sure your products are creating appeal on the e-commerce websites.
Adobe Photoshop and Lightroom are the most popular photo editing software, giving you flexibility in editing your images from a variety of angles.
Some other popular photo editing software you may use are PhotoDirect Essential, Myedit, Fotor, PhotoscapeX, and so on.
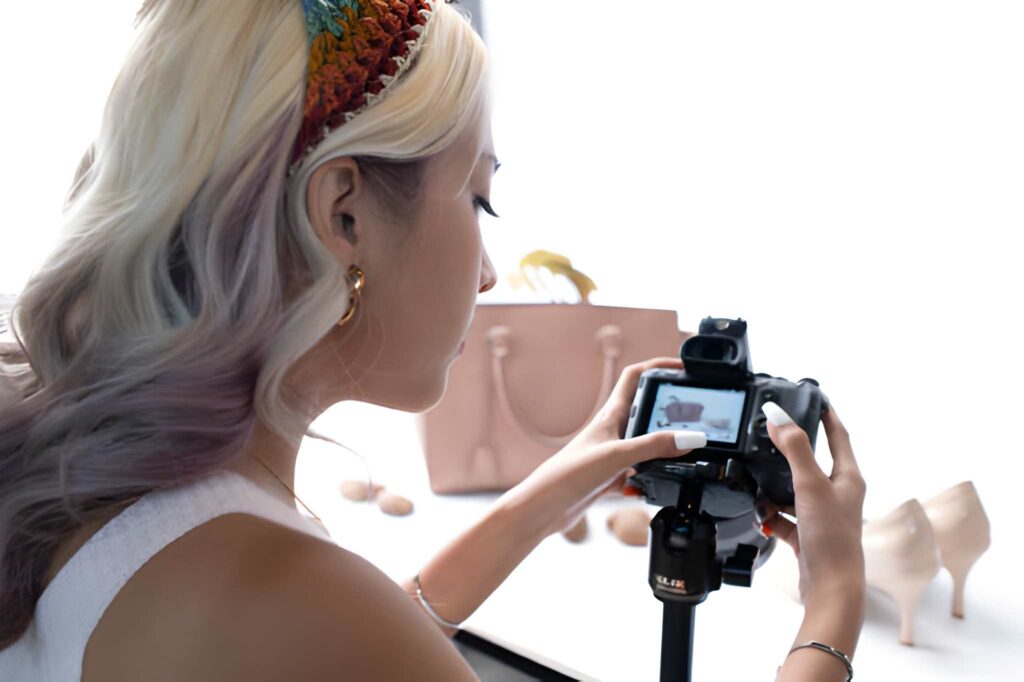
How to take the best product photos
If you have everything you need for your product photography setup, it’s time to capture some stunning images of your products.
To ensure you get high-quality photos that highlight the product details perfectly, you need to follow some simple steps, which I will describe for you in the next sections.
Set up your background & table
As I mentioned earlier, you can create your photography setup using either a table, a chair, or a backdrop stand.
If you are using stands for your background, assemble all the parts, including pipes and connectors. After that, adjust the stand height and width.
Finally, set up the background with the clips. Make sure the background is free from folds, wrinkles, and creases.
To set up the background with a chair, use your clamps to hold the backdrop with the top rail of the chair.
Make sure the sweep background covers from the top rail to the seat of the chair. The background should be firm and wrinkle-free as usual.
Set up the product
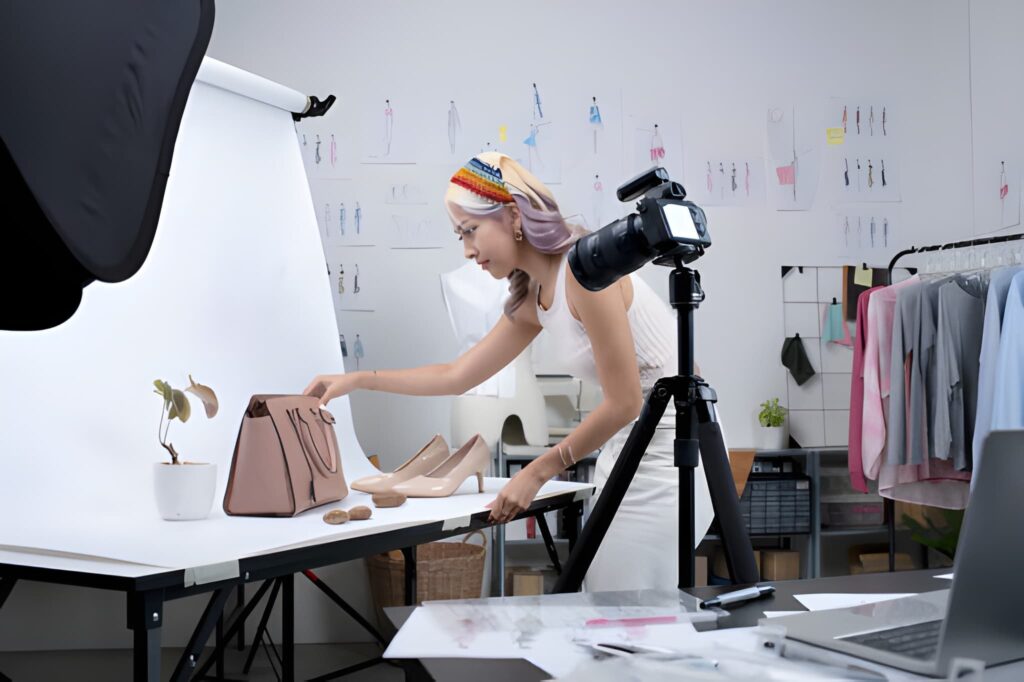
Clean and polish your product before presenting it in front of the camera. Make sure there are no labels or tags on the product.
A professional DSLR camera can capture even the finest details of your product, such as a fingerprint. Therefore, make sure you present a clean and good-looking product for an uncluttered presentation.
Adjust the light
Even if you have premium illumination equipment and lighting accessories, you can end up with a flat product photo with uneven brightness and shadows.
Whether you are using natural light or an artificial light source, adjust the light according to the guidelines below:
- Determine the optimal placement of the light source
- Make sure the light is set according to the camera settings
- Ensure the right intensity of the light source
- Use diffusers to create an appropriate atmosphere and mood
- Make the best use of your softbox if you have one
Natural daylight
You can make the best use of the natural daylight in two ways. Photos of a few types of products, fashion items with models, for instance, require capturing outside in natural light.
While taking photos outdoors, try capturing your photos one or two hours after sunrise or before sunset to avoid overexposure due to harsh sunlight.
Another great way of shooting your product photo in natural light is capturing the photos near the window or in a shaded area to avoid direct sunlight.
You may also use diffusers or reflectors to soften the light if you find the light is too bright.
Artificial light
When you are taking photos of your product with an artificial light source, make sure you capture every detail of your product.
Therefore, you need multiple light sources to give your product the right amount of exposure.
If you are using softboxes, you need at least 2 sets of equipment – one as the main light source and the other as a diffuser to eliminate shadows.
The primary light source should be placed in front of the product, and the diffusers should be checked from different angles to determine their optimal placement.
To get the best value, position the softbox from the backdrop, about some feet away from the subject. Also, position the softbox with 45 degree angels from the subject’s face.
Keep in mind that the distance between the softbox and the subject is a major factor in taking high-quality product images.
After that, set the camera to ISO 100, an aperture of about F/8, and a shutter speed of 1/200s. This will give you the best product images.
To get a proper image, make changes to the light source and camera settings. This will make your photo perfect.
Adjust the camera
If you are starting with a digital camera, then keeping the majority of the settings in automatic mode can be a good option. But it will not produce good picture quality.
You may set the white balance to auto, turn off the flashlight, and set the image quality to the ‘highest’ level.
Another important camera setting you should consider is the output image format. Image editing software works best with the RAW image format.
This format allows the most adjustable option. Therefore, set the format to RAW if you are capturing with a DSLR or iPhone.
- Keep the ISO as low as you can: Keeping the ISO at the lowest setting will produce an image with the least digital noise. A higher ISO is only desirable in low-light conditions. When taking product photos in good lighting conditions, we need to set the ISO to 100 or 200 to keep the images free from unwanted noise.
- Use a small aperture: Set your camera aperture to the smallest number you can, f/16 or f/22, for example. At this setting, your camera allows less light to pass through the lens, but the depth of field is increased. At a higher depth of field, the camera will capture more detail of the subject and make the subject the point of focus, which we care about a lot in product photography.
- Shutter speed: Shutter speed defines the amount of time the camera sensor is exposed to light. Slower shutter speed creates motion blur but provides a sharper image. In product photography, we’re capturing the static product using a tripod. Therefore, we do not need to worry about the images becoming blurry due to a slower shutter speed.
Set up the white card reflector
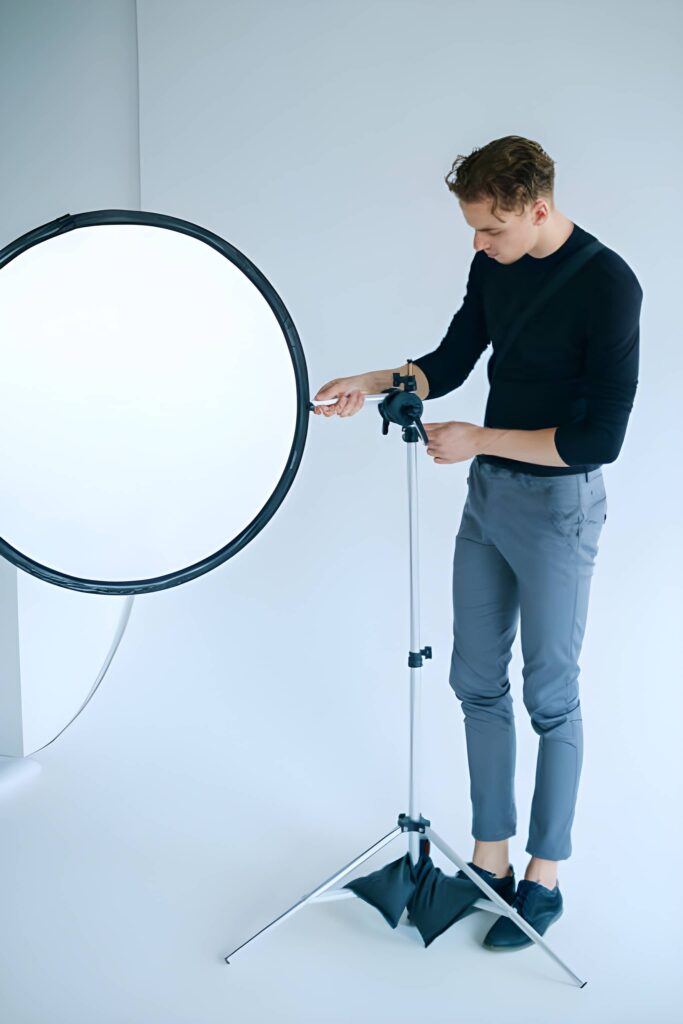
White reflectors in product photography are used as light fillers. These lighting accessories are used for filling the shadow with a soft light that is reflected from the source.
- Reflector for outdoor conditions: When you are shooting outdoors, try putting the white reflector in front of the subject. You may also move it slightly left or right to find the best position for eliminatingthe shadow. If you are in a low-light condition, then place the reflectors from different angles to direct the available light to the subject.
- Reflector for indoor conditions: Place the white card reflector opposite the light source while you are shooting indoors. It will make the best use of the light, illuminate the product from a different angle, and eliminate shadow.
Capture your photo

After you have set the light, reflector, camera, and background, it’s time to take the photo.
Below are some simple product photography tips that you need to remember while capturing the photo.
- Try to highlight specific features of the product that make sales
- Understand the goal of the photo beforehand
- Use props or models if they complement your product
- Keep the focus on the product
- Take pictures from different angles and perspectives
- Take close-up shots to capture the details of the product
Evaluate your photo
After capturing some photos of different products, take some time to evaluate what you are producing. Take a closer look at your images and find out the areas of improvement.
Experienced photographers will have some idea of the necessary changes they need to the photography setup for better results.
For example, they will change camera settings such as ISO or shutter speed, light intensity, or position of the reflector for catching high-quality product photos.
Edit your photo

After you are done with your product photoshoot, it’s time to retouch them. If you are an expert image editor, then you can do it for yourself.
Otherwise, you need to hire an e-commerce product image editing company, where you can make your edits for $1 to $5 per image, which I think is considerably cheaper.
Below are the services that you might need to enhance the appearance and overall appeal of your product images:
- Creating clipping paths around the product
- Background removal and addition of a consistent background
- Image color change – creating multiple color options
- Shadow creation service
- Image manipulation and composition
- Image retouching and blemish removal
If you are interested in outsourcing your edits, you can read our guide on product photo retouching costs.
Optimize your photo for the website
Optimize your product images before publishing them on the websites. Optimizing the images will reduce the load time of the website.
It enhances user experience and thus helps get a better ranking on search engines. Below are the steps you need to take while optimizing your images:
- Compress the image to reduce the file size, so that it loads in seconds
- Change the file format to wider support, like JPEG, PNG, or WebP
- Resize and crop the image, and ensure your product looks great on both small-screen and large screen size device
- Add image alt text & description for SEO and accessibility.
Click to watch the Product Photography Tutorial: HOW TO TAKE AMAZING PRODUCT PHOTOGRAPHY
Bonus Tips for Product Photography
Consistent product photography is the best way to take product photos. It’s important to increase customer trust and boost your e-commerce business.
To take a high-quality product image, you have to follow some tips like taking multiple shots from different angles, proper subject placing and others.
Here we explained 6 tips for photoshoots on how to take professional product photos.
Take multiple shots from different angles
There are a number of reasons why you should take multiple photos from different angles. At first, it’ll create a different perspective of your image.
Customers will be better informed of what they should expect from your product.
Multiple photos of the same product from different angles will make a variety of visually stimulating product presentations.
You may present different textures and patterns of your product that may not be possible from a single photograph.
Here are some shooting angles to make your image stand out.
- Eye level: it’s the angle where the photographer shoots straight on, and the direct front of the subject.
- High angle: The photographer takes high-angle shots so that shoppers see the product from above.
- Low angle: When a photographer shoots the subject from below, it’s called low angle.
- Bird’s eye: from a bird’s eye angle photographer shoots from top down angle, it’s like a bird seeing the product, that’s why this angle is called bird’s eye angle.
Define your idea beforehand
You should have proper product photography ideas before you take the photos. It will save you time and help you avoid unnecessary revisions.
Create your plan first and have a clear vision of what you are going to do.
If you are not a one-man army, then discuss your plan with your team members so that everyone is on the same page and works toward the same goal.
Be consistent
Consistency in photography includes the techniques to take photos in the same lighting, background, and composition. Why is it important for product photos for your e-commerce?
Well, it is important to ensure a cohesive look of the products throughout the e-commerce platforms.
It will increase customer conversion and reduce the return rate. In the end, consistency will create your brand identity and enhance its value.
Capture the photo with context
It is important to give confidence to the potential buyers that your product is going to solve their problem.
One way of doing so is to take a photo of your product with context.
For example, if you are selling toys, you can take a photo of a kid who is enjoying playing with the toy.
Similarly, when taking photos of a sofa, take the photo with a model who is sitting on it and feeling comfortable. The context will give confidence to the viewers and make more sales.
Keep the product the center of attention
Keep your focus on the product. A colorful background may distract your viewers’ attention. Therefore, try to use a white or similar background.
Using props and models is a good practice to complement the product. But never let the models become the primary focus of your photos.
Also consider the color of the product, lighting conditions, and other perspectives to judge whether the product is getting attention or not.
Natural Editing, Not Overdoing It
After properly taking the product photos, the next steps are product image editing. Many time image looks weird due to over-editing. So make sure to keep the image natural and look enhanced.
To keep your image natural, follow the natural editing process that’s given:
- Vibrance: Maintain the image vibrance, don’t use high saturation. If you use high saturation, it looks unnatural.
- RGB curve: By adjusting the RGB Curve, you can maximize the image quality. It helps you to maintain the storytelling tone, like warm and cool.
- White balance: During the time of the photoshoot, the big problem is white balance. Due to high or low lighting, the image seems white or a little black. By adjusting the white balance, you can make the image natural. You can do it by adding soft contrast, keep in mind over contrast makes your image unnatural.
Types of product photography
When you’re taking product photos for your e-commerce, the first thing you need to decide is which type of product photography you need. There are several types of product photography, such as lifestyle photography and packaging photography.
Here, we discussed some popular product photography styles currently trending.
Lifestyle photography
Lifestyle product photography happens in a real-life situation as opposed to traditional product photography, where the photos are taken in an indoor setup.
Here, the objective is to show the fitness and design of the product and create an emotional connection with the viewers.
The photographer tries to present how the product can impact the daily lives of the audience.
For example, running shoes or fitness trackers can be photographed with a model when she’s jogging in the morning and enjoying nature.
Single or individual product shots
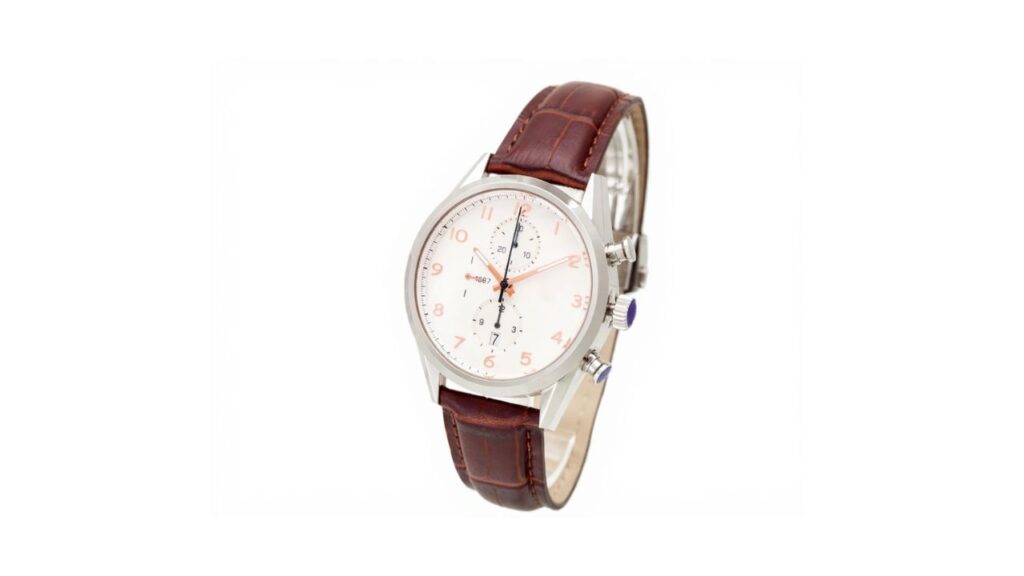
Single-product shoots are the most common photography style for e-commerce businesses. It used to frame a single product with a pure background, providing a clean, distraction-free image.
These individual product shots highlight the product details, such as texture, color, and product size. Customers get a clear idea about the product quality.
Detailed or Macro product photo
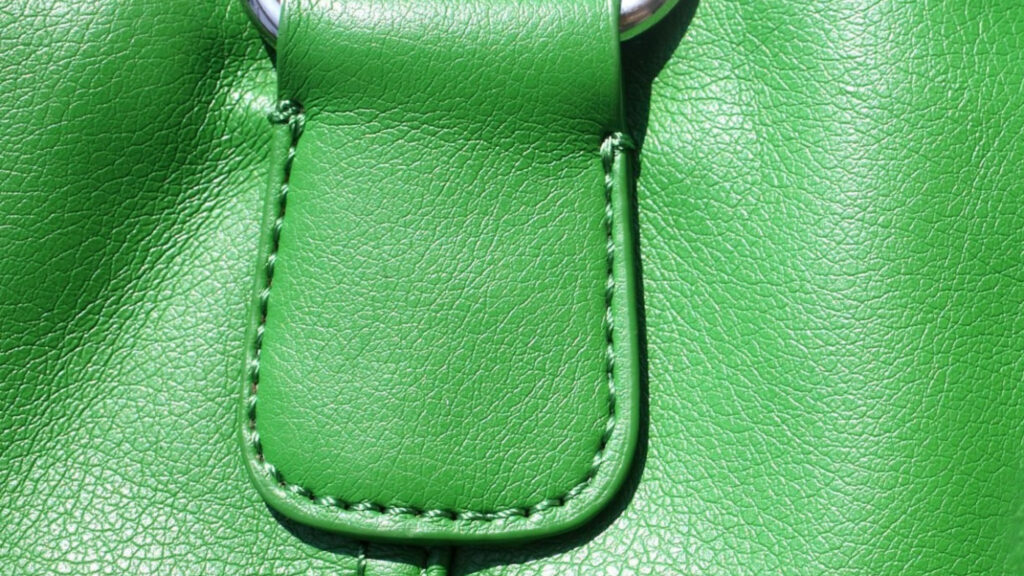
In detailed photography shots, intricate details of a product are highlighted with a macro image.
These photos focus on the color, texture, and craftsmanship of the product and help the viewers make an informed decision.
Detailed shots are taken with a macro lens to ensure the resultant image is clear, sharp, and free from distortion and blur.
Group Shots

Products with multiple color options and variants may be presented with group photographs.
In group photos, you can show the customers your entire color patterns and other available options that the customers can choose from.
Small product items, such as jewelry and cosmetics, can be photographed in groups to show the customers all the available options they have to choose from.
Scale shots
Scale shots are taken to make the viewer understand the size of the product in relation to another object. The objective of scale shots is to give the viewers an idea of the size of the product.
For example, you may photoshoot your product next to a coin to create a sense of scale.
Big product items, such as furniture, can be presented with a model so that the customers understand their size.
Packaging shots

If you have invested a good amount of money in designing your product packaging, the design reflects your brand persona, then why don’t you take a few photos of your packaging materials?
A photo of the product along with the packaging creates a new dimension to product photography.
It creates a stronger connection between the product and the customer, where the customers can not touch or see the products that are sold online.
Start taking your product photo
You do not need every piece of equipment and accessory to start capturing images of your products.
It depends on your photography skills, the type of product, your photography idea, and many other factors.
Many professional photographers may also go through trial and error to take great product photos.
The bottom line is – take your time, generate your idea, and start taking your photos.
If you are not happy with what you are producing, then change your idea and upgrade your equipment. Seek the help of the professionals if nothing works.
Final words
For every e-commerce owner and online product seller, high-quality product photos are crucial to boost and increase their online presence. To take your product image, you need some equipment, even your setup an studio or not.
In this content, we guide all about how to take product photos from equipment and studio setup to photo editing. By following the guide, you can create a high-quality image that stands out.
Keep in mind, a quality image depends on your photography skills, the type of product, your photography idea, and many other factors. Many professional photographers may also go through trial and error to take great product photos.
The bottom line is – take your time, generate your idea, and start taking your photos. If you are not happy with what you are producing, then change your idea and upgrade your equipment. Seek the help of the professionals if nothing works.
FAQs
What are common product photography mistakes?
There are several mistakes photographers make when they take product photos. The most common mistakes are poor lighting setup, distracting background, blurry image, not shooting from multiple angles, dust on the product, and improper framing.
Does a product photo help to increase your sales?
Yes, high-quality product images help to increase your sales by 60-70%. Customers analyze the product image before deciding to purchase. The high-quality product image helps to make their decision fast. It helps to engage with your customers.
Can I take high-quality product photos with an iPhone?
Yes, you can create high-quality product images through your iPhone. To create a standard product image, follow these tips: shoot in RAW, try portrait mode, use a Bluetooth shutter button, adjust exposure before capturing, and shoot from multiple angles.
Do I need an expensive camera to take professional product photos?
No, you don’t need an expensive camera to take a high-quality product image. If you’re a beginner and don’t have enough budget to buy a camera, you can start with your smartphone.
Professionals mostly use DSLR and mirrorless cameras for professional product photography.
What angle should I use for product photos?
For best practice, shoot from multiple angles; a 45-degree view angle works well for e-commerce product photos. You can use low-angle, upside-down, and bird’s-eye angles to create a high-quality image.