
Before Ghost Mannequin Photography you must know Ghost Mannequin Photography tips. The Ghost mannequin helps you to capture more professional clothes pictures. It can also simulate the genuine shape of your clothing items so that customers can visualize themselves wearing them.
Setting up a mannequin, dressing it up, and taking pictures isn’t the only way to do ghost mannequin photography. To produce a professional-looking shot of your clothing for your eCommerce business, you’ll need to use some strategies. In this article, I’ll discuss some methods for getting the best ghost mannequin images for your eCommerce store or catalog.
Why Do You Need Ghost Mannequin Photography?
Clothing should be displayed in such a way that customers can understand the shape, fit, and everything in between. The more information customers receive, the more likely they are to purchase. Models are expensive, and mannequins can be alienating, so your product photography must show the products being worn.
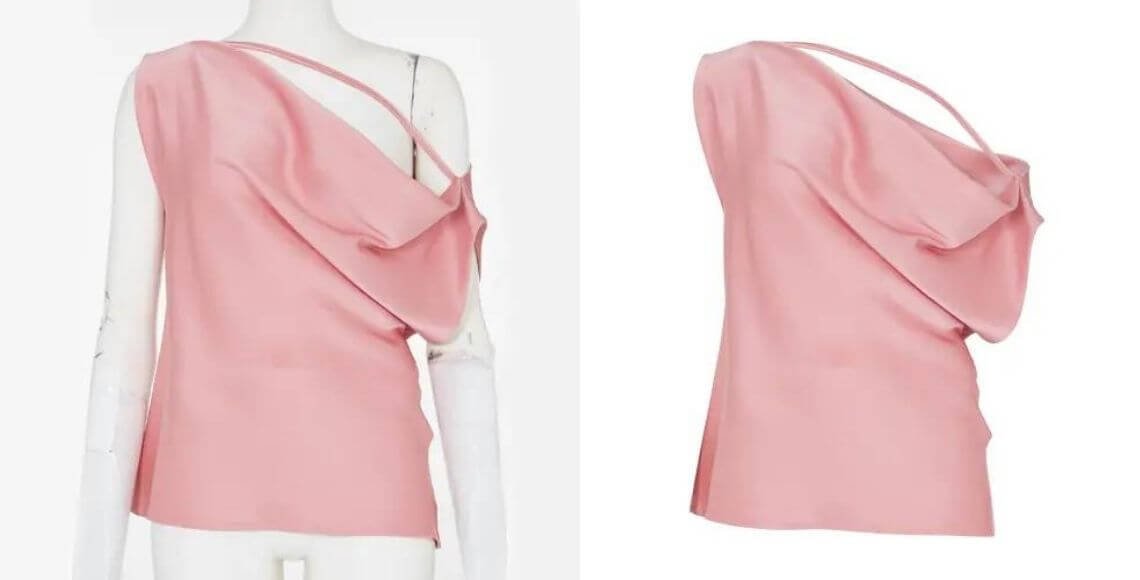
The ghost mannequin, also known as the invisible mannequin, is a piece of equipment used to more precisely demonstrate clothing items. The ghost mannequin effect allows you to take multiple photos of a product on a mannequin and then combine them in post-production to remove the mannequin. The end result is a realistic image that keeps the viewer’s attention on your product.
The Importance of Photographing Ghost Mannequins
When it comes to marketing your fashion items, using a ghost mannequin service is the only way to make your images the ultimate sales magnet. Customers don’t want to view unappealing product photos, which is why ghost mannequin photography is so important.
Furthermore, purchasers are never persuaded to make purchases by bad aesthetics.
The ghost mannequin effect brings your fashion product images to life. Ghost mannequin photography is a primary priority for most businesses looking to boost their image and increase sales. So, if you want to win the competition, you’ll need to master the procedure and take better photos for your online fashion business.
Ghost Mannequin Photography Tips for Product Images
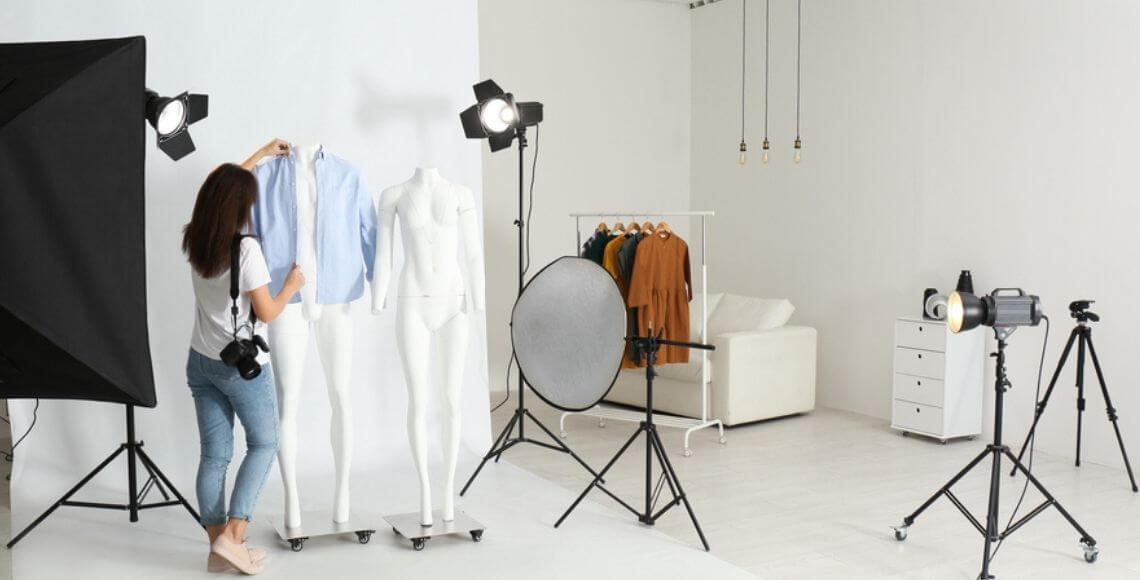
Select the Appropriate Ghost Mannequin
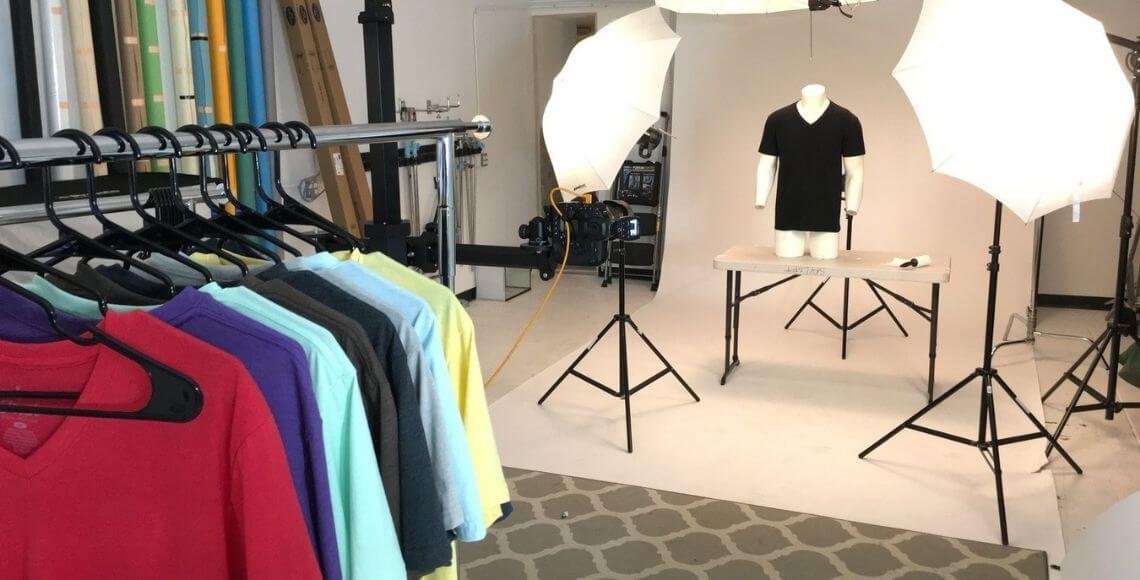
Image source: skyloft-studio.com
It’s crucial to choose the perfect mannequin for your products before you start taking pictures. Because invisible mannequins are available in a wide range of shapes and sizes. Choosing the perfect mannequin from a large number of mannequins may appear difficult, but you must take the time to do so so that your picture shoot is not spoiled.
The Right Camera Settings For Ghost Mannequin Photography
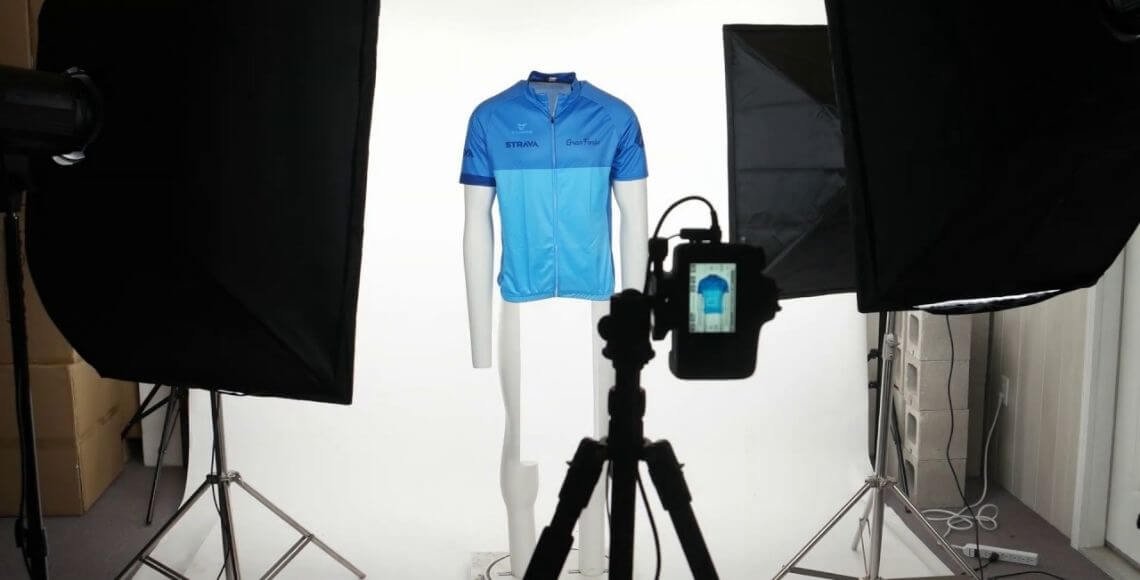
Image source: youtube.com
Your ghost mannequin product photography plan can be utterly derailed if you use the wrong camera settings. As a result, putting the suitable camera settings is crucial. Any camera can take high-quality clothing photographs with the appropriate settings and positioning.
The camera offers a manual mode that allows you to separately set ISO, aperture, and shutter speed. However, depending on the weather and your preferences, you can alter the settings before snapping images.
When photographing clothing, keep the ISO as low as possible. Increase the ISO to add extra light to your photo and make it great if you’re shooting in poor light. When capturing product photographs, make sure to use the widest aperture possible (F16 or F22). Maintain a calm and steady pace.
Style Your Garment For Better Ghost Mannequin Photography
Image source: mannequinmall.com
If your garment isn’t quite right, use styling pins, clips to tighten the back panel. You may use as many pins as you desire. Take your time styling the item on the model and making sure it fits correctly. If the garment has any creases, you won’t be able to take the perfect photo. As a result, make sure there aren’t any creases visible.
Take Closer & Back Shots
Customers always want to see the products up close and personal, which is why closer photos are so important in making a strong first impression and assisting your customers in making decisions. You’ll also need to take back shots to highlight the full range of products that shoppers are looking for. This aids in product differentiation as well as persuading users to shop on your website. A better picture shoot will ensure that your product is visible across the screen and provides a positive experience for your customers. To get some back shots, rotate the mannequin and take shots from the back of the garment.
Keep All The Line Straight
It’s a good idea to highlight any intriguing inner linings, cuffs, or zips on your garment in your photos. Spread your garment’s legs apart to show off the zips, open up the collar or jacket (or adorn it!), and pictures from several angles. This can help an outfit look more polished, and it’s something to think about if you’re shooting like a fashion blogger.
Show More Detail
The purpose of ghost mannequin photography is to show off the shape of your clothes in a better way. You should also provide extra information so that clients can understand the scope of your product. It’s a good idea to highlight any intriguing inner linings, cuffs, or zips on your garment in your photos. All of these elements are quite beneficial when it comes to selling your product.
A Step-by-Step Guide to Image Editing
After you’ve finished shooting your ghost mannequins, you’ll need to fine-tune your images in post-production so that you can use them for whatever you want. You can either edit your own photos or hire a ghost mannequin service.
On the other hand, outsourcing this time-consuming task may save you time and effort. Follow these seven simple steps to create your own ghost mannequin effect in Photoshop if you have to make the edits yourself due to budget constraints.
1. Open your files in Photoshop and create layers
To edit the mannequin and foam board images, you’ll need to open them in Photoshop. Make a new layer for your mannequin image’s background. To make your overall background, fill that layer with white. Labeling your layers will help you distinguish them and keep track of them.
2. Using a Selection Tool, select the product in the mannequin image
Click on the product to find it in your mannequin image. Zoom in close and select a selection tool to work with: this could be anything from a selection tool to a lasso tool to a magic wand tool; all three can assist you in making the desired selection.
It’s worth noting that shooting with a white background allows you to easily remove the mannequin due to the color separation between the product and the background.
3. Position and fine-tune your mask
After selecting the entire product and removing all of the background and mannequin, refine your mask so that it is nice and tight. Selecting the “Refine Edge” tool from the select menu will also complete the task.
In the “Refine Edge” dialogue box, place a mask on your shirt layer and click “OK.”
Your product should now be floating freely on the white background you created earlier.
If necessary, refine the mask’s and/or product’s edges to give them a nice, clean look.
4. Rinse and repeat the previous steps with the Foam Board Image.
Switch gears and go over Steps 1, 2, and 3 again on your foam board product image.
Photographing the product inside-out allows you to show the product’s inside back, completing the mannequin illusion.
Create a new layer, then select the product before creating and refining your mask.
5. Place the Photographs Together
When both images have tight, clean masks, drag the mask from your foam board image over to the image of your ghost mannequin product image.
Place the foam board image on the bottom and the mannequin image on the top of the layers.
Adjust the foam board layer’s positioning and proportions so that it sits perfectly behind the mannequin layer, in a rounded curve, just below the shoulder.
6. Remove the Unnecessary Parts from the foam board layer.
Hide your mannequin layer and brush out any parts of the foam board layer that aren’t required at this time.
All you have to do is keep the triangle of your neckline between your shoulders.
It’s important to remember to remove that piece from the foam board image because it’s already in place in the mannequin shot.
After you’ve finished, double-check that your layers are clean and that nothing is out of alignment, especially in the neck and shoulder area.
7. After you’ve finished adding shadows, save your work
Add shadows between the two layers to make the product images look more professional. Keep in mind that you should save your Photoshop file with all of the layers intact.
You’ll have a fantastic 3D effect if the editing job is done correctly, which will improve your product photography and help you increase sales in your online store.