
There are several reasons why clipping is essential, but before going into depth, here’s a tutorial for you on how to create a clipping mask in Photoshop.
Photoshop offers a range of editing options, and if you are new to the Program, it may take some time to familiarize yourself with the details and tools.
For example, creating a clipping mask might seem like advanced editing, but our tutorial breaks it down for you. Even if you’re using Photoshop for the first time, we are almost certain you can complete it.
This article will describe everything about the clipping mask in Photoshop.
What Is A Clipping Mask in Photoshop?
Have you ever wondered if you could hide or reveal parts of your layer instead of permanently deleting them?
A clipping mask is a way to show one picture or design through the shape of another. It’s like putting a stencil on top of a picture and only seeing the parts that match the stencil shape.
Creating a clipping mask makes cool text or image effects in graphic design. A very efficient way of working without having to lose any editing steps for any kind of graphic design is through the use of a clipping mask in Photoshop.
To begin work on creating a background mask in Photoshop might seem a little intimidating initially. Still, as time goes by and you get some basic ideas about the tool, it will make you want to use this feature and Photoshop Elements more often.
Adobe Photoshop has three main masking techniques to make use of.
- Pixel Layer Mask
- Clipping Mask
- Vector Mask layer
1. Pixel Layer Masks
To control the transparency or opacity of a specific layer, Pixel Layer can help you mask an image in Photoshop. This Photoshop element is mainly used by professionals when working with portraits, products, cars, etc.
2. Clipping Masks
The basic concept of creating a clipping mask is to clip both the top layer and the bottom layer just beneath it into the layer panel, a very creative way to combine photographs and images, and give extraordinary results. It can be used to mask new layers, even all types of layers.
3. Vector Layer Mask
For objects that have hard edges, it’s highly recommended. Photoshop has various ways of making selections to edit images, for example, removing photo backgrounds or similar edits.
For this, it’s effective as they are precise in using paths and vector masks.
Understanding layers in Photoshop will help you with a lot of stuff, editing techniques, and methods.
Layers are one of the most important elements in Photoshop to work with, and having a basic understanding is essential.
Step-by-step guide to create a clipping mask in Photoshop
Here’s a step-by-step guide on creating a clipping mask in popular design software like Photoshop.
We may use a keyboard shortcut at some point in this guide. Remember that a creative clipping mask can be done in any version of Photoshop, even if it’s workable in Photoshop CC too.
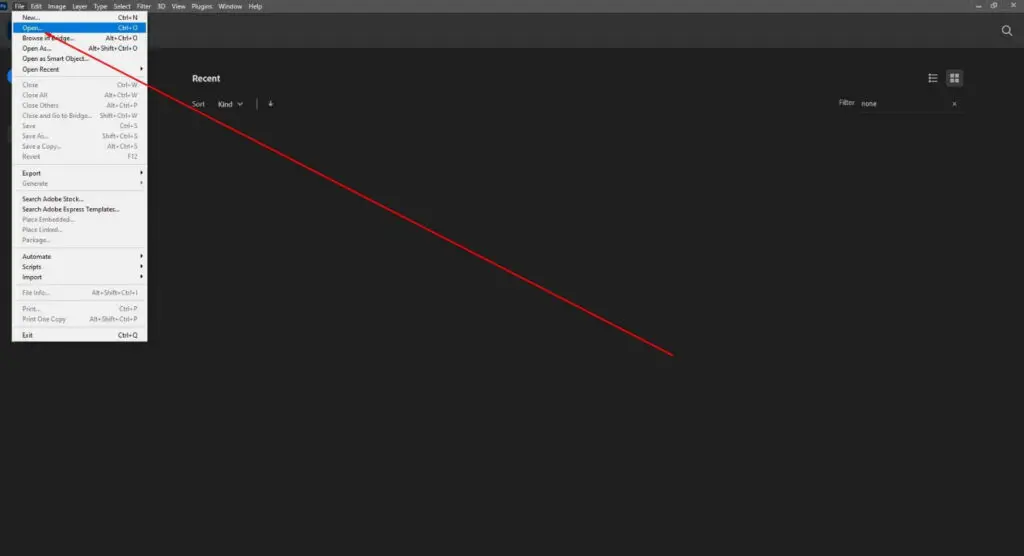
Step 1: Launch Adobe Photoshop and open your image.
To apply a clipping mask in Photoshop, firstly Upload the image by going to File > Open, then select the image and click Open.
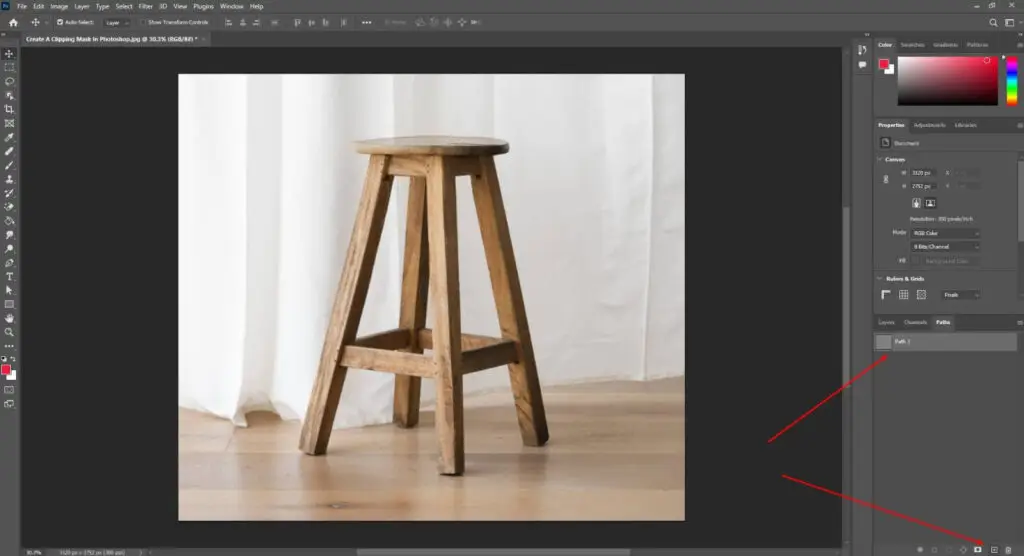
Step 2: Select the pen tool from the main toolbar.

Step 3: Select and create a new path.
Go to the Path menu on your right side, and select a new path. If you cannot find the path tool, go to Windows and select the path from the list.
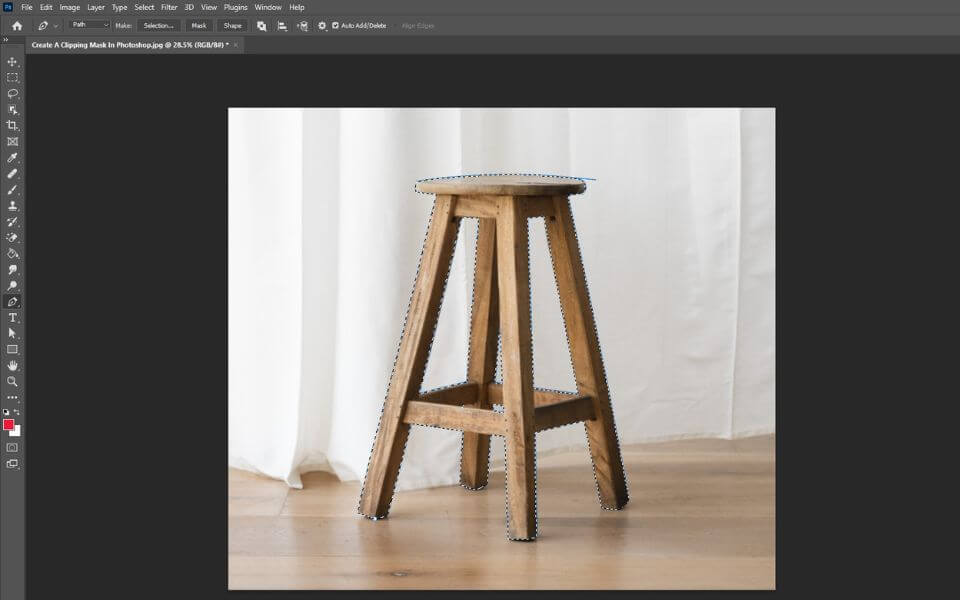
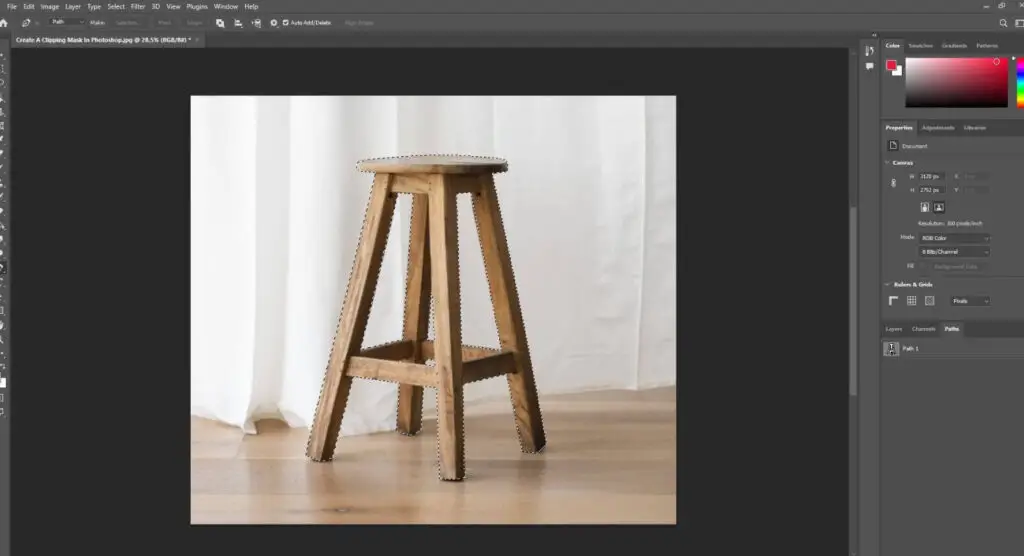
Step 4: Create a clipping path around your product very carefully.
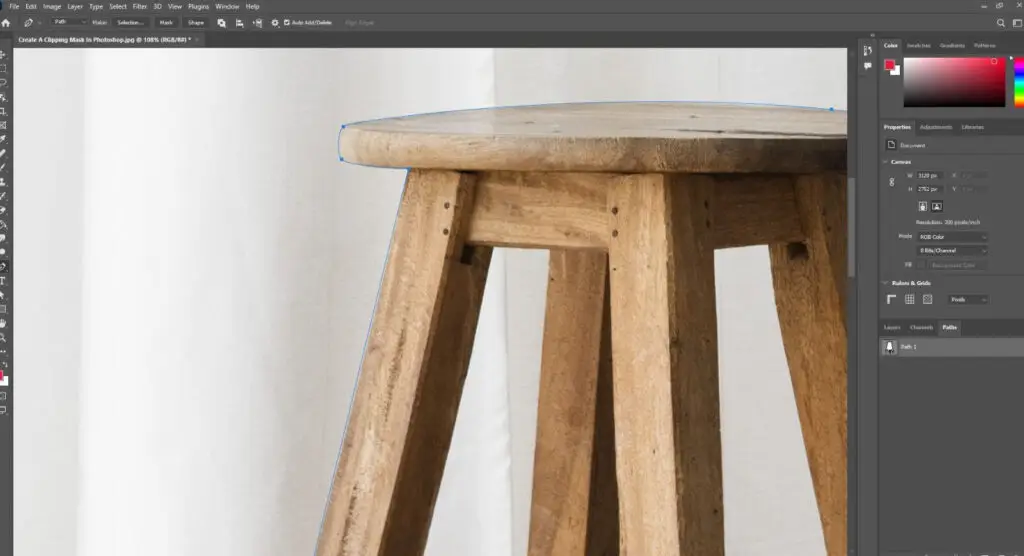
Step 5: You are successfully done with the clipping path when you have completed the drawing around the subject.

Step 6: Select the clipping path by using Ctrl + Enter.
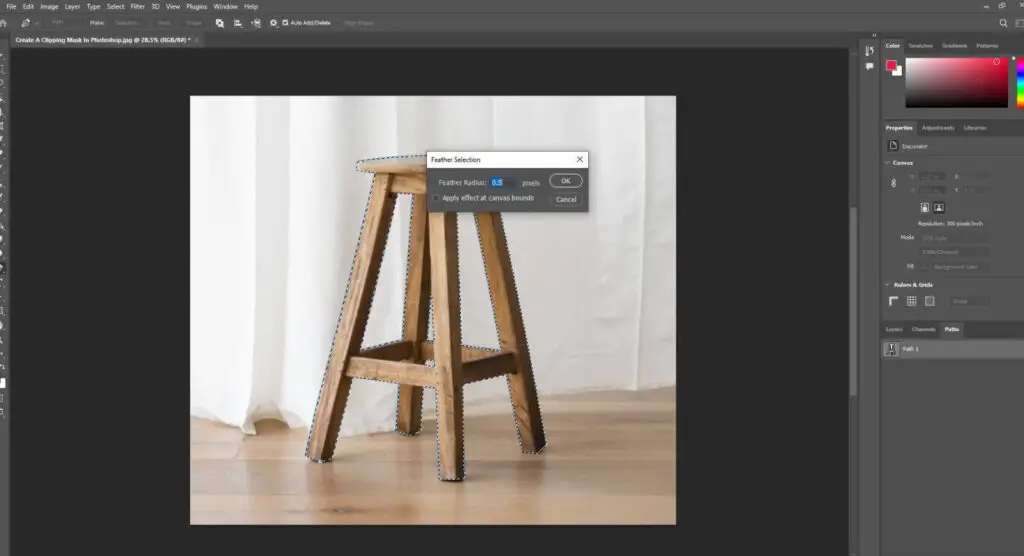
Step 7: For smoothness, apply a 0.5 feather value from the feather option by ‘Select > Modify > Feather’ or using a shortcut by pressing ‘Shift+F6’.
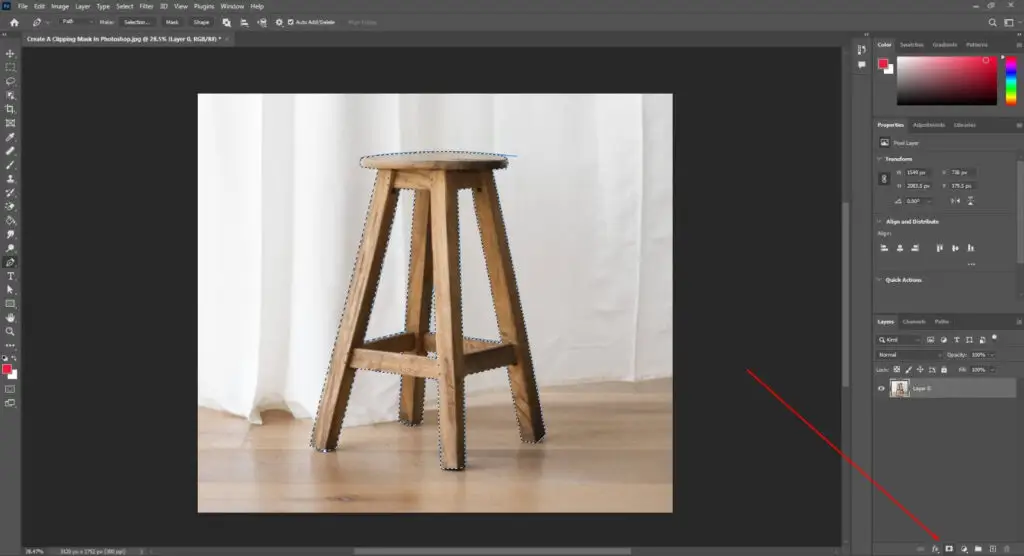
Step 8: Select Layer From Background and click OK.

Step 9: Add a layer mask, as shown in the image below.
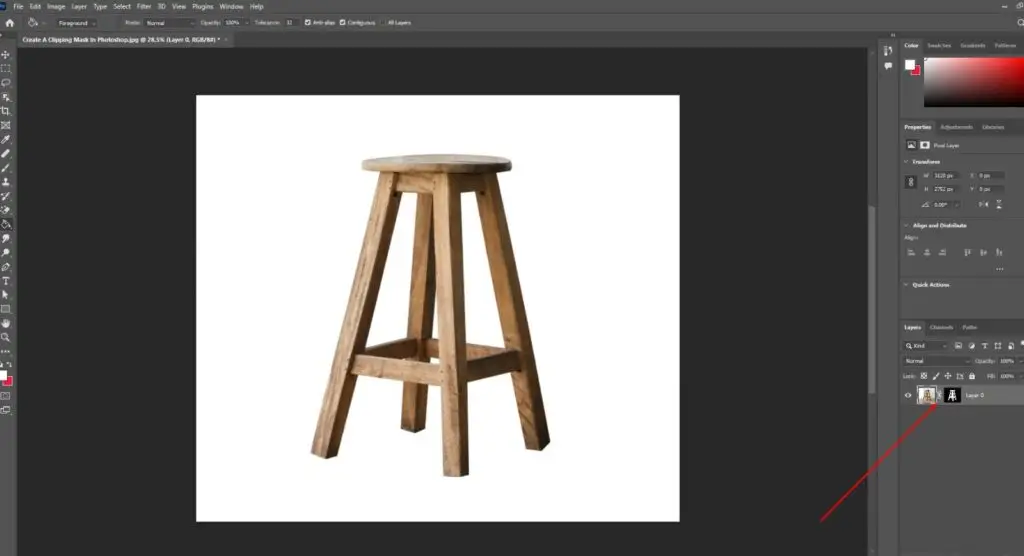
Step 10: After adding the layer mask, you will get a similar view, as shown in the picture below.

Step 11: You can now disable or enable the layer mask.
One common question that people, especially those new to photo editing, often wonder is whether layer masks are necessary when simply using the eraser tool to remove sections of the image.
However tempting it might seem, this easy fix is extremely disruptive to the user’s work pattern and stands as a major problem for the editor if they want to change something in the image later, as the edit with the eraser tool would be permanent.
Difference Between A Clipping Mask Vs. Layer Mask
A clipping mask is the process of putting a subject on a shape. It’s mainly used to fit an image on any text or any shape; You will see only the part of the image that is inside the shape. Layer masks are specially designed to selectively hide a part of images. It’s like a stencil that conceals white when black is selected.
Let’s explore the key difference between a clipping mask and a layer mask
| Terms | Clipping Mask | Layer Mask |
| Purpose | Controls visibility based on the shape of another object (base layer). | Controls the transparency of a single layer. |
| Effect | Reveals or hides content in the clipped layer based on the shape of the base layer. | Selectively hides or reveals parts of a single layer using grayscale values. |
| Number of Layers | Involves two layers, even more layers you want: a base layer and an adjustment layer (or multiple clipped layers). | Applies only one layer. |
| Visibility Control | Controls the visibility of content in the clipped layer, but does not affect other layers. | Controls transparency within a layer, affecting its visibility in relation to other layers. |
| Result | Content in the clipped layer is visible where it overlaps with the base layer’s shape; outside areas are hidden. | The layer’s visibility is controlled based on the grayscale values, allowing partial transparency. |
All the while, photo experts use clipping mask photos as the perfect go-to because the edits in the image are reversible. Even the original data practically remains untouched.
It allows you to change anything you want in the picture later. There are also some photo masking apps you can find for Android and iPhone that can help you to create a clipping mask in Photoshop instantly.
Conclusion
In sum, the clipping mask is crucial if you are trying to learn graphics design and photo editing. It helps you to create images inside text or shapes. We explained the full process of clipping mask on a simple way in this article. Please follow the step-by-step guide carefully to get precise results.
A clipping mask helps create a unique design for websites, social media, advertising, and branding. So keep practicing to make your editing skills more perfect.
We hope this article helps you better understand and learn how to work with a clipping mask in Photoshop.
FAQs
Is a clipping mask the same as cropping?
No, a clipping mask hides part of an image, while cropping removes part of it. Both cropping and masking are used in different cases, not the same.
Which software supports clipping masks?
Most of the software supports a clipping mask. Some popular ones are Adobe Photoshop, Illustrator, InDesign, GIMP, BeFunky, and Affinity.
What are common uses of clipping masks?
Clipping masks are used to make visible only the parts of your image that are in shape. Editors use it to place a photo on a text shape and on an icon and logo.
What is the shortcut to do a clipping mask?
The shortcut to create a clipping mask is Cmd+Option+G on Mac and Ctrl+Alt+G on Windows. It will automatically create the clipping mask; you have to use the shortcut with the left mouse cursor after moving the mouse between the layers.
What is the shortcut to undo the clipping mask?
You can undo the clipping mask work using the shortcuts Option+Cmd+G on Mac and Alt+Ctrl+G on Windows. It will make undo automatic.