
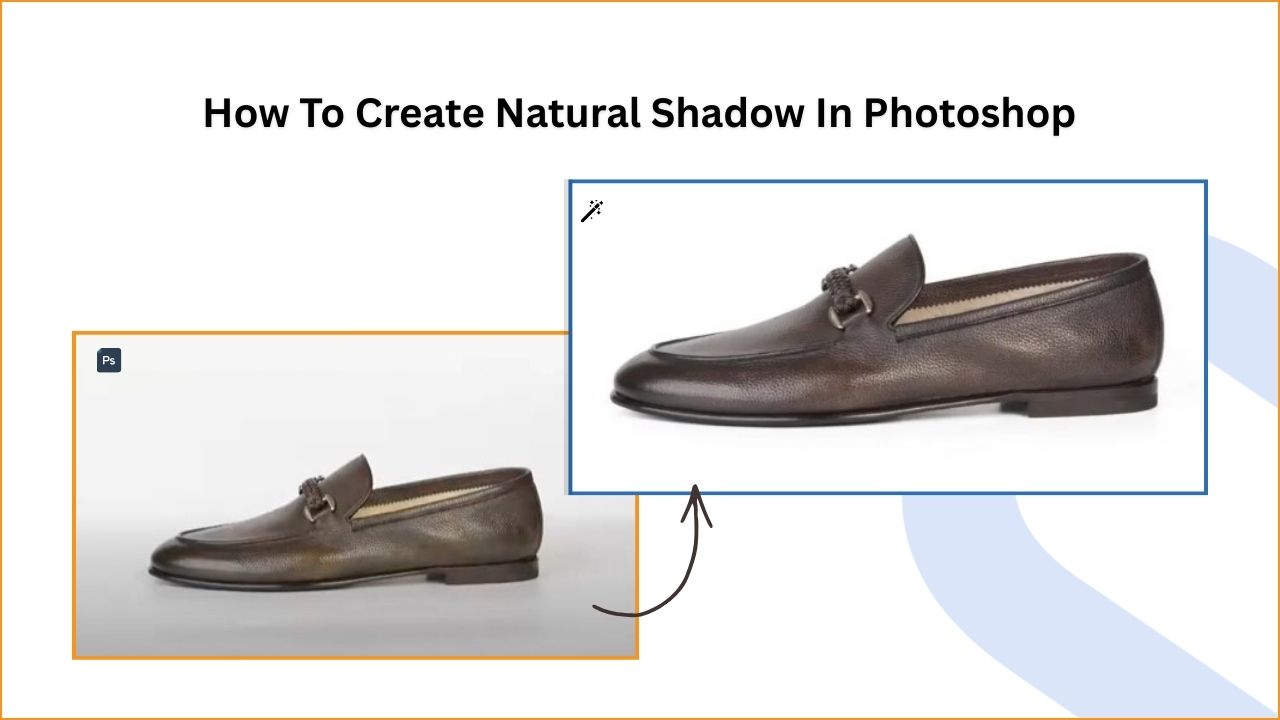
Improving image appearance with realistic shadows is one of the hallmarks of professional image editing.
Mastery of creating natural shadow forms is a crucial part of the Adobe Photoshop skill set.
Using the natural shadow effect in your eCommerce photographs can make your products pop off the page and into your customers’ shopping carts quickly.
It takes only a few minutes in Photoshop, and there’s no need for elaborate or costly lighting equipment.
This article aims to show you how to create natural shadows in Photoshop.
What is a natural shadow?
A natural shadow is a photo editing technique used to recreate or enhance the original shadow of a product to make it look realistic. Designers create this effect using Photoshop by adjusting opacity, blur, and light direction to match natural lighting conditions.
The structure of a natural shadow depends on the light source angle, distance, and product shape. This technique adds depth and dimension, making the product image look more realistic and professional instead of flat or artificial.
Natural shadow effects are widely used for fashion apparel, lifestyle products, jewelry, and electronics. It helps products look more natural, improves visual appeal, and creates a 3D-like appearance similar to a real-life presentation.
How to Create Natural Shadow in Photoshop
E-commerce owners, photographers, and editing professionals often use natural shadows in product photos. It makes your images look more realistic and helps you to create a real, authentic, and appealing image.
Here, we step you through applying a natural shadow effect in Photoshop to make your product image look realistic, unique, and eye-catching.
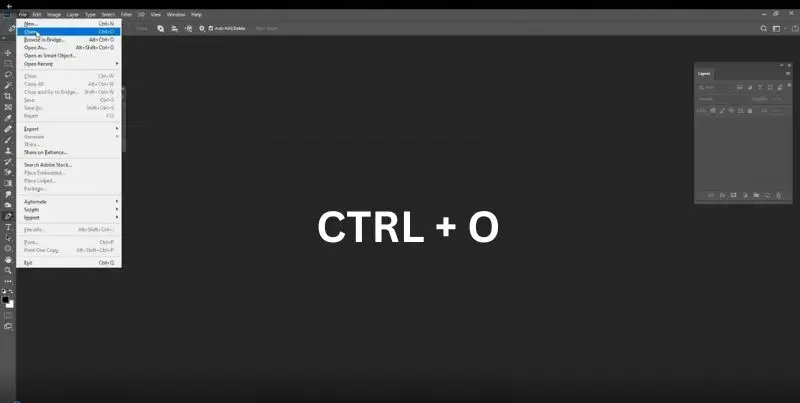
Step 1: Launch Adobe Photoshop and upload your image.
After you have successfully opened Photoshop, select File > Open from the menu bar.
Next, search through your photo library and select the image that you wish to modify.
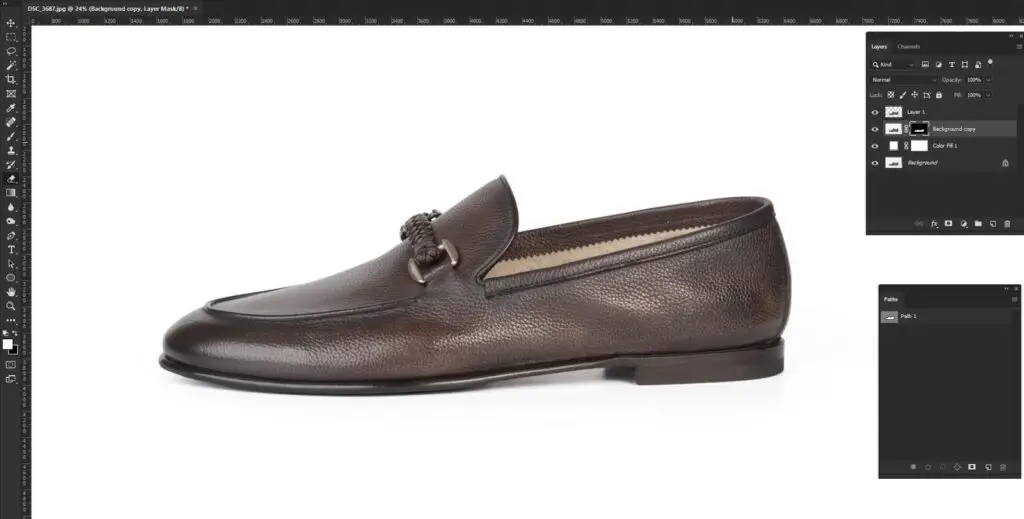
To follow this tutorial, you can use any product or object photos, like shoes or bottles. Take a simple one with a white background.
If the photo does not have solid background you should follow this tutorial on how to remove the background in Photoshop and remove the background.
Then add a solid white background. Once you have learned how to create natural shadow in Photoshop with a simple one, you can proceed with a complex one with different backgrounds and shapes.
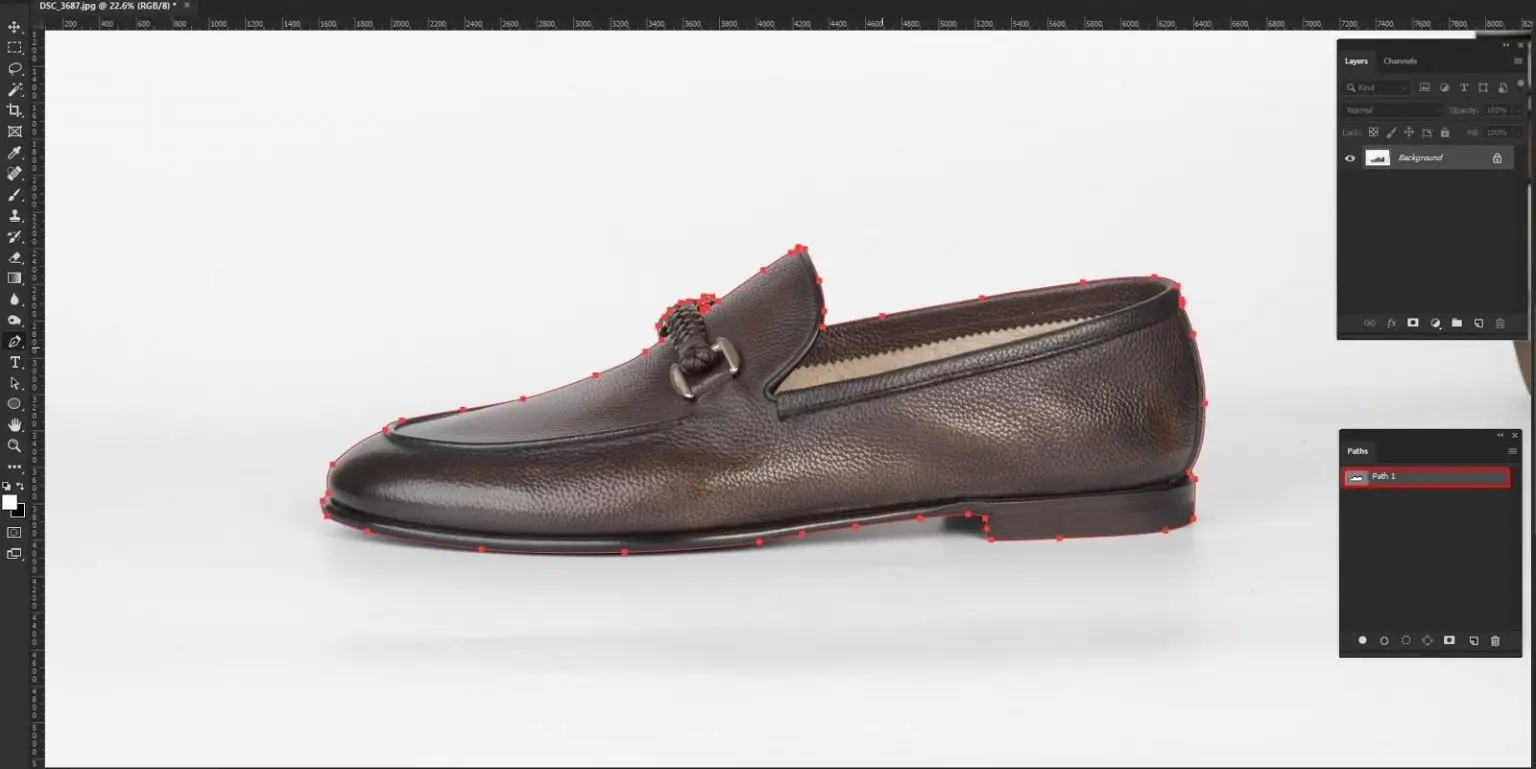
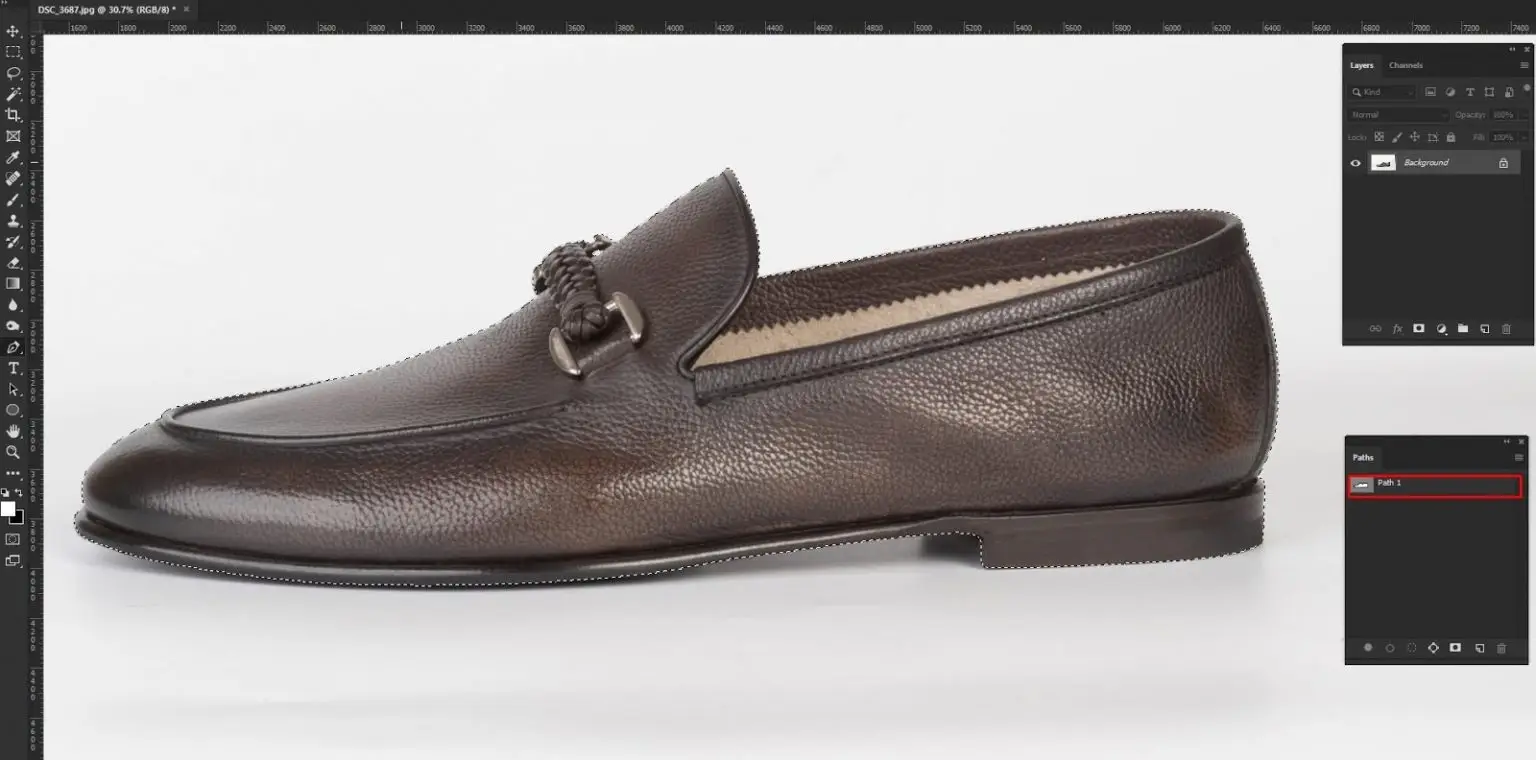
Step 2: From the main toolbar, select the pen tool
Select the pen tool from the main toolbar to create a clipping path around the subject.

Step 3: Select a new path
Choose a new path from the path toolbar.

Step 4: Draw a clipping path around your product
Start creating a clipping path around the subject to remove the existing background of the picture.
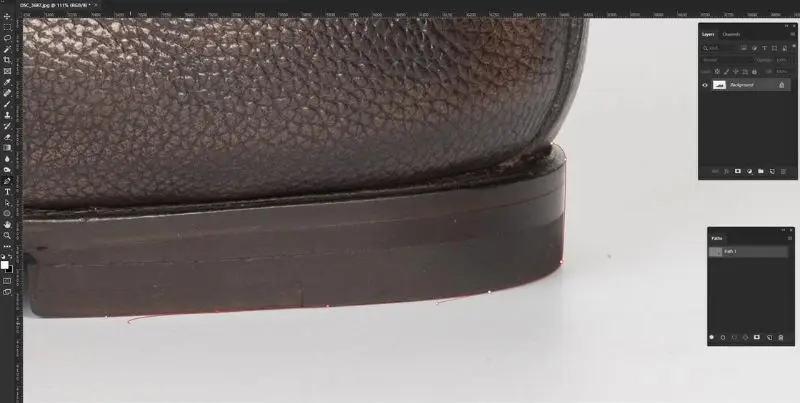
Step 5: Complete the clipping path
Draw and complete the clipping path very precisely.
Step 6: Use ‘Ctrl + Enter’ for selection
Use the shortcut ‘Ctrl + Enter’ to select the clipping path that you have created.
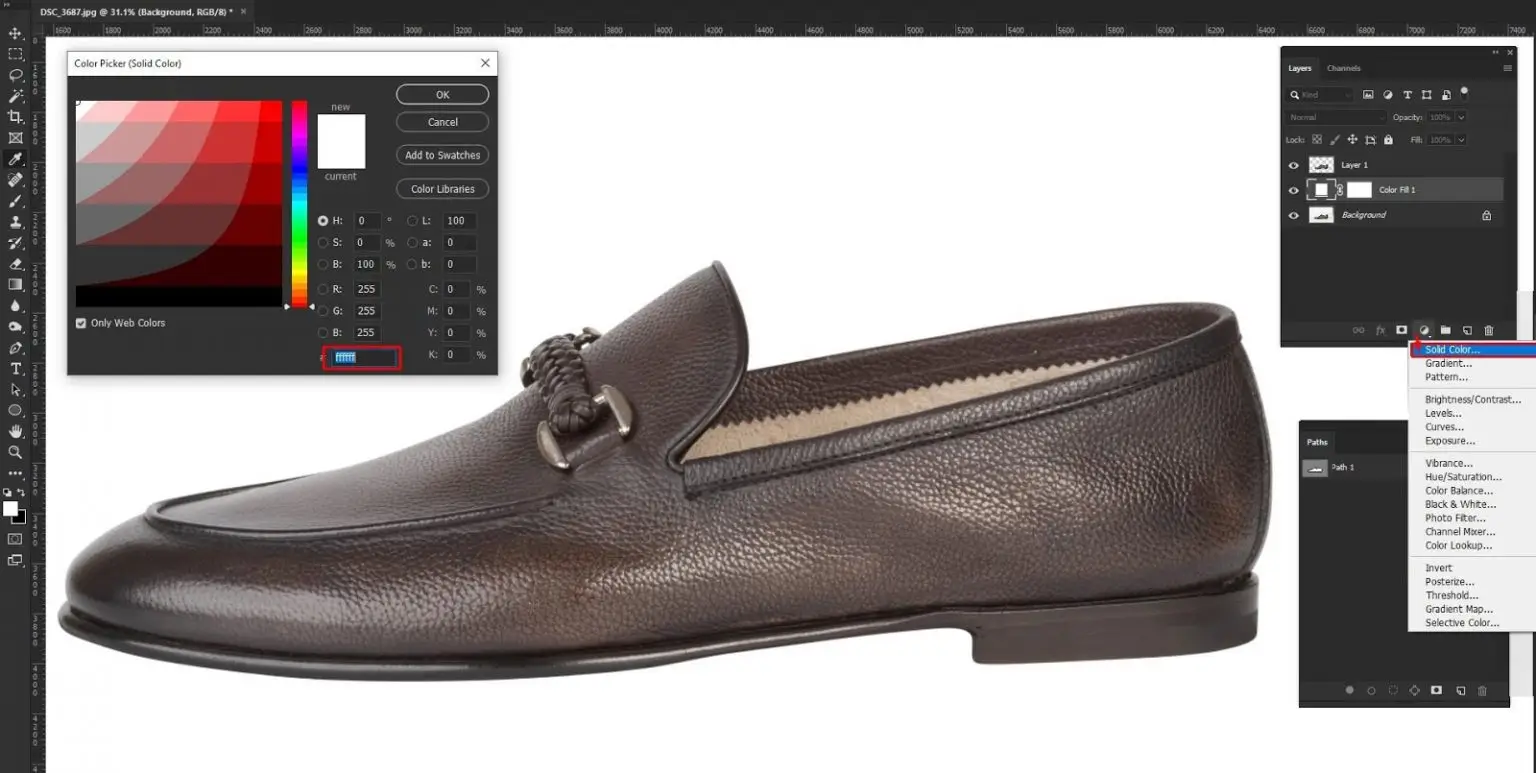
Step 7: Make a new layer 1 Ctrl + J.
Create a new layer as Layer 1. From the layers toolbar, you can use the keyboard shortcut Ctrl + J.

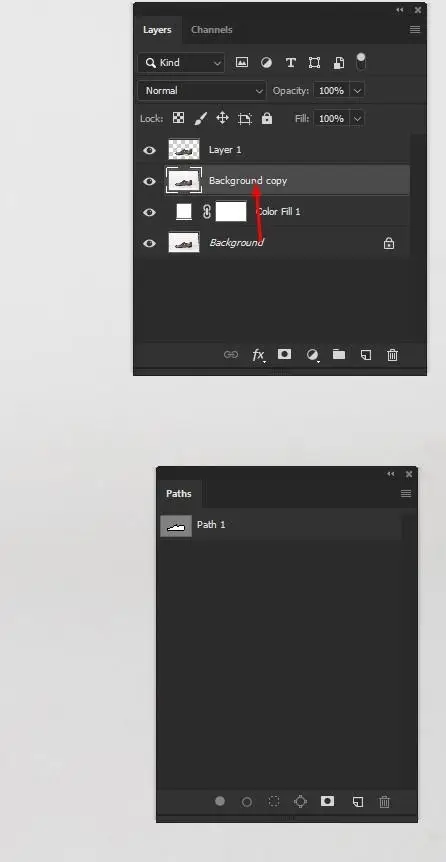
Step 8: Duplicate the background layer, create a mask, and select a solid background.
Make a copy of the background layer and mask the copy layer to make it appear transparent. Next, select a solid color layer and place it in the background.
Step 9: Select a background in the new layer
Make a background selection with your next background copy.
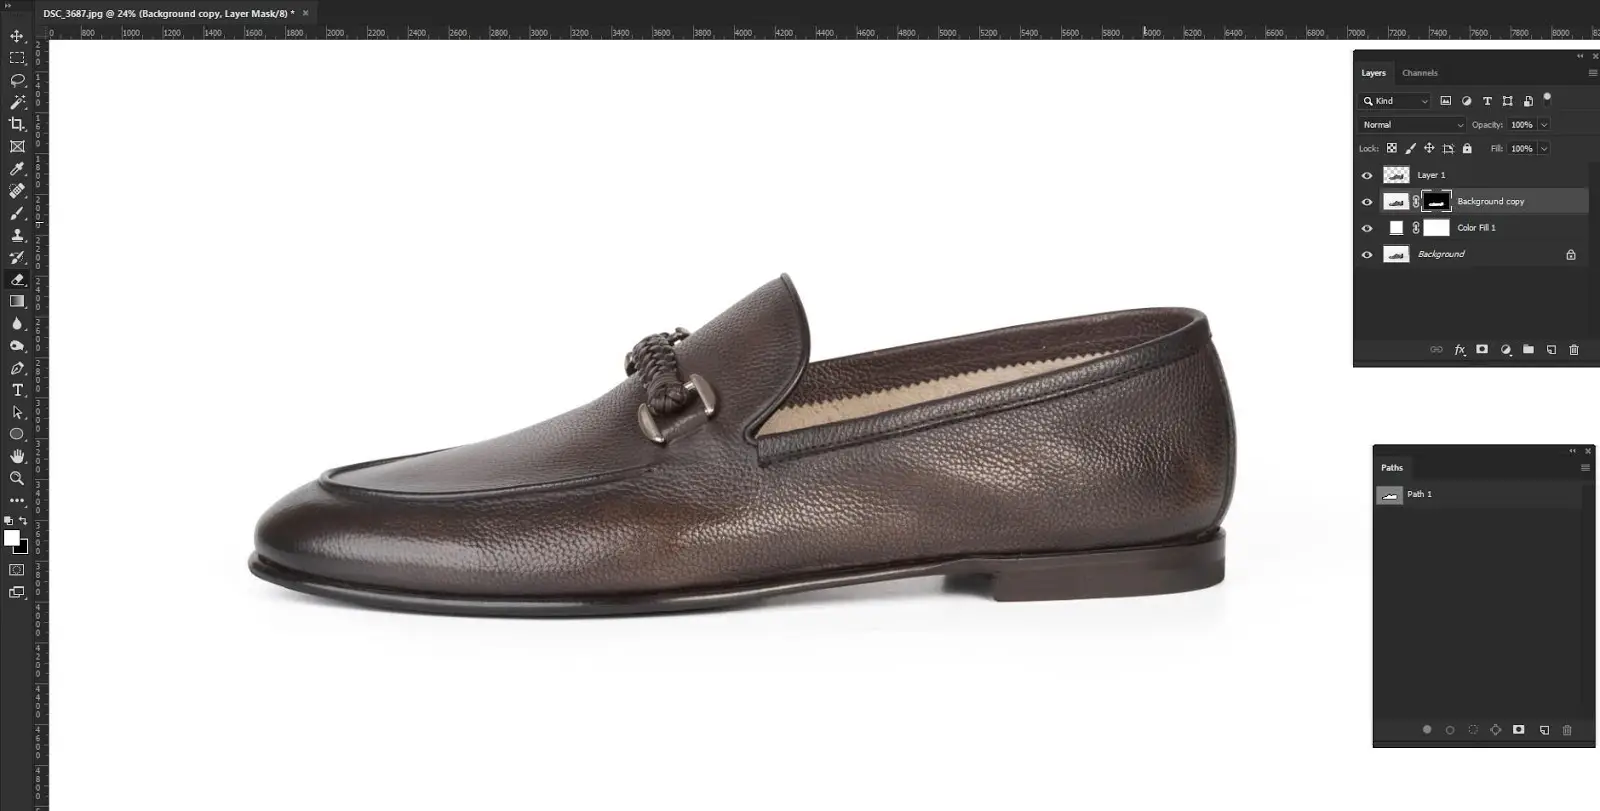
Step 10: Use ‘Ctrl+Alt+2 > Feather’ or ‘Shift+F6’ for smoothness and inverse + Mask
Doing this supposition adds some noise. Now, to delete that noise, we need to
- Choose the lasso tool and select the shadow we want to keep, and then
- delete everything else in the selection by pressing CTRL+Shift +I, then
- With the selection active, press the Delete key
Step 11: Use ‘Select > Modify > Feather’ or ‘Shift+F6’ for smoothness
Go to ‘Ctrl+Alt+2 > Feather‘ or ‘Shift+F6, inverse, and mask to smoothen out the subject.
Apply 0.5 feathers to the edges to make them smoother. First, go to the ‘select’ option from the previous menu, then the ‘modify’ option, and finally the ‘feather’ option.
You can also use the Shift + F6 keyboard shortcut.
Final Tips on How to Create Shadow in Photoshop
Photographs look more professional and credible when they have natural shadows around them.
But, unfortunately, you might not take images in the ideal conditions or with the right lighting to get the shadows you want.
Natural shadow can be a drop, reflection, cast way, or any other type of shadow.
The realism of the shadow depends on the product, light source, angle, background, and surface.
It can be said that experienced shadow creation services aim to make a natural one, depending on the image’s circumstances.
Experience and understanding are the keys. Observe real-life shadows cast by objects in different lighting conditions.
This will help you understand how shadows behave and their variations. As a result of natural light reflection, we get a natural shadow.
It doesn’t have a phony feel to it. So in your product photographs, it’s always a good idea to keep the natural shadow.
Here are some resources that can help you learn about the natural behavior of shadows:
- Photography and Its Shadow by Hagi Kenaan
- The perception of cast shadows – Author Pascal Mamassian, David C. Knill, Daniel Kersten
- https://www.adobe.com/creativecloud/photography/discover/shadow-photography.html
Watch the Video in the Tutorial
Wrap up:
Natural shadows are used widely in product photography. Every e-commerce owner, small startup, and product photographer uses it to make their product images authentic. That helps them to grab customers’ attention and trust.
By properly implementing the natural shadow creation process and adjusting contrast, balance, texture, depth, and composition, you can make your image look attractive.
To get an accurate natural shadow, keep practicing and play with the shadow settings, like opacity and blurriness.
FAQs
What opacity is best for a natural shadow?
Natural shadows usually use lower opacity (around 20%–70%) depending on the light intensity and product distance from the surface.
Which blend mode is best for natural shadow creation?
Multiply blend mode is commonly used because it helps the shadow blend naturally with the background.
How does the gradient tool help create a natural shadow?
The gradient tool helps create a smooth transition from dark to transparent, which makes the shadow look more realistic and natural.
Why is Gaussian Blur used when creating shadows?
Gaussian Blur softens the shadow edges and makes the shadow look more natural instead of harsh and unrealistic.
What colors should a natural shadow use?
Use dark gray or soft brown color for natural shadow. It can make your image look natural and realistic.