
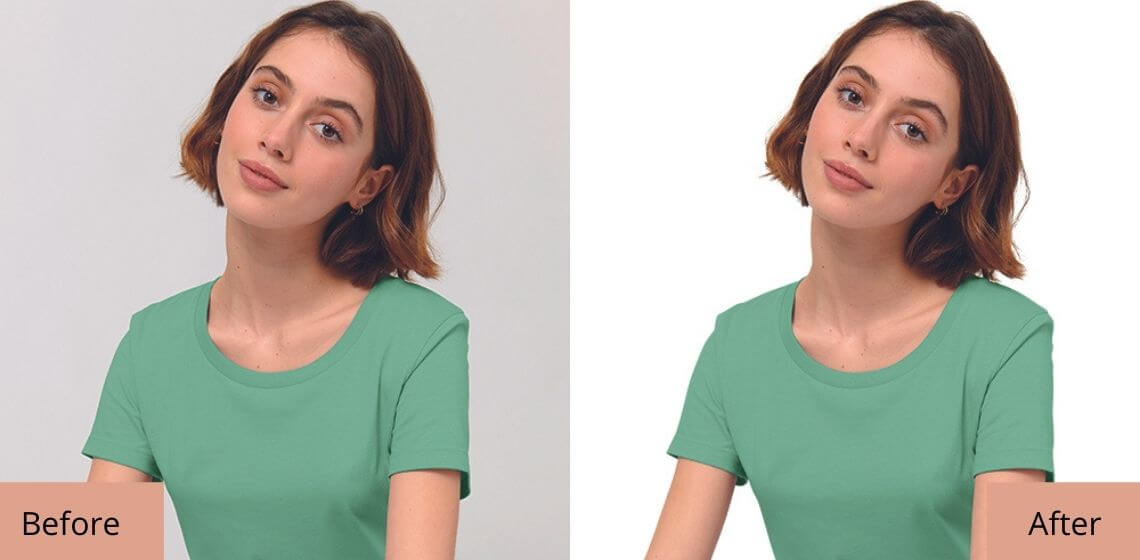
Being able to flawlessly cut images out Background masking techniques are essential for achieving faultless pictures. For most editing jobs background removal is essential. You can use a layer masks in photoshop instead of an eraser. If a prospective designer wants to take on some Photoshop challenges, he’ll need to learn some sophisticated skills.
We are occasionally confronted with a photograph with a complicated background of shapes. The designer has no choice but to apply masking techniques if the client only wants one thing in the picture isolated.
What is the layer mask tool in photoshop?
Although you can alter or even delete it with the Layer Mask, the Eraser tool’s effects are frequently permanent. The benefit of using Layer Mask is that you may create your mask using any of the Photoshop tools. Various brushes and gradient options let you construct the perfect mask now that you have access to marquee selections.
Why is the layer mask important?

Photoshop layer masks provide advanced control over image transparency, which is one of the program’s most basic features. Every Photoshop user should have a basic understanding of layer masks and how to apply them due to their fundamental nature.
They open up a world of creative possibilities and make it easier for Photoshop users to do simple tasks. Layer masks in Photoshop govern the transparency of the layer they’re applied to. In other words, a layer mask allows lower-level picture data to shine through by hiding areas of a layer.
Photoshop layer masks are akin to masquerade ball masks, to give a simplistic analogy. These masks conceal some features of the face while revealing others, most notably the eyes, nose, and mouth. Layer masks in Photoshop can be used to hide and reveal areas of a layer in a similar way.
Professional service for your layer mask

Image source: bwillcreative.com
Experts recommend getting professional service for complicated professional photo editing services for the best outcome. Online photo editing services such as Uk Clipping Path are affordable and also tend to give you your desired photo results.
We provide different photo editing services such as clipping path, background removal, shadow creation, and more. Get your best-desired photo editing service from us and make your product photographs the most attractive part of your website.
How to Use Layer Masks in Photoshop
To mask a layer, first, pick it, then use the layer mask button as seen above. Layer > Layer Mask > Reveal All is another option.
Selection Tool
When you need to mask the background, the selection tool can come in handy. After you’ve made a selection, you may use it to create a layer mask. You can easily mask out the object you wish to eliminate rather than entirely remove it. This allows the user to smooth the edges of the object.
If you need to reverse the changes the image information will be there. As a result, this strategy allows you to experiment and explore choices without losing any image data permanently.
Refine Edge Feature
Another tip is to construct and control the mask using the Refine Edge function. Another benefit of using this tool is the ability to shift edges and contrast edges and backdrops. This image masking techniques function also has an output part.
The ability to select specific masking effects and the ability to preview and invert masking effects makes things easier. The editor benefits by masking or removing the backdrop of a photo. It enables users to merge photos in a seamless and faultless manner. For all intents and purposes, image masking offers a slew of other capabilities that result in top-notch photos. It’s critical to speak with the correct people to achieve that degree of perfection
The Chain Link
The chain-link layer is a layer that hides chain links. You might also be curious as to what that chain link between the layer thumbnail and the layer mask thumbnail is for. Simply put, this chain link means that if you move the layer picture around on the canvas, the layer mask will follow.
This can be quite beneficial. For example, if you need to relocate an image’s background after carefully cutting it off. Otherwise, you might be tinkering with layer masks, attempting to find the right portion of a pattern to “allow through.” You should disable the chain link in this scenario.
Layer mask filled with the gradient
Layer masks are not just about Black and White. Layer masks can actually carry any type of grayscale pixel data. Toggle to the gradient tool with G, then click on the thumbnail of the layer mask to select it.
Layer mask filled with black
If the white pixels in the layer mask are replaced with black pixels, what do you do? Simply click the layer mask thumbnail, then select Edit > Fill from the drop-down menu. Let’s go with black. The layer mask thumbnail turns black and the matching layer vanishes from the canvas almost instantly.
In contrast to our last example, which used a layer mask filled with white pixels, layer masks filled with black pixels result in full transparency in the masked pixel area. What happens if we use white for half of the layer mask and black for the other half? The image is split in half, with the other half remaining translucent. We’d see half clouds and half birds in this instance.
Final Words
You should now have a better idea of what layer masks are and how to use them. By increasing your ability to explore new creative ideas, incorporating this tool into your workflow will make you a better Photoshop user. It’s a necessary tool that allows you to photoshop your image into the desired shape.