Despite what most internet store owners believe, shooting jewelry may be simple and enjoyable. You won’t even need a large studio setup because jewelry products are little.
To take your jewelry photography to the next level, use the suggestions and recommendations above to generate eye-catching photographs, attract more customers, and raise your sales.
With the appropriate arrangement, even beginner photographers can capture fantastic jewelry photographs.
Type of tools used for photo editing jewelry products photos
Standard tools
These are tools that have an overall effect on the image, such as brightness, contrast, and so on.
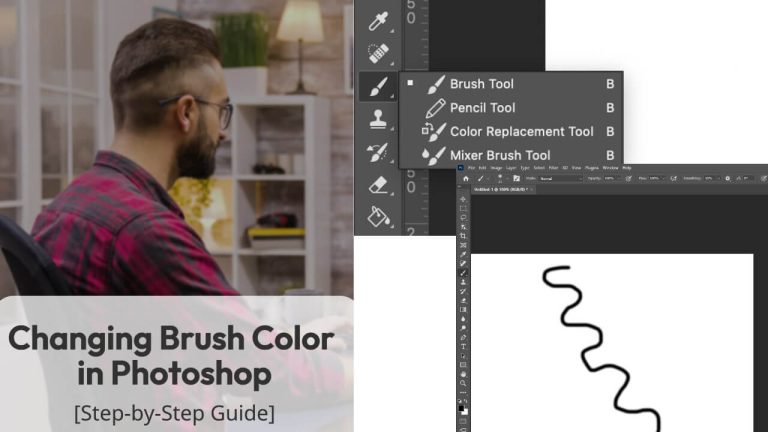
Brush-based tools

Brush-based tools allow you to make modifications to particular portions of an image while keeping the rest of it untouched. Brush-based instruments are similar to paintbrushes. When using a basic paintbrush tool, you choose a color and then paint on the image as the color appears.
Brush-based editing tools, on the other hand, only modify the image where you paint. They are both simple to use and powerful in terms of the amount of control they provide. Brush-based tools are what I like to utilize over regular tools.
Utilize retouching tools with brushes
Brush-based tools need you to select a brush size and hardness level from the top menu after selecting the individual tool, as seen below. Size refers to the brush size, while hardness refers to the edges.
A hardness of 0% means that the edges of your painting will fade off, which is ideal since your modifications will appear natural.
Apply Various Colors to Jewelry Photos in Photoshop for a more attractive look
Dodge to lighten specific parts of the image for jewelry photo editing
Dodge is a tool that uses a brush. It works similarly to the Brightness adjustment, except it allows you to choose which parts of the image to brighten.
To modify the colors of an image, use Hue/Saturation for jewelry photo editing
To change the color of metal or the color of the product itself, use the Hue/Saturation tool. If you have ten different stones in the same style of jewelry, for example. You can use photoshop to change the color of some stones.
Smudge tool for jewelry photo editing
Use the smudge tool (brush-based) to change specific parts of the image. The arrows depict the white light shining on the pearls in the left set of earrings seen below. Colors are literally smudged with the smudge tool, giving the pearls a lovely gradient shine.
Clients would require additional alteration for an image so that it will be on the ad or on their homepage, or in another prominent location. Edits like this are helpful in certain situations. To use, click and drag on the area you wish to smear using the smudge tool, then set a brush size.
For jewelry photo editing make duplicate earrings
When earrings do not contain natural materials such as pearls or gemstones, photographing both earrings is rarely beneficial. Even if you do, one earring is usually more photogenic than the other.
It’s important to note that doing modifications like this requires having the image on a white backdrop or having the background removed. You can employ a variety of freelancers to remove backdrops.
There are several ways to replicate in Photoshop, but one method is to select the earring using the rectangle marquee selector tool, then edit>copy, then edit>paste.
Spot Healing brush tool for jewelry photo editing
Use a spot healing brush for dust and scratches in product photography. To see the sub-icons, click and hold on the menu icon. Then choose the one you require.
In product photography, this is one of the most commonly used brush-based retouching methods.
To apply, select the tool, the brush size (from the top left of the top menu), and then click and drag on the spots Photoshop examines the pixels in the immediate vicinity of the clicked area and replaces it with those pixels.
Brightness and contrast tool for jewelry photo editing
Brightness and contrast are the perfect tools because they are a free feature in picture editing software. Brightness changes how a photo looks.
The contrast tool makes the darker parts of the image even darker to stand out from and with the lighter areas of the photo. This enhances the vibrancy of the colors. Adding contrast to product photos improves their appearance.
While brightness can be useful, it often leads to some details being lost due to oversaturation. However, it is dependent on your image, the colors in it, and the lighting, so experiment with the sliders to discover what appears best to you.
Make your way to Image, then Adjustments, and after that Brightness/Contrast on the top menu. Play with the sliders to see how they affect your image.

Final Words
Photoshop allows you to do a lot of things, but the tools listed above are the ones I use the most. Many of these are simple to use, so watch them on YouTube to understand how to utilize them.
Give any of the tools in the submenus above a try if they sound intriguing. Choose a tool, a brush size, and start painting where you want to make changes with any brush-based tool.
There are some settings for each tool on the top menu; the default settings usually work well, so start there. You can start experimenting with the settings once you’ve grown familiar with the tools.
However, if you don’t have the technical skills to use photoshop or if you don’t have the budget to hire a pricey graphic designer, the best and easiest solution is to opt for professional Jewelry photo editing services which are readily available online. If you are unsure of which one to choose, you can start off with us because of our high-quality results and comfortable rates.