

How to take pictures of clothes to sell online is essential knowledge for anyone looking to attract buyers and maximize sales with eye-catching photos.
High-quality clothing photos are the number one important element for attracting potential customers online. In today’s digital era, apparel retailers have no choice but to showcase their products on different e-commerce platforms.
No matter how beautiful and trendy the clothes you have are, you need to know the art of clothing photography to post your sales online.
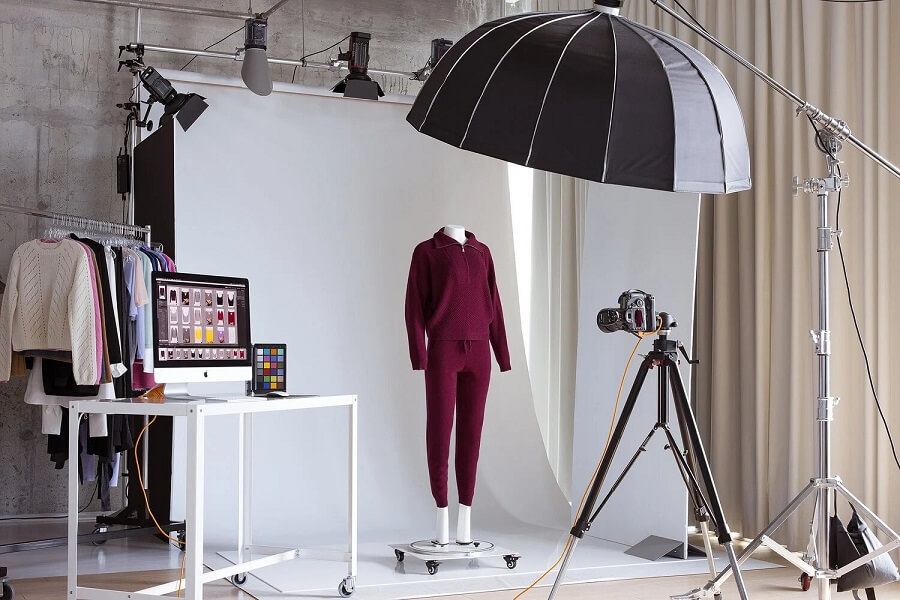
In this article, I’ll take you through the process of clothing photography – from setting up the camera and light to post-processing techniques.
Plan how to display your appeal products: The best ways
lay out your apparel products in different ways. Your photography style will determine your approach to clothing photography. Below are the most common clothing photography styles. Decide which one is right for you to connect with your customers.
1. Invisible mannequin
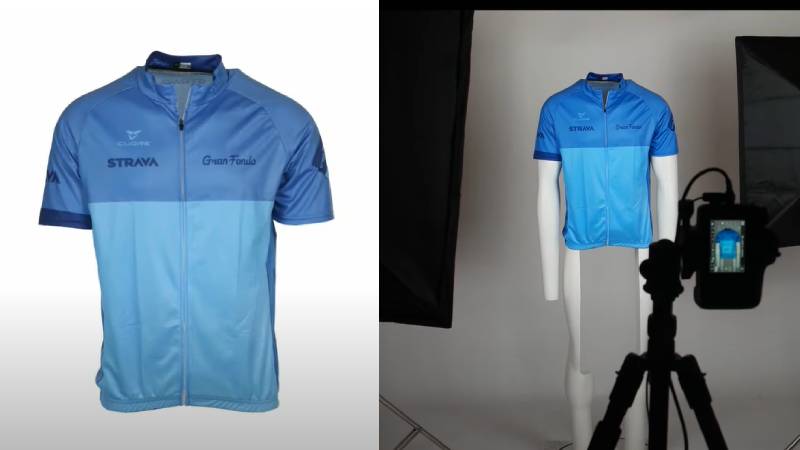
Invisible mannequin, or the ghost mannequin, is the most popular technique for showing clothing items online. In this technique, the apparel item is first photographed with the mannequin or model. Then the mannequin is removed from the clothing item in the post-processing.
If you have editing knowledge, you can do it yourself. But for a professional outcome, you can take a professional ghost mannequin service from an expert.
When you want a professional presentation of your clothing products, the invisible mannequin is the way to go. It has some unique advantages that have made it different from the other options for showcasing clothes online.
For example, you can show the shape and fitness of your clothing item to the customers. It provides an almost in-store shopping experience.
2. Use a model
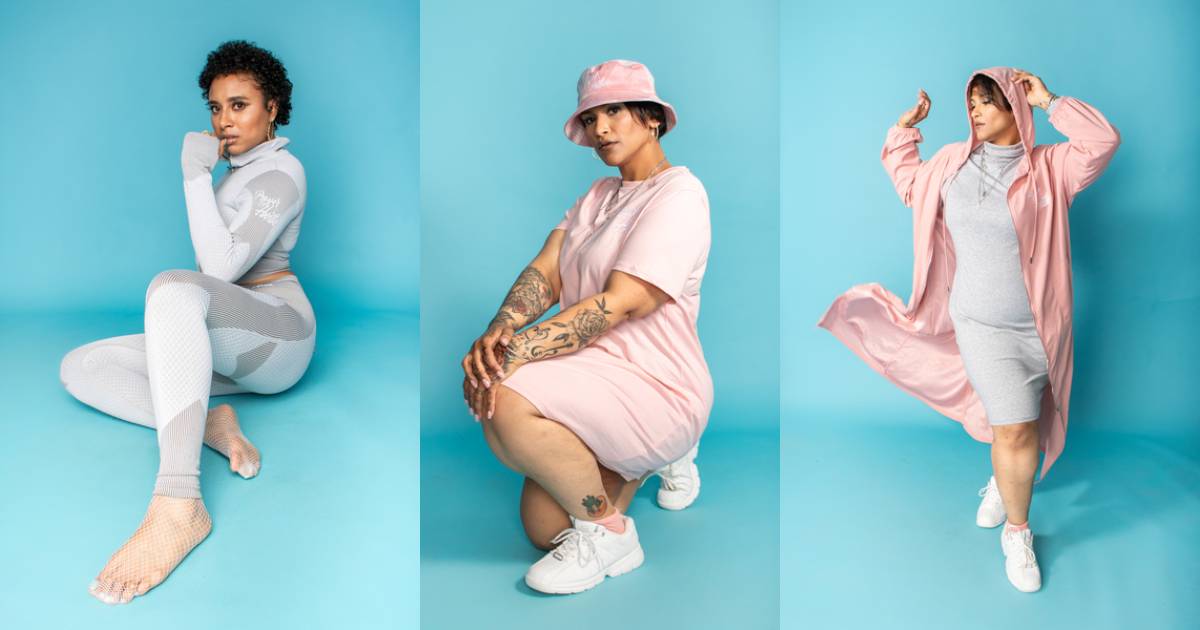
Using a human model is another way of presenting clothing photos online. There are a number of benefits of using a model.
For example, the viewers can understand the looks, sizes, and fits of the clothes because of the realistic presentation of the apparel items. It also creates an emotional connection between the dress and the customers because of the use of the human element.
A human model will also help you create a lifestyle context for your appeal item. Thus, the customers will imagine themselves wearing the clothes in real life. They can understand whether the items will suit them or not and make a better purchase decision.
You can hire a professional model if your budget allows. Try to hire multiple models based on the size, gender, and ethnicity of your target customers. Pay attention to the consistency, styling, and composition of the photo to properly convey your message.
3. Flat lay photography
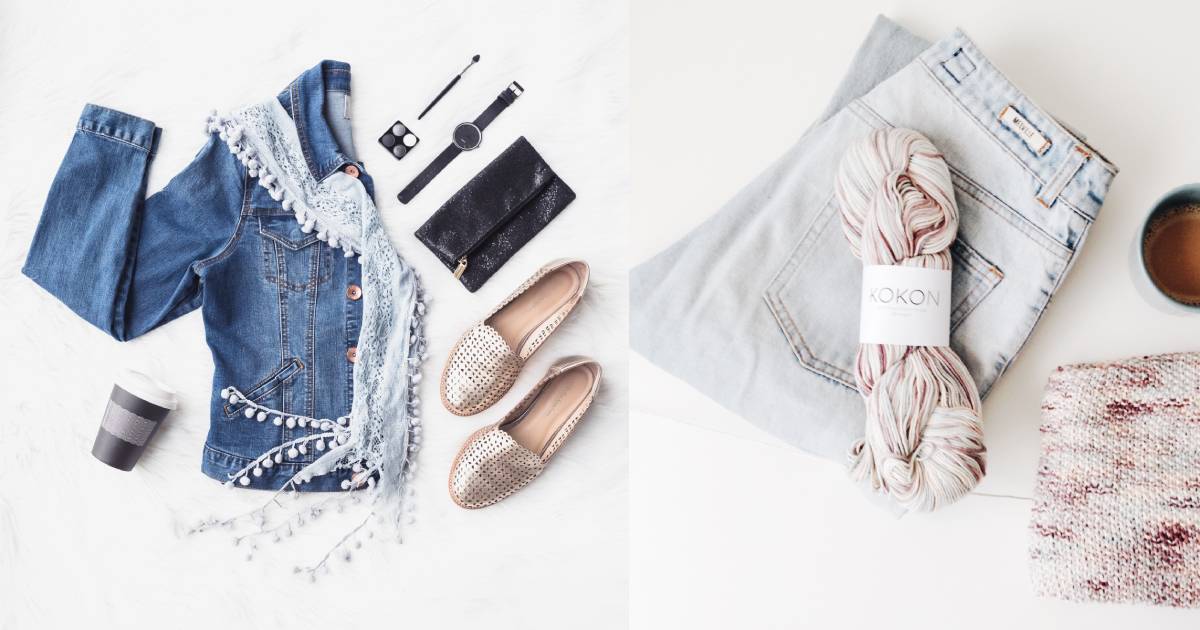
Flat lay is another great way of showcasing apparel products online. In this technique, product photos are taken in a top-down manner, keeping the products on a flat surface. In this type of product photography, you can display a combination of clothing items along with accessories such as shoes and sunglasses to create a visually compelling composition.
Additionally, flat-lay clothing photography is a great way of highlighting intricate details of your clothing items. You can present the embroidery, pattern, and fabric quality of your product nicely. Apart from this, you can apply your creativity in flat-lay photography by telling a story with the presentation of creative composition.
Before you decide on the flat lay, check whether you can achieve your photography objective with it. You do not need a mannequin or a model for it.
To create a flat-lay clothing photo, you just need to arrange your clothing and props on the background and lay them on a flat surface. After that, you need to set your camera and light. Finally, capture the photo and make necessary adjustments in the post-production.
4. Hanging apparel photography
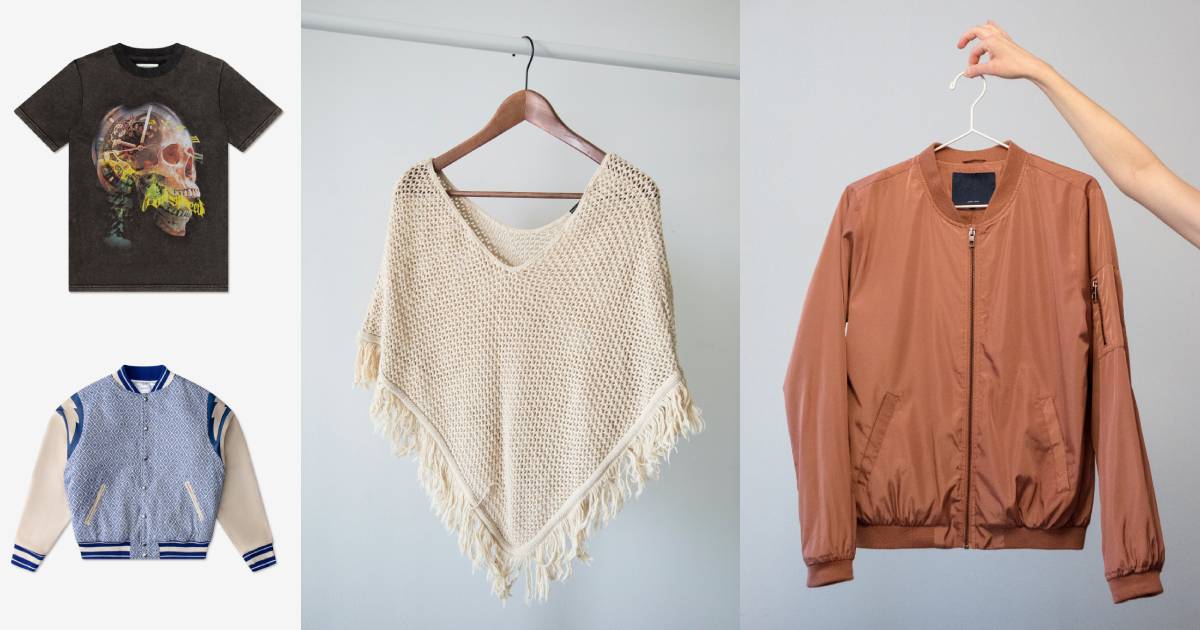
Capturing clothing photos on hangers or other hanging devices is one of the easiest ways of apparel photography. In this technique, clothing items are captured and presented in a way that replicates how these items may appear while they are hung in a closet or store.
There are a number of benefits of capturing apparel photos this way. Firstly, the process of taking photos while they are hanging on a hanger is quite straightforward. If you have budget constraints, you can capture apparel photos yourself in this manner.
Some customers may prefer to see your clothing items displayed on hangers, apart from seeing them in other ways. However, it is important to note that presenting clothing photos in this way may not offer the same experience to online buyers as other ways of presentation, such as the ghost mannequin technique.
DON’T FORGET TO READ: Best Clothing Photography Ideas To Boost Ecommerce Sales
List of clothing photography equipment: Take beautiful apparel product photos
High-quality product photography is essential for apparel ecommerce. Clothing photography helps in building trust and also conveys brand identity.
We have listed the top essential clothing photography equipment that turns ordinary shots into visual masterpieces. From high-quality cameras to versatile lighting setups, we’ve got the scoop on everything you need to capture the intricate details and textures of your apparel products.
Camera
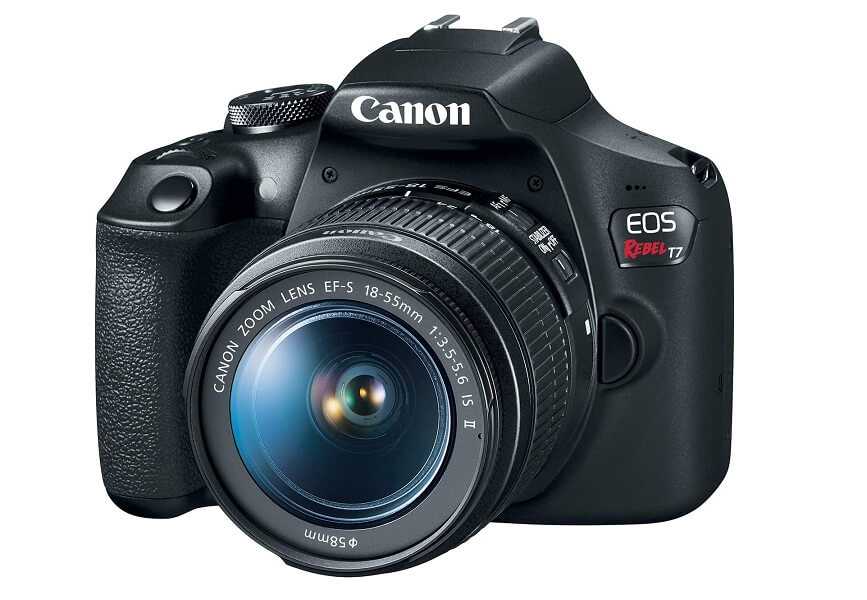
A good quality camera is mandatory equipment for capturing fashion items. There are a number of factors that you need to consider while choosing the right camera for your photography project.
Camera resolution is the number one factor to consider. A camera with around 24MP can be a good starting point and enough for regular fashion photography. Another quality you should consider is lens compatibility. Check whether the camera is compatible with the lens you need to use for your project.
Apart from these, consider some other qualities, such as the low-light performance, sensor, and autofocus system, while choosing the camera for apparel photography.
Lighting equipment
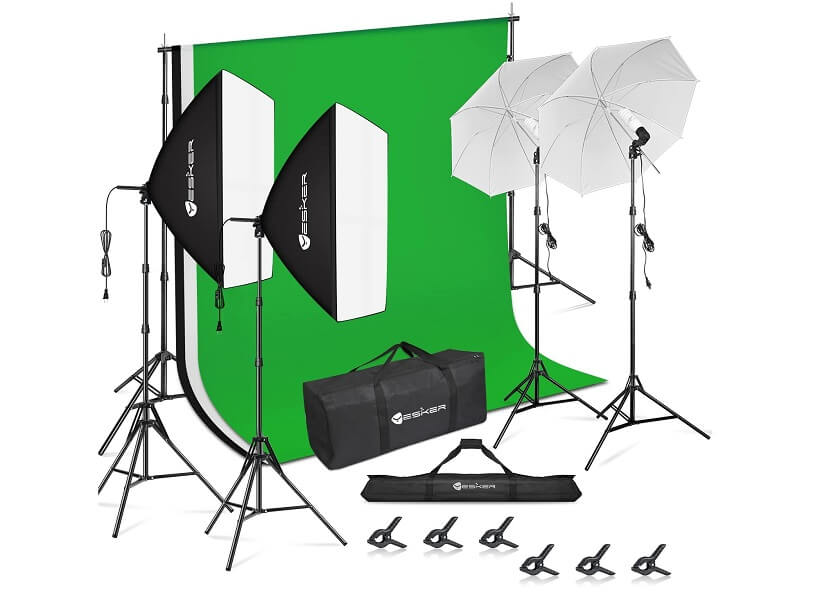
The bare minimum lighting equipment you need for apparel photography is continuous light sources, light reflectors and modifiers, and lighting mounts. Softboxes are the most popular continuous light source options.
They can diffuse the light with their in-built mechanism and produce soft and even illumination. Apart from the softboxes, you may also use LED panels and fluorescent lights as the light sources.
To separate the clothing from the background, you may use background lights. These lights will create a separation between the product and the background and prevent the clothes from blending with the background.
Apart from these, light meters, gels, and color temperature controls are some other lighting accessories that you may consider for your apparel photography project.
Image background
The background color of clothing photos should be neutral. White is the most popular choice as the background color for product photography. Gray can also be a good option. A background with a neutral color will keep the focus on the clothing only. They create no distractions and keep the clothing the center of attention.
Seamless paper or fabric is the most popular option as a background for clothing photography. You should use a background mount and stretch the backdrop down the ground to make it seamless. Additionally, make sure the background is free from wrinkles, dirt, and blemishes.
Tripod
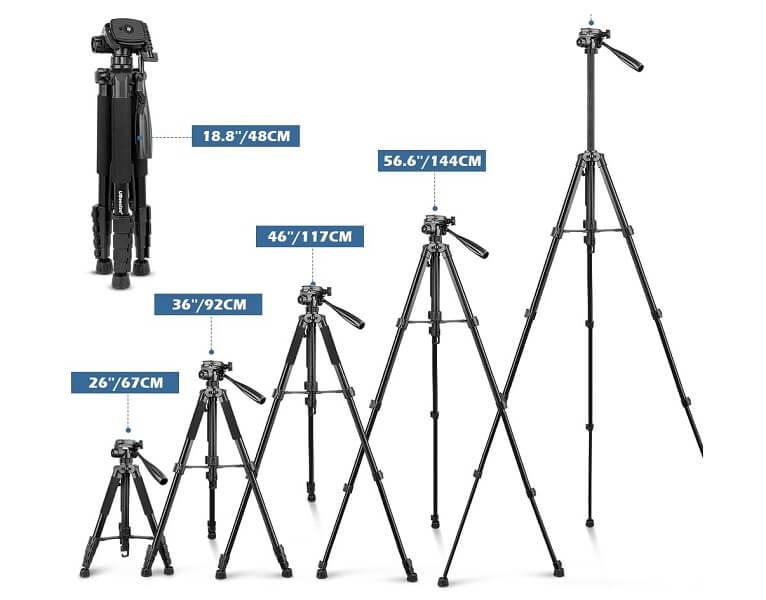
The tripod is necessary for the stability of the camera. It will save your photos from the blurriness caused by accidental camera shake. It is also useful for capturing sharp and detailed images in low-light conditions. A tripod will allow you to capture consistent images of your apparel items for the product catalog by keeping the camera fixed and stable.
Tripods come in various sizes and features. They have varying load capacity, sturdiness, and height. Consider these features while choosing your tripod for the project. Additionally, make sure that the tripod you have shortlisted is compatible with the camera you will be using for clothing photography.
Model or mannequin
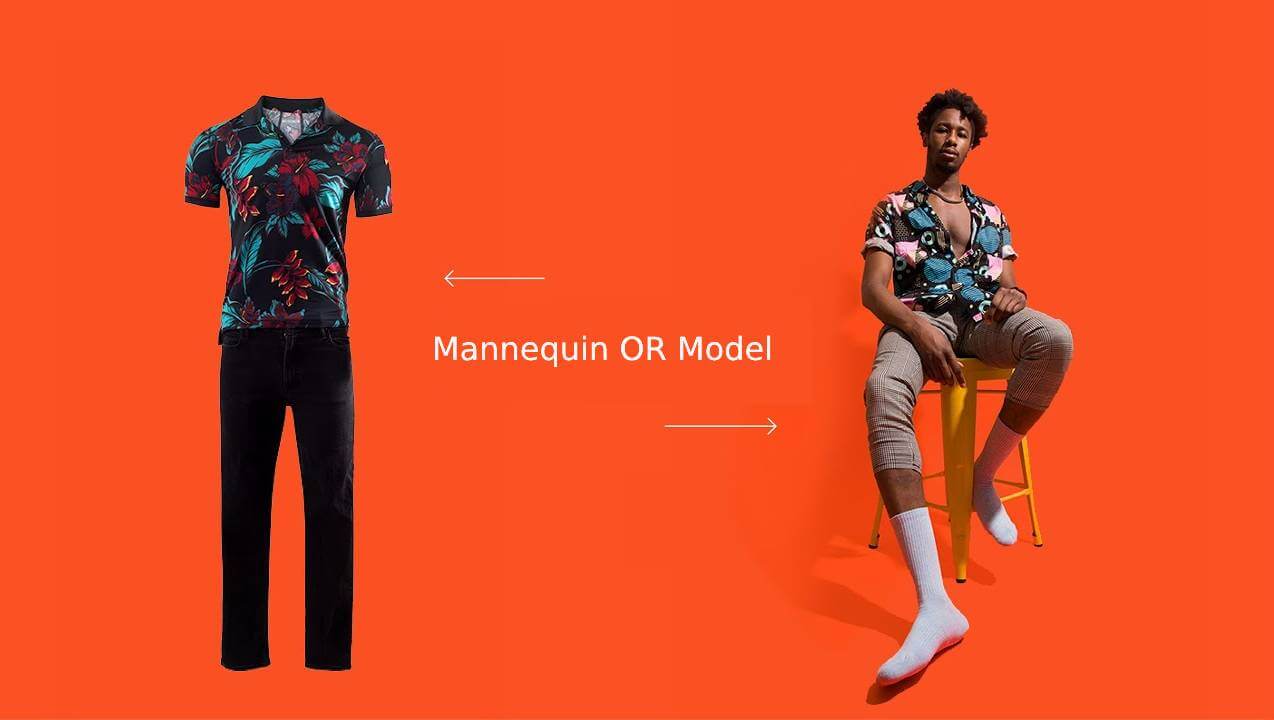
If you want to show the fitness, shape, and style of your garment item in your e-commerce photos, then you may either use a model or a mannequin. Human models will add emotion by presenting the clothes in a lifestyle context. They will also add a human element to your clothing and evoke trust from your potential customers.
You can also use a mannequin, create a human-like shape with your garments, and then remove the mannequin at the post-production table. It is cost-effective, can be effective for consistent photography of multiple fashion items, and speeds up your photography process.
Other accessories
There are optional accessories that you can use to enhance your fashion photography setup. Below is the list of recommended optional photography equipment.
- Light meters – to check and maintain the lighting level and intensity
- Remote shutter release – to eliminate camera shake
- Props – to complement the clothing item and create a specific mood
- Color checker – to maintain color accuracy and adjust white balance
- Product turntable – to take 360-degree clothing photos
- Macro lens – to take close-up shots to display the texture of the clothing
- Boom arms – to position the lights at the desired positions
How to prepare your clothing for a photoshoot
You can not choose the clothes at random. Before capturing the photos of your fashion items, you need to prepare them for the photoshoot. Clean and iron your clothing to ensure that they are free from stains, wrinkles, and dirt.
Are there any flaws or imperfections in the clothes? Check whether there are any loose threads or buttons. Repair or change the cloth as necessary.
You also want to remove unwanted tags and labels from the clothes. Remove pet hair or other debris by using a fabric brush. Close the zipper, buttons, and other fasteners if necessary. Finally, iron your clothes to make them smooth and presentable.
Setting up the background
You should hang your background using a support system or a mount. Place the mount in a suitable position in your studio. If you are using paper for your background, unroll it and secure it with the mount.
If you are using fabric, be extra careful to ensure it is free from wrinkles. Lastly, check for any unwanted colors, blemishes, or inconsistencies in the background. Take some test shots, examine them, and make necessary adjustments before capturing the final shots.
In the case of flat-lay photography for clothing, the background setup is quite simple. You need to place your background paper on a flat surface where you intend to take the photos. You can choose a tabletop or simply a flat floor for the support of the photography setup.
Setting up lights
You need three types of light systems for your clothing photoshoot – primary light, filler light, and backlight. The primary light will be used to illuminate the garment. You can place the light at 45 degrees left or right of the subject, and the light source can be placed at 45 degrees above the subject from the ground.
The filler light can be placed on the opposite side of the main light source. The purpose of this light is to fill the shadows and illuminate the subject uniformly. You may use multiple lights for this purpose.
Finally, the backlight or background light is usually used to illuminate the subject from behind. If the situation demands, you may set up your backlight not directly behind the subject but at a 45-degree angle.
Arranging fashion items
If you use a mannequin, choose the model that fits the clothes perfectly. Make sure the collar, sleeve, and hemlines are positioned perfectly. Additionally, try to smooth the wrinkles to give the garment a polished look.
For flat-lay clothing photoshoots, organize the garment on the background along with the props. Create a theme or story beforehand and arrange the items to create the desired mood. Keep some negative spaces between the elements. Make sure the garment becomes the center of attention.
Set up the camera
Before you take the photo, make sure you have the right lens installed in your camera. For shooting indoors, a prime lens with a moderate focal length can be a good starting point. However, if you want to take close-up shots, then use macro lenses.
Set the aperture setting of the camera should ensure that the entire garment is in focus. The common practice for aperture is f/8 or f/16.
The ISO of the camera should be as low as possible to eliminate noise and grain. Try to keep it under 400. Shoot the image in RAW format to ensure maximum flexibility in the post-processing.
Enable the gridlines of the camera to apply the rule of thirds. If you are not an experienced photographer and do not know all the details in the settings, try utilizing the ‘auto’ mode.
Start taking pictures of clothes
After you have arranged your fashion photography setup with proper arrangement, light, camera, and background, now it’s time to capture the photos. Consider the photography composition and keep the focal point on the garment.
Take test shots and evaluate whether the photos showcase the clothes accurately. Pay attention to the details and try to highlight the features of the clothes. Try to capture the story and the message that you want to share with your customers.
How to edit your clothing photographs to attract customer attention
After you have taken your photos, it’s time to work on the post-processing stage. The process starts with importing your image files to the computer. Then use a reliable photo editing software, such as Adobe Photoshop, to refine your images.
There’s no single guideline for clothing image editing. The application of different photo editing techniques will vary based on the quality of the RAW image. Below are a few commonly used techniques that image editors may apply to fashion products.
Light adjustment
Although we have tried to use different types of lights during our photography session, it is not always easy to maintain completely balanced light and shadows. Therefore, you need to adjust the light in the post-production when necessary.
The process involves exposure, contrast, highlight and shadow adjustment, white balance correction, application of dodging and burning effect, and selective light adjustment for specific parts of the image.
Correct the exposure of the image to make it neither too dark nor too bright. Your objective should be to maintain the details in both dark and bright areas. Make sure the shadows do not hide any detail of the image.
You may sometimes need to adjust the light of a specific part of the image. Select the part of the garment first to isolate it from the garment, and then apply the appropriate effect to correct its light.
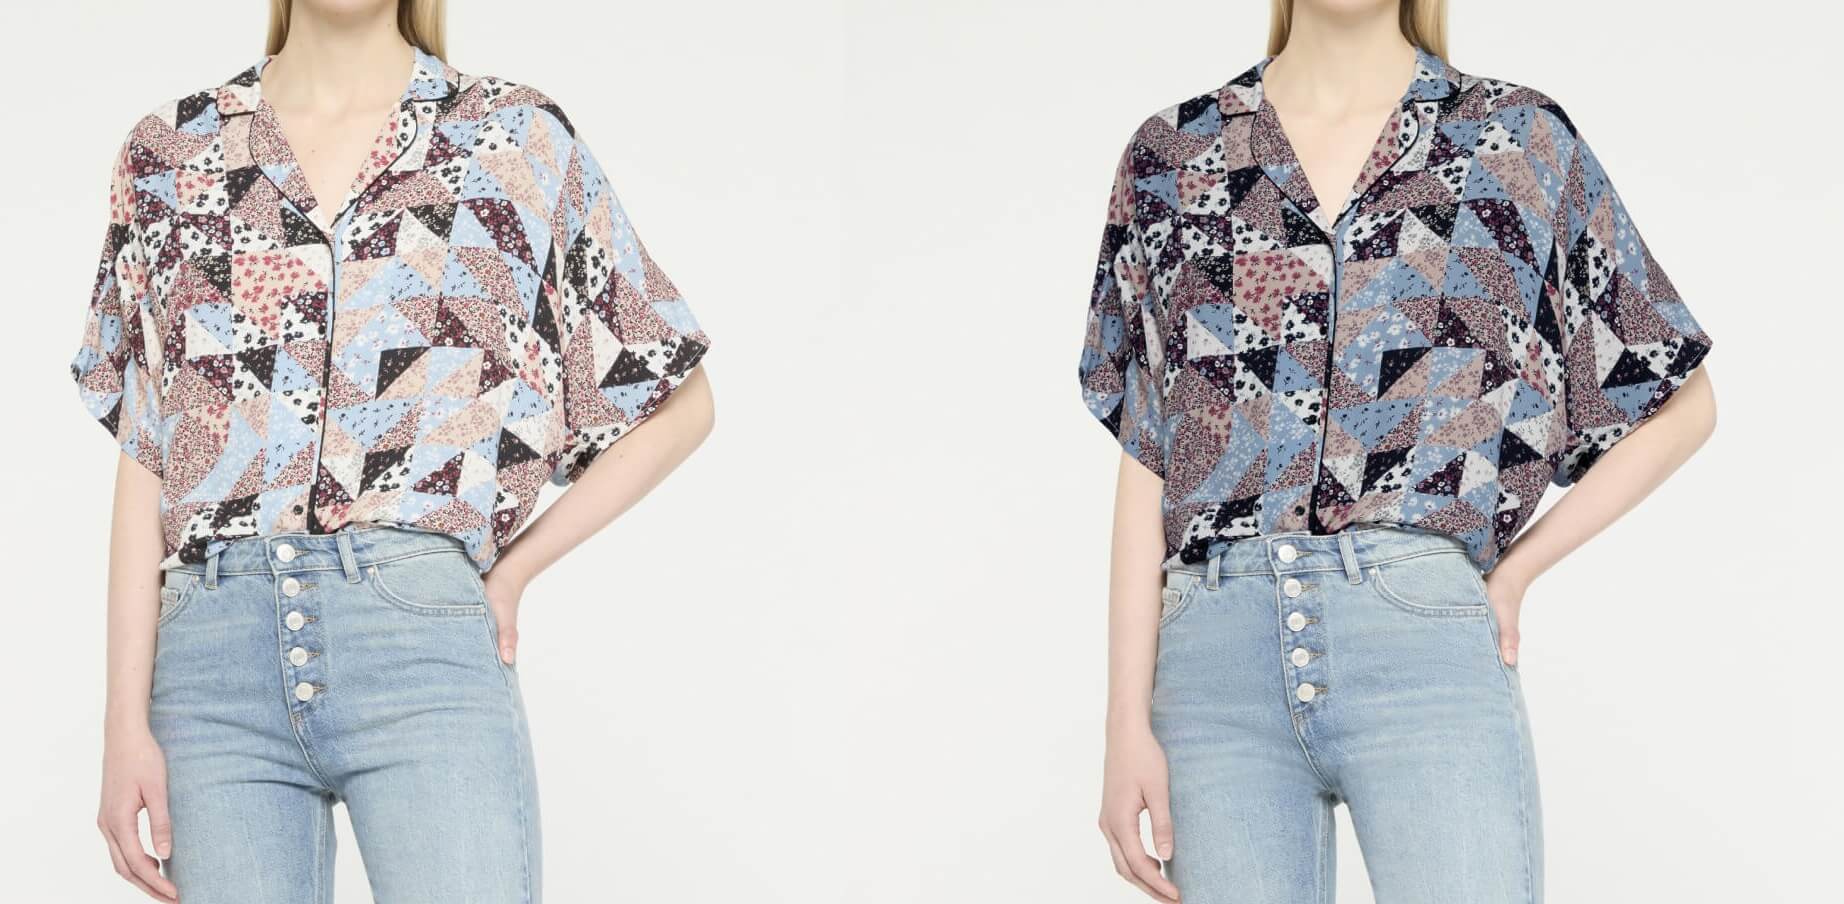
Adjust or change the color

Color correction for clothing photos has two different aspects: color adjustment and color change. Color adjusting means modifying the color of the clothing by the application of color correction tools to get an accurate color that represents the actual fashion item. This process involves utilizing presets and filters, masking and layering to adjust the color of a specific area of the product, color grading, and toning.
The color change is a photo manipulation technique where the image editors change the original color of the product to create multiple color variations. This technique is useful when you have multiple color options for your garment product. You can just take a photo of a single color variant and then replicate the other color options in the post-processing.
Remove background
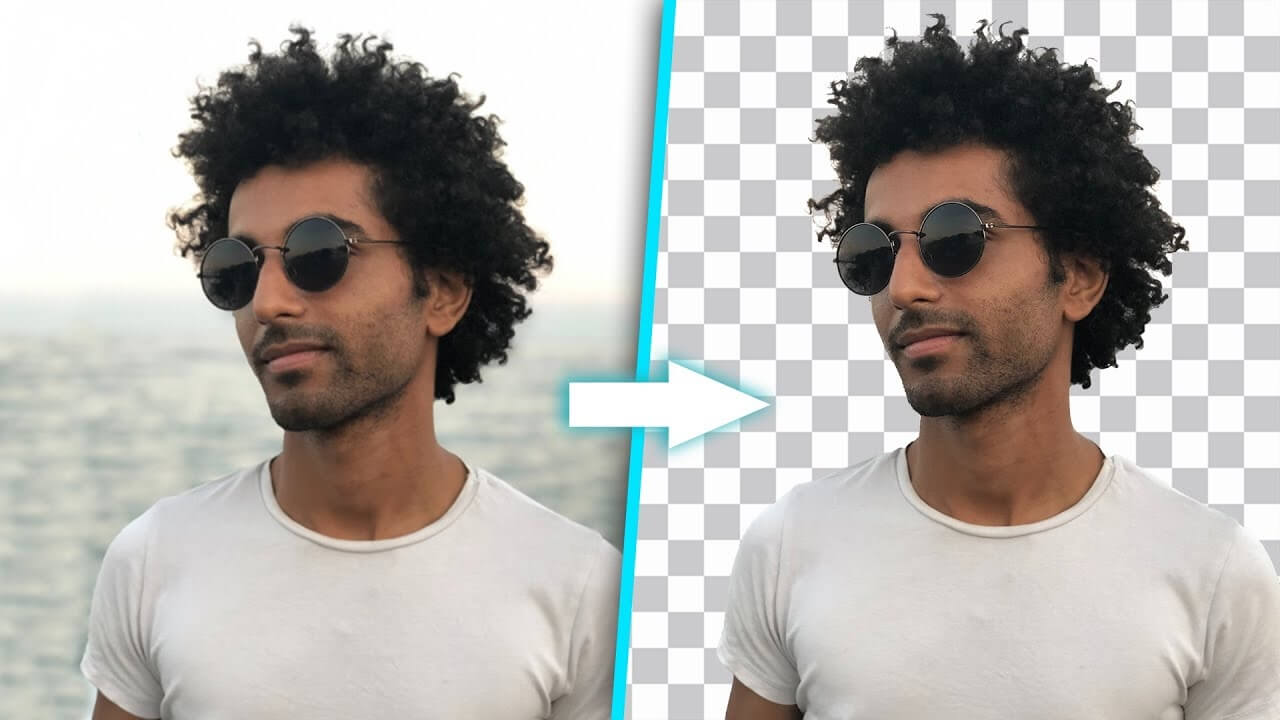
Background removal of the clothing images is necessary when you need to apply a consistent and similar image background across all the photos of your products to maintain cohesiveness and create a brand identity.
Sometimes you can not get the desired background for your photos, even though you have tried your best in the photography session. In such situations, you need to change the image background by applying photo editing techniques.
To remove the background from clothing images, the subject should be selected with an appropriate tool. There are a number of automated and manual selection tools in Photoshop. The manual pen tool is the best selection tool to isolate the subject from the background with precision. After you have selected the subject, remove and apply your desired background.
Remove wrinkle
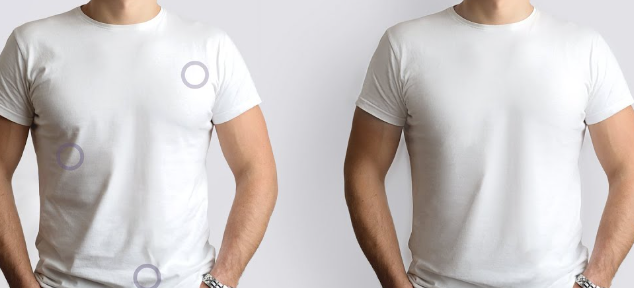
Wrinkles can badly affect the aesthetic appeal of clothing photos. You can remove these unwanted creases in Photoshop with the application of the right tool. For example, the ‘spot healing brush’ tool is an easy way to smooth out wrinkles.
Simply select the tool from the toolbar and brush it over the affected area. For stubborn wrinkles, you have other options such as the ‘clone stamp tool or the ‘content aware fill’ tool.
Add text or logo
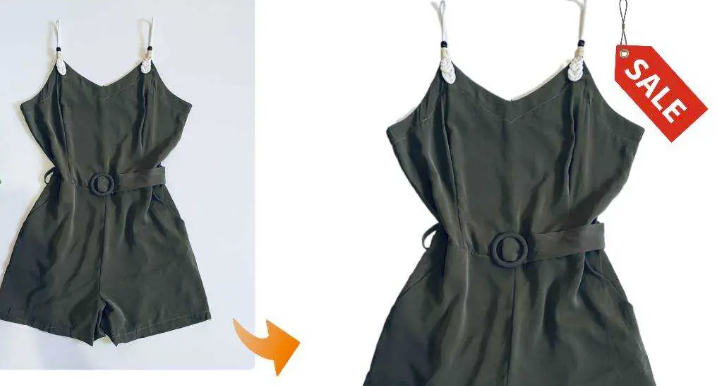
You can add some text on the fashion item to communicate any promotional messages, such as any discount offer, features of the product, and so on. Additionally, you may add your logo to the clothing photo to help your customers recognize your brand.
You can add these elements to the product using Photoshop. While adding texts, make sure you have positioned them correctly and maintain consistency across all your products.
Remove mannequin
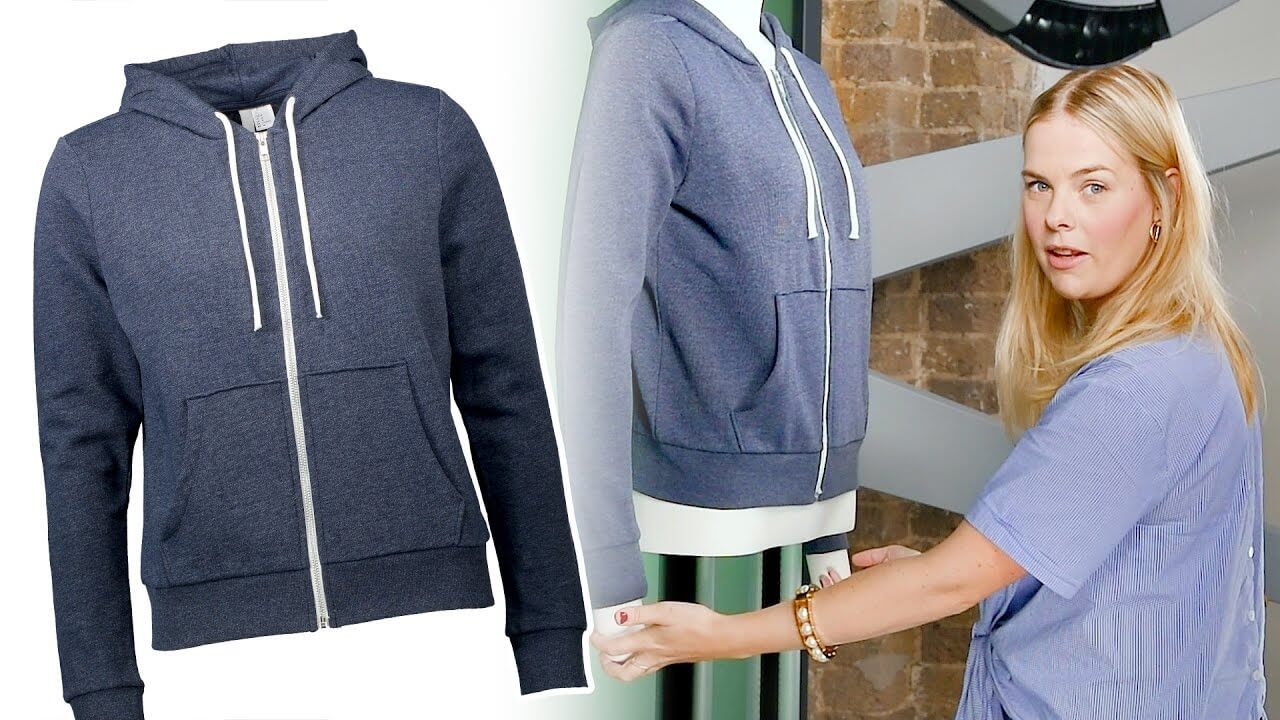
If you want to apply the ghost mannequin effect, make sure you have multiple images of the fashion item captured from different angles. Creating the invisible mannequin is a manual process. You need to select the mannequin area in the images and assemble the different parts to make the images complete and realistic.
Conclusion
Selling clothing online largely depends on the quality of clothing photos. As discussed in this article, there are different methods of clothing photography. Choose the right approach that aligns with your marketing and business objectives.
Whether you opt for the ghost mannequin, hanging appeal, or flat-lay photography method, any of these techniques has its own benefits. Resonate with your customers and engage them with your brand to drive online sales.
FAQs
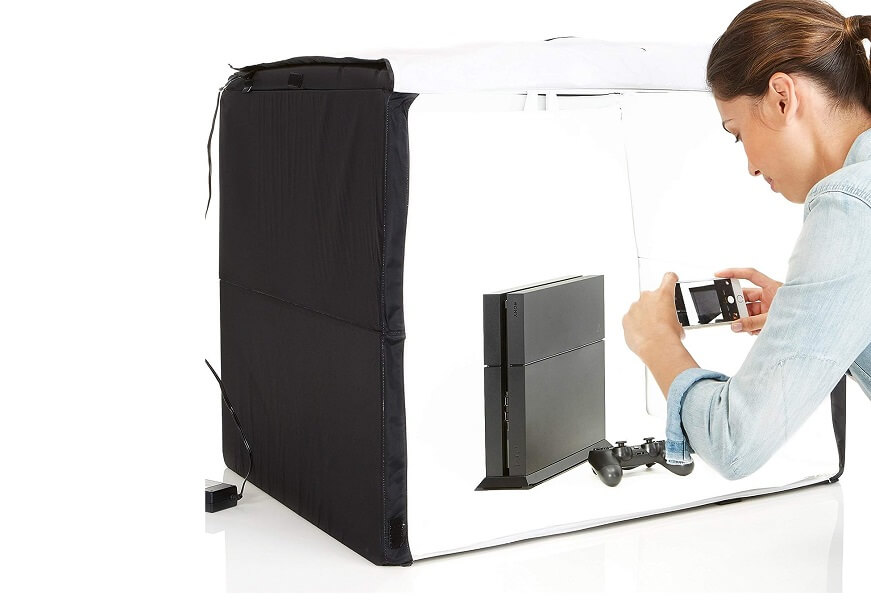
Can I take professional clothing photos with a smartphone?
Yes, you can capture professional clothing photos with a smartphone. Use a tripod and a proper lighting setup, and apply creative techniques and ideas to capture professional clothing product images.
What lighting is best for clothing photography?
The best lighting for clothing photography is soft, diffused light. This helps you capture image textures, color, and detail. You can use natural or artificial light to make a soft, diffused light setup.
What background should I use for clothing photos?
Use a plain background color; it should be white, black, gray, or another color. This makes your clothing images destruction-free.
Should I use a model or a mannequin to photograph clothes?
If you want to capture lifestyle clothing images, use a model. To capture a 3D-shape image without any elements, use a ghost mannequin. You also need to consider your budget; the model requires more budget than the mannequin’s photograph.
What camera settings are best for clothing photography?
The best camera settings for clothing photography are aperture F/8 to F/11, ISO 100 to 400, and a shutter speed of 1/125 to 1/400. To capture quality images, play with multiple camera settings.
What common mistakes should I avoid in clothing photography?
Try to avoid common mistakes in clothing photography, such as improper lighting setup, distracting backgrounds, dust, and wrinkles on clothing.