
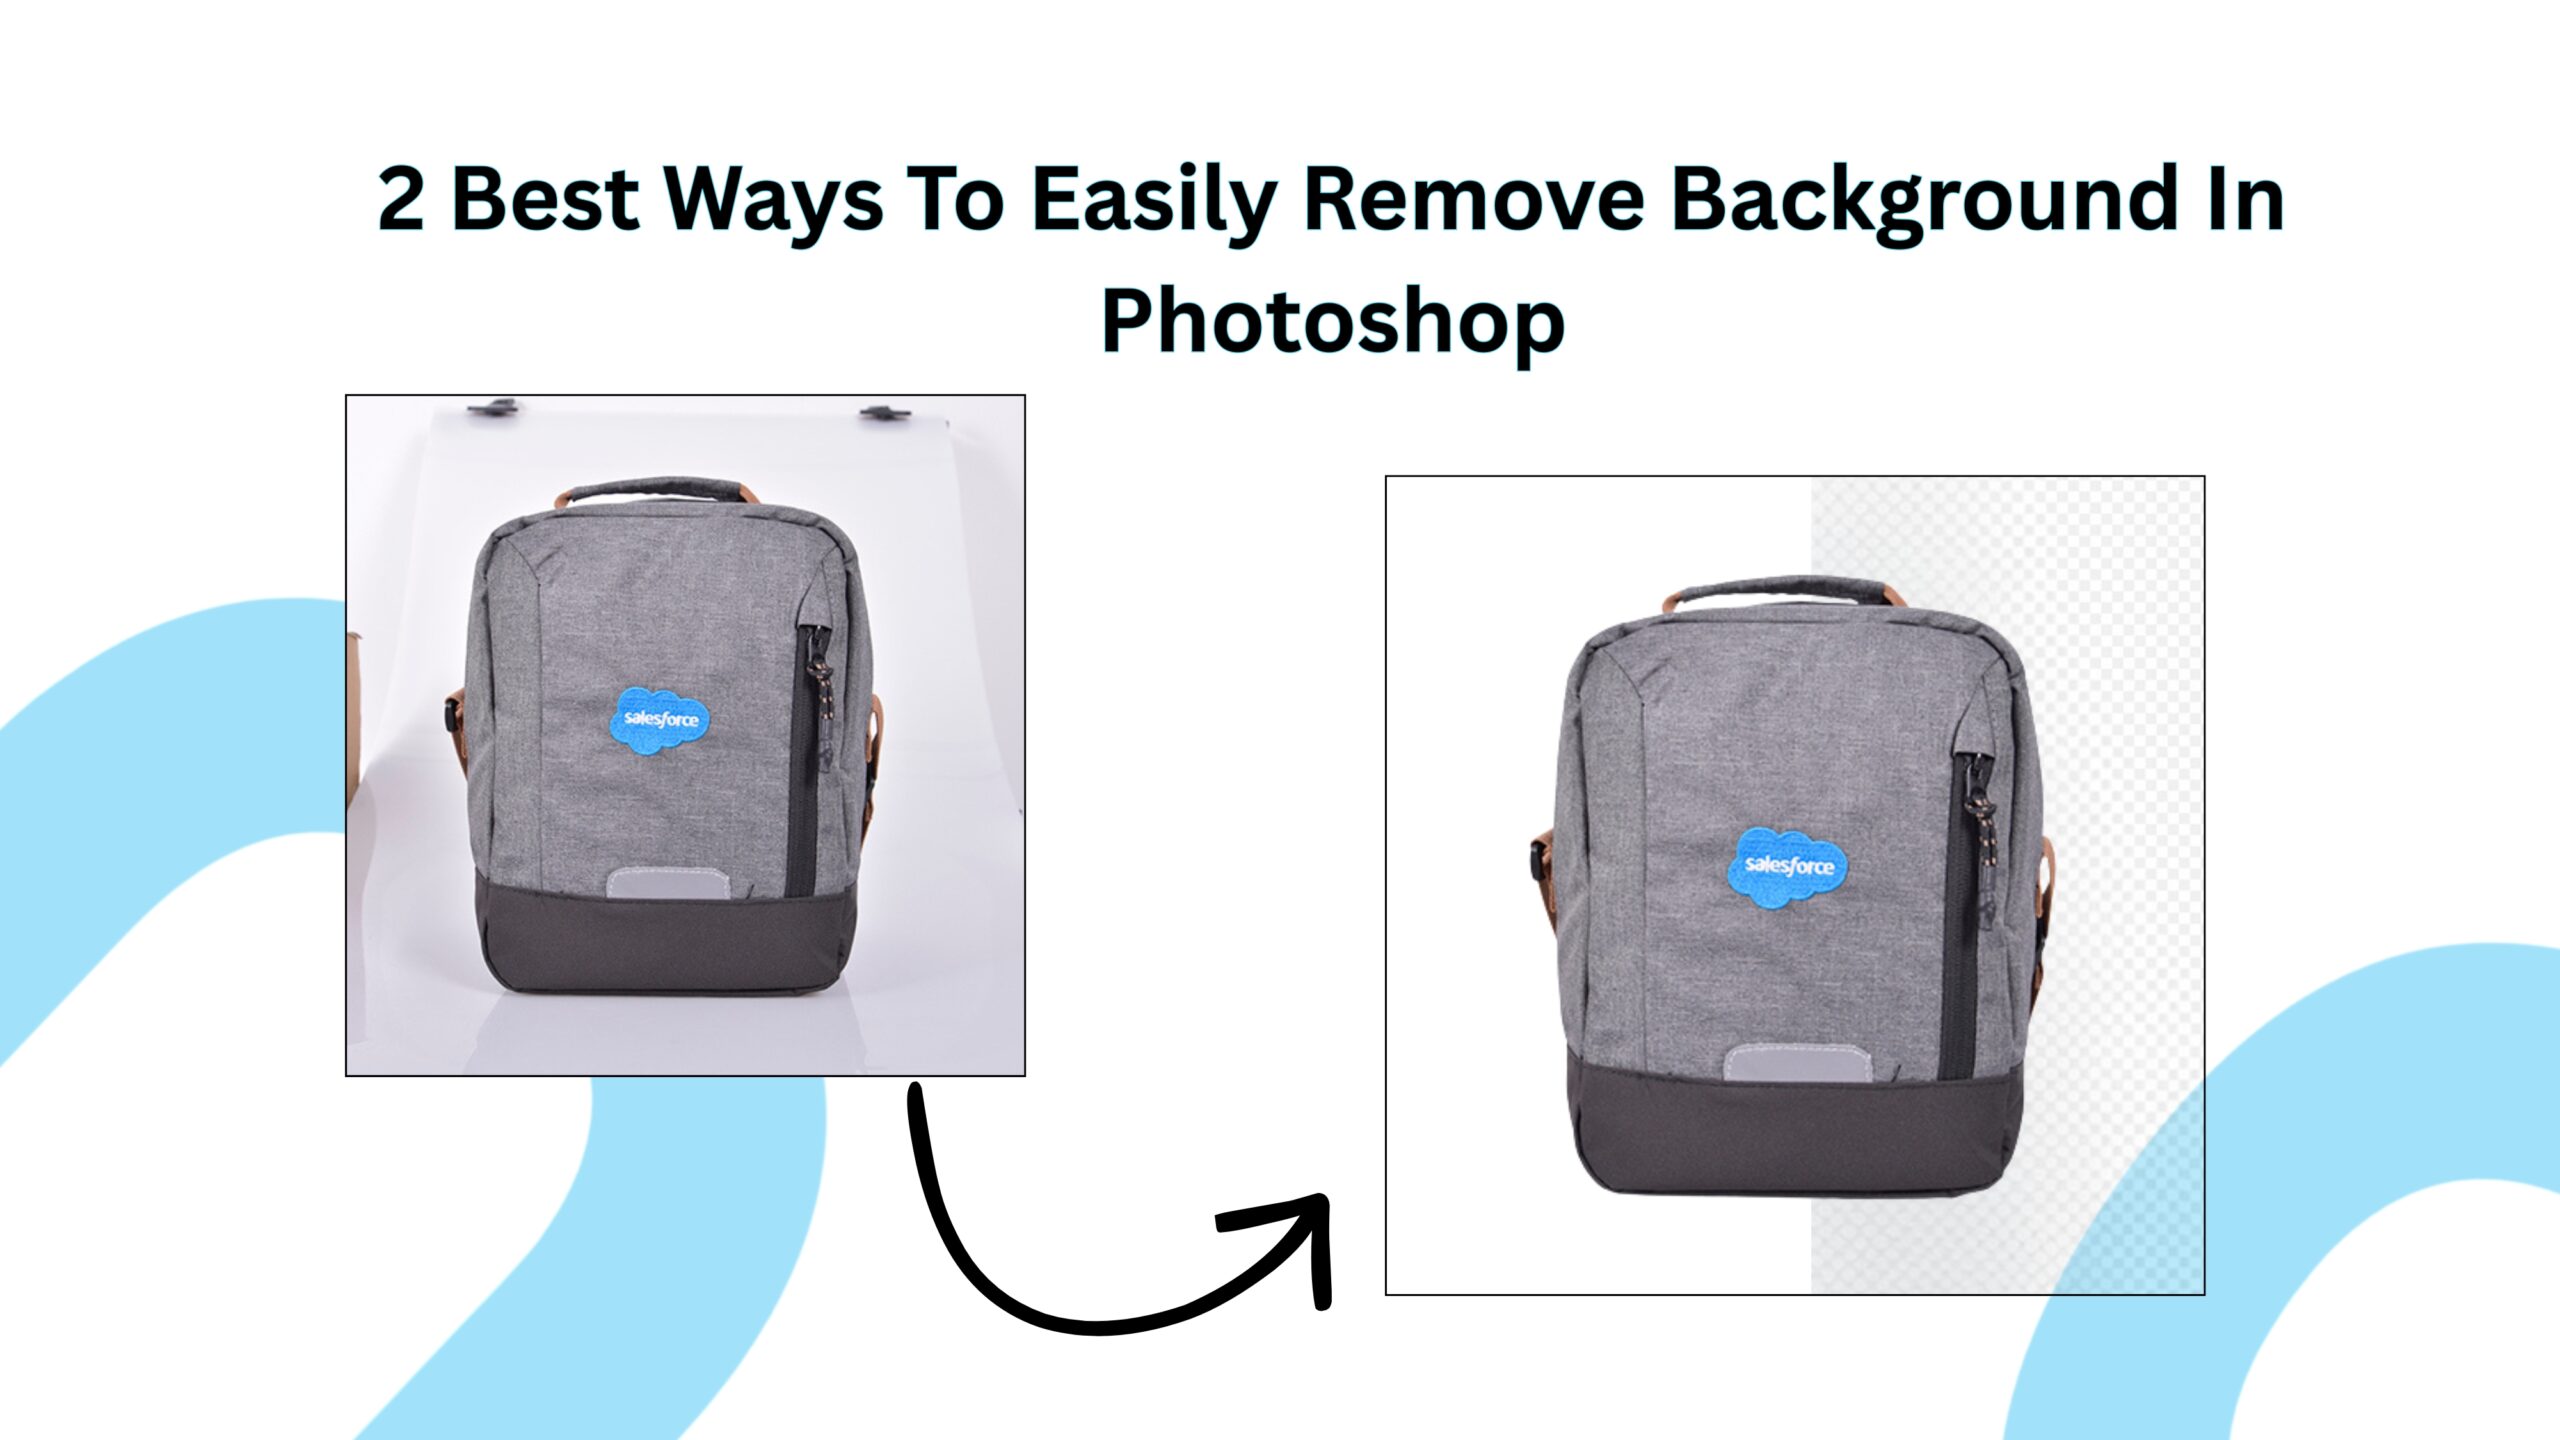
You can easily remove the background in Photoshop by following the two methods outlined in this guide, which include some simple steps. You are learning background removal through Photoshop Elements in the easiest way possible. In this guide, you will learn how to use Photoshop Elements to remove the background of an image.
Background removal is done, especially using Photoshop. Photoshop elements are highly revered amongst the other different techniques that we often see online, while looking at product pictures or even on billboards and posters.
The industry of e-commerce and photography is vast and virtually endless. And editing is one of the most vital factors of it. Professionals use editing software with special tools that allow users to manipulate, enhance, and change the image in any direction they want.
However, there are many editing applications and software, and Adobe Photoshop remains the go-to choice for experts when it comes to making edits on photos and images.
There are Photoshop elements to remove backgrounds and make edits like retouching or image manipulation easy to do, even for beginners.
How to Remove Simple Product Image Background in Photoshop
1. Launch Adobe Photoshop and open the image you want to edit
Launch Adobe Photoshop and select File > Open, browse for the image you want to remove the background from, and choose the image. You can also use the shortcut keys on your keyboard to open a file, Ctrl+O for Windows and Command+O for MacOs.
2. Start drawing a clipping path around the object


After successfully opening the image in Photoshop, use the pen tool to create a normal clipping path around the subject. Complete creating a clipping path and make sure to add or create two additional layers.

3. Exploring the layer window
The layer window plays a vital role in any editing in Photoshop. Explore the layer window a bit to get more used to working with it. The layer window gives you a more suitable and worthwhile experience of working in Photoshop. This Photoshop element is found on the right side of the window.
The layer window has an existing layer called background. This background layer is where there are no edits are made to the image. So, for example, if there are absolutely zero edits done after opening the image in Photoshop, the layer window will only consist of one background layer.
Select the layer and right-click on it, and choose the option ‘Layer from Background.’ It will open a new layer, and you don’t need to change the default choices given. Press OK, and it will create a new layer. You will change the name to ‘Layer 0‘ from Background.
4. Select the Magic Eraser Tool
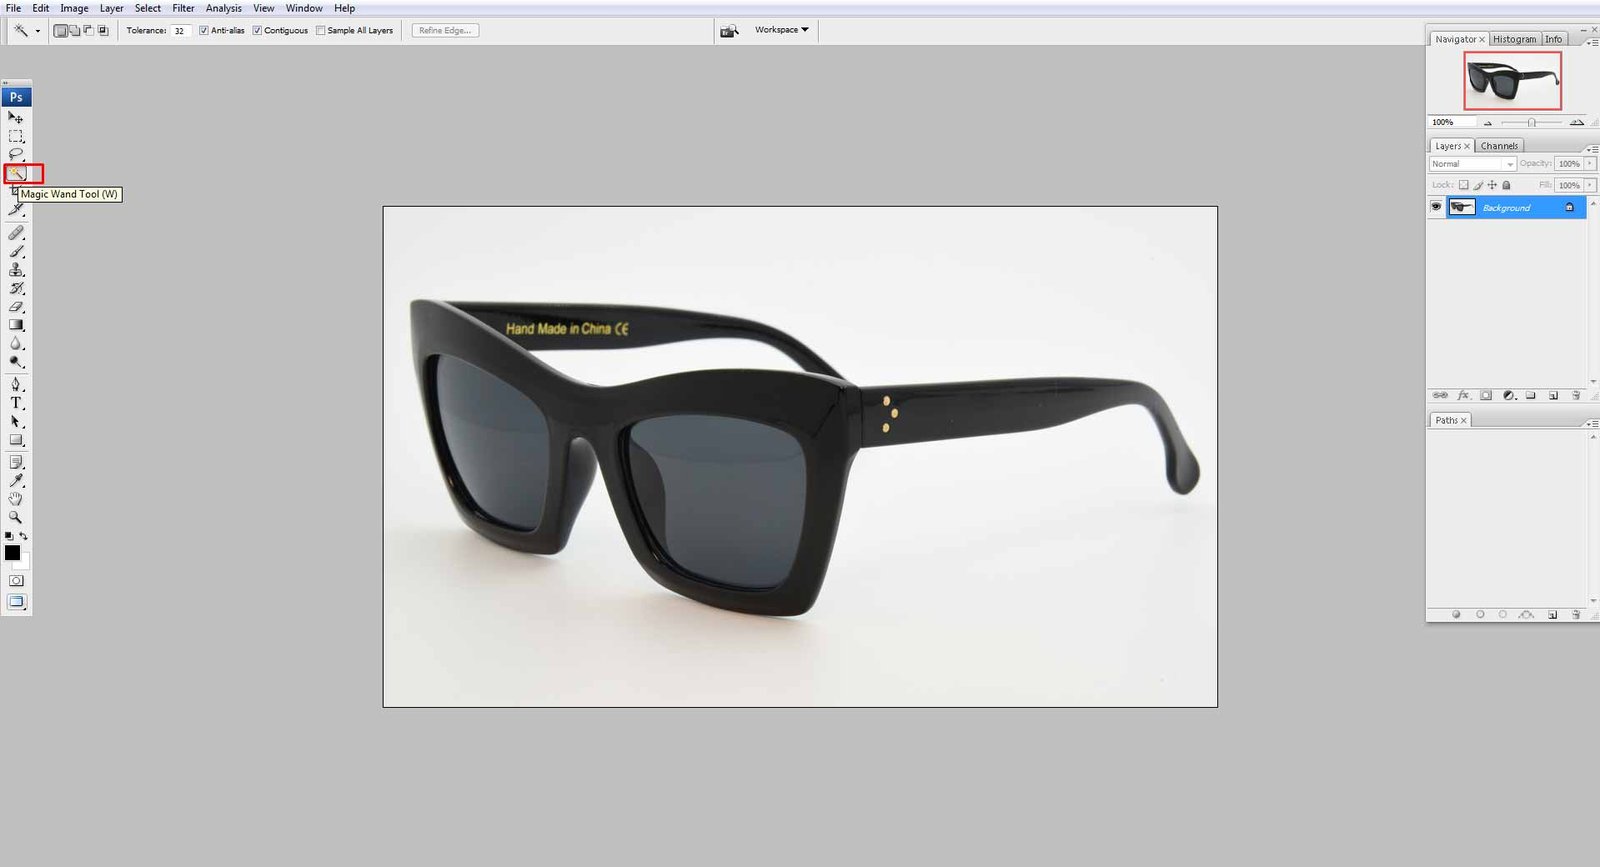
This Photoshop element works wonders in your picture. You can find it under the Eraser tool. Click and hold the eraser tool symbol and select the Magic Eraser Tool from the menu that appears on the screen.
5. Adjust the settings for the Magic Eraser Tool
After selecting the magic eraser tool, adjust the settings in the top menu bar.
- Select the tolerance option and adjust it to 20-30.

When you utilize this element in Photoshop, the low tolerance level will help remove specific portions or parts of your image while using the tool. Try working with this tool and modify the options as per your requirement after getting to know the tool better.
- Check on the Anti-Alias tool
- Give a check to the Contagious box
- In the opacity option, set the opacity to 100
Adjust the above settings according to you while working on the image.

6. Select the background to remove it
The magic eraser tool you worked on in the earlier steps will enable you to remove the background and make it transparent by erasing all the colors. This method works best for solid background color images.

In case of a gradient background of images, adjust the tolerance level, which will influence the outcome of this tool as it impacts how many colors are removed.
One click is enough for removing a solid background; however, make sure to make the minor adjustments you might have to consider when using the eraser tool.
7. Remove the background and save the image

After you are done with the steps above, save the edited image. Now you have a transparent image you can work with or use, and place another background in the picture.
How to Remove Complex Image Background In Photoshop
1. Open the image in Photoshop

Please select the image you want to edit and open it in Photoshop.
2. Use the Background Eraser Tool

From the Photoshop toolbar, select the background eraser tool. If you cannot find it directly, see the tool; this might hide it underneath the eraser tool. Then, select and hold the Eraser Tool for the background eraser option to show.
3. Adjust your brush options
Set the brush hardness to 100% and adjust the width of the brush to your required size, as you will be making broad strokes.

Then, select sampling from the tool option and make its adjustment continuous. Continuous sampling will enable you to erase only the colors similar to the center of the image. For more complex color removal, for example, the in-between background hair, you would have to choose the discontinuous option.
Set the tolerance to 20 – 25%. Tolerance usually helps you to increase the range of colors that you will be removing.
4. Sampling and tolerance Adjustments

You must erase the image background very carefully. Zoom in if you have to for a clear view. Make sure to erase the colors from the edges at first. If you think it might be difficult to erase a few colors, set the sampling settings to discontinuous and level up the tolerance to 30% or more.
5. Save your image

After you are done erasing the background, save your image.
Using the brush and eraser tool are some of the basic Photoshop elements for removing background from an image. However, there are times when you might want to use an advanced tool to edit and remove the background for a more complex picture.
Using the pen tool
Making use of the pen tool will be the perfect solution for this. The pen tool is a bit of an advanced Photoshop tool to use. You would require some practice to use it efficiently. However, if you get your hands on the pen tool, editing backgrounds or removing backgrounds will become easy for you.
Conclusion
Background Removal is a well-known technique that plays a vital role in product photography, promotional pictures, and advertisements. Photoshop is the most popular editing software among designers and graphic editors, helping to create the perfect photographs for you, be it for product marketing or general photography. Professionals, as well as beginners, use this software.
Learning how to remove backgrounds in Photoshop from an image helps you to do better product marketing. For your e-commerce business, this specific editing, which is clipping path or background removal, is essential, and learning it on your own can help you in times of urgency.
However, background removal of an image has to be done very precisely and efficiently; therefore, choosing a professional is a recommended option by influential marketers.
UK clipping path, your trusted image retouching partner. For a professional touch in the background removal service, feel free give a free trial.