

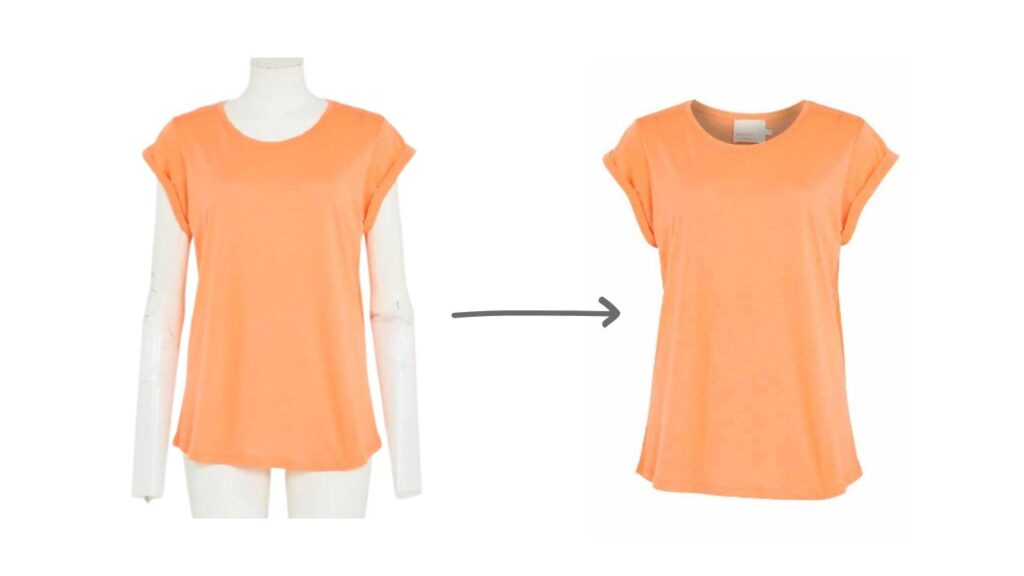
The invisible mannequin that gives your products an attractive look, and learning how to make a ghost mannequin in Photoshop will instantly help you at times for your business.
What is the Ghost Mannequin Effect?
When you want to showcase both the front and interior of your garment products, a clothing ghost mannequin is a powerful tool to use.
It is an invisible effect where the picture is removed from the dummy and the product image. It ensures both the product’s inner and outer parts that give the customer a better visualization.
The ghost mannequin effect in Photoshop is also known as the invisible mannequin or hollow man effect. The ghost mannequin is a photography and post-processing technique.
Mostly used in the fashion industry to showcase clothing that makes it appear as if an invisible model is wearing it.
The invisible mannequin or hollow man effect is commonly used for ecommerce product photography. Especially garments like dresses, shirts, and other apparel are highly used in the invisible mannequin technique.
Reasons Why You Should Use the Ghost Mannequin Effect for Your Product Photos
1. Professional Appearance: The technique gives your clothing a clean and professional look, making it more appealing to potential customers.
2. Details and Fit: It effectively highlights the details, fit, and features of the garment, helping customers make informed purchasing decisions.
3. Cost-Effective: When we use the ghost mannequin technique instead of models can be more cost-effective for product photography, as you don’t need to hire models for every item.
Creating Ghost Mannequin Product Photos: A Quick Overview
Start by setting up your clothing product in a way that highlights its unique features and keeps the background color accurate.
Once you’ve done the ghost mannequin product photography through camera and lighting, it’s time for the magic wand and eraser tool in Photoshop to remove the mannequin, leaving only the garment. This process ensures your customers focus on the clothing itself, not the mannequin.
Next, create a new background layer that complements your clothing and suits your online store’s aesthetic. This technique elevates your clothing photography to a professional level, making your eCommerce business stand out from the competition.
Your ghost mannequin product photos will exude a sense of style and sophistication that captivates potential buyers, driving sales and boosting your brand’s reputation. Mastering this art of photo editing is an essential skill for any modern clothing retailer looking to thrive in the digital marketplace.
It is easier to create the ghost mannequin effect when the source material, such as photographs or pictures, is of good quality. Although apparel sellers usually have an invisible mannequin for their product photography shoots, many sellers rely on editing techniques to get a better picture for their online sales.
This complete guide to ghost mannequin tutorial shown in this article will help you create ghost mannequin effects without any huge hassle, and with or without a good-quality picture of the product.
How to Create a Ghost Mannequin Effect in Adobe Photoshop – (Step-by-Step)
To show the following steps, we have used an apparel t-shirt on both the front side and backside photograph to show you how to create a ghost mannequin effect and merge the pictures to make it more realistic. Read our other guide on how to take perfect clothing for ghost mannequin photography. This guide helps you ins and outs of taking better photos of your apparel.
Follow the step-by-step complete guide and learn how to make your ghost mannequin for your images in Adobe Photoshop.
Step 1: Open Adobe Photoshop and Upload Your Image
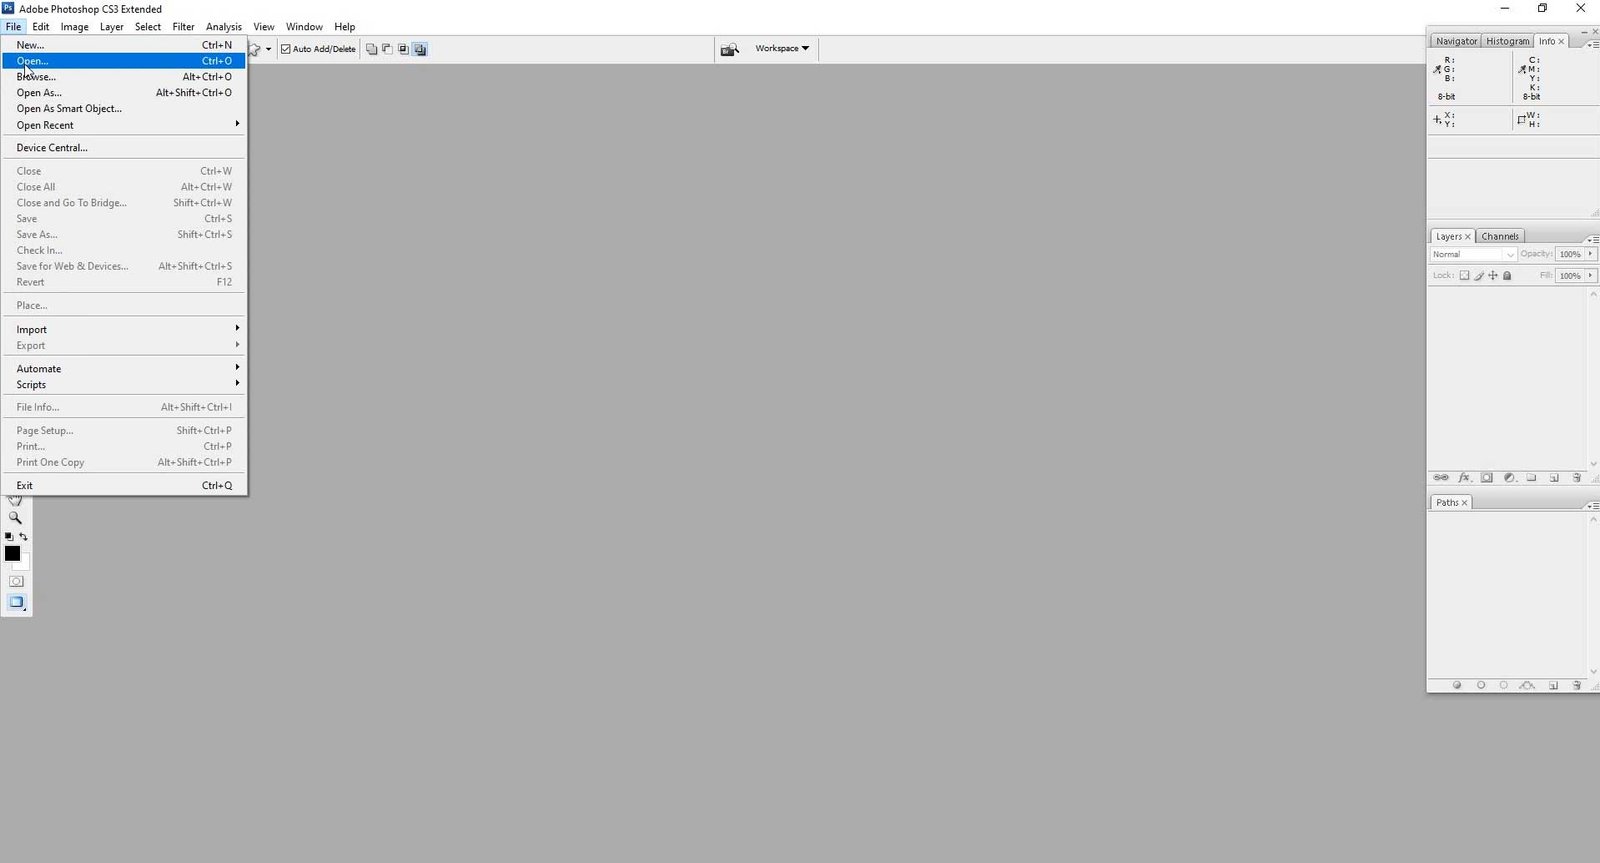
Upload your image in Photoshop by going to File > Open.
Step 2: Select the pen tool from the main toolbar
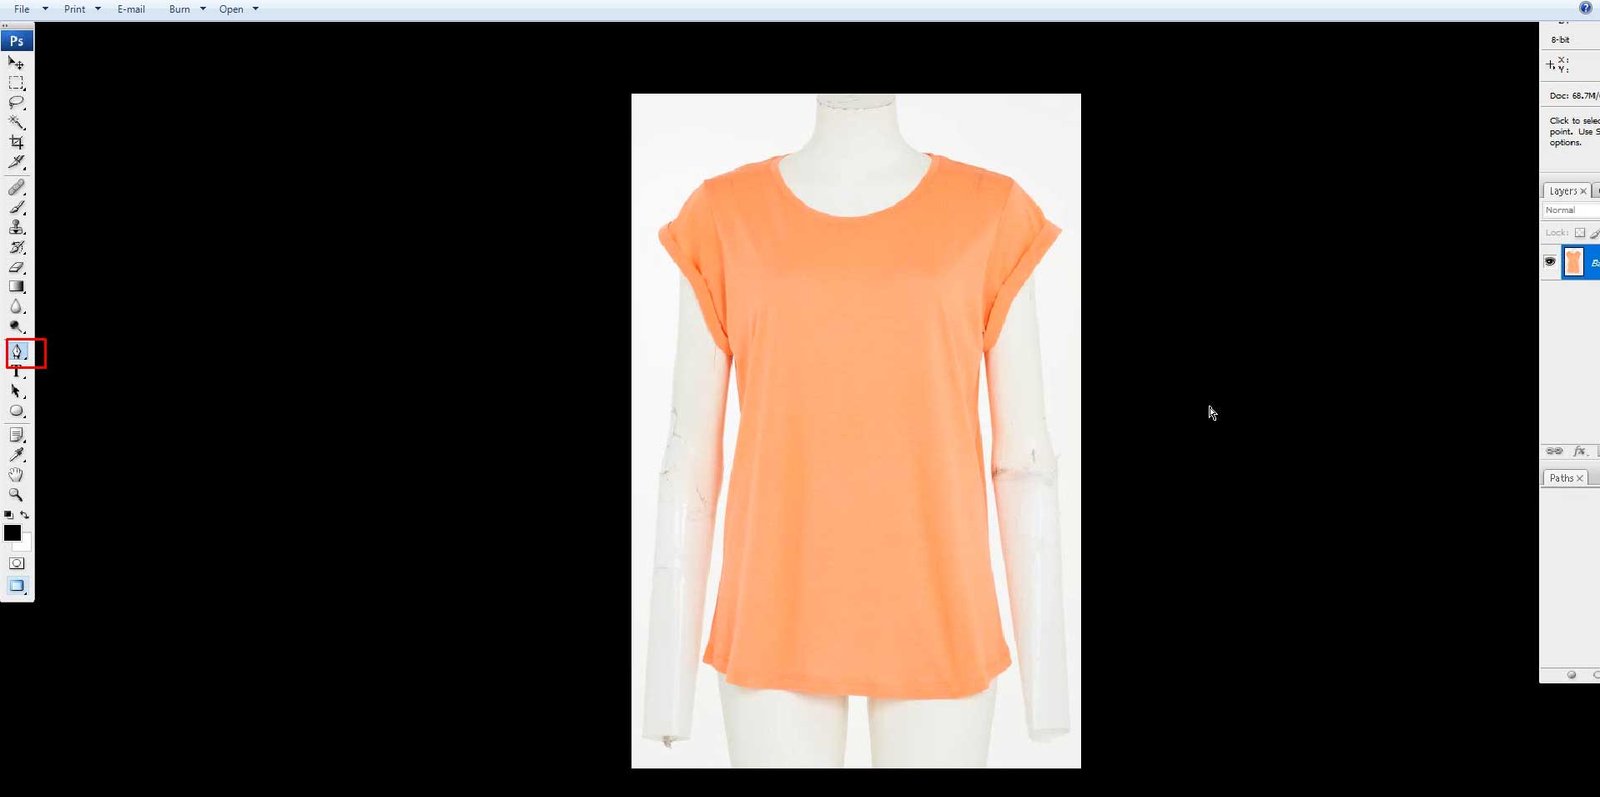
From the main toolbar, select the pen tool to create a clipping path.
Read our related guide on how to create a clipping path on photoshop. This DIY guide helps you create a path for your product photos.
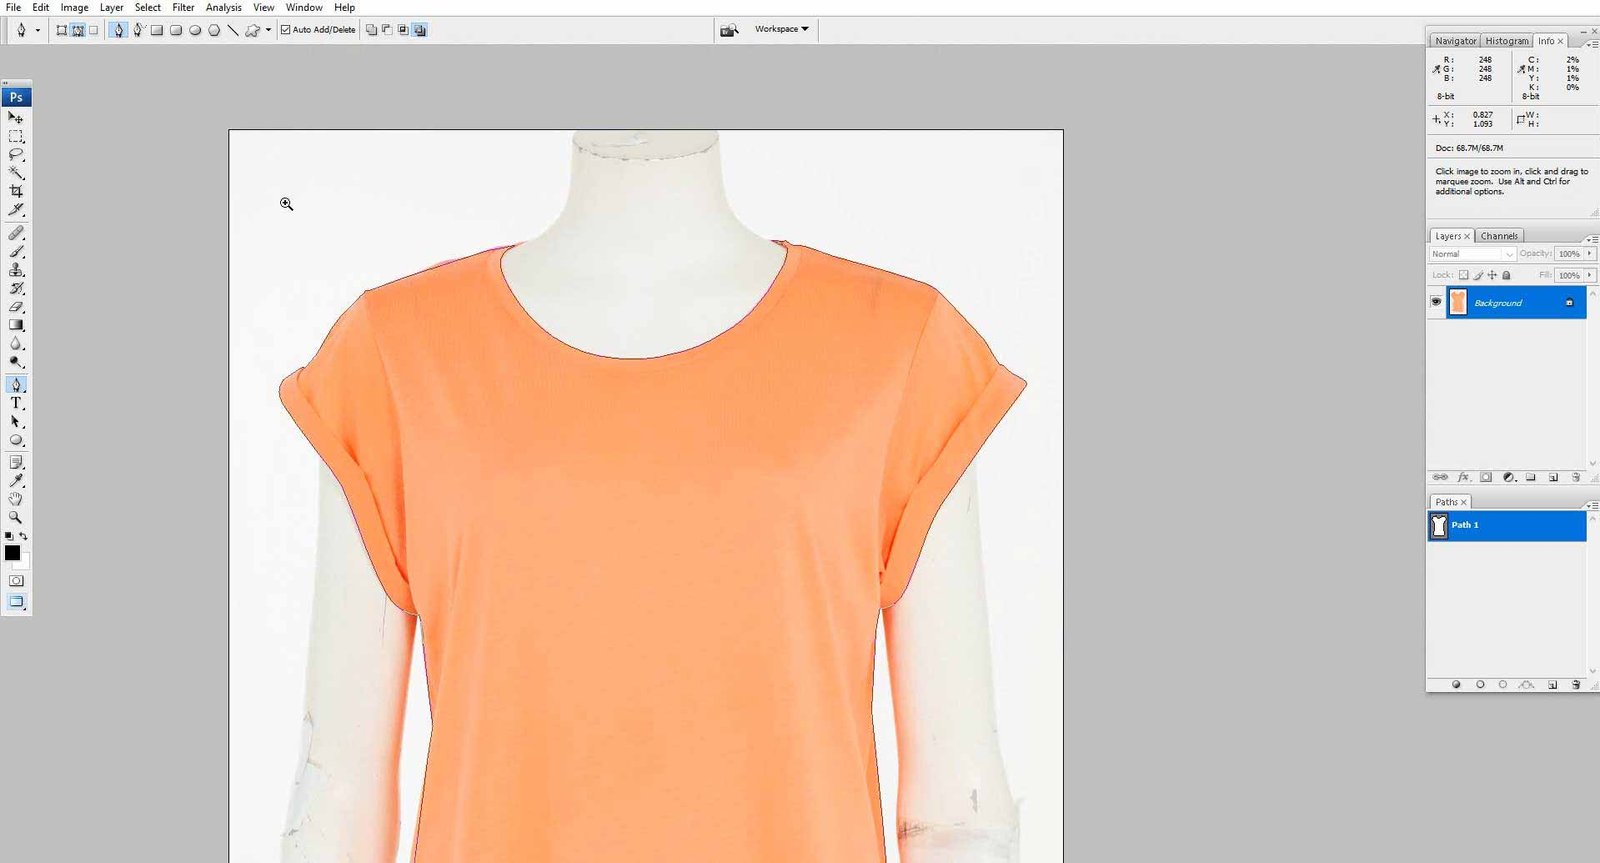
Step 3: Select a new path
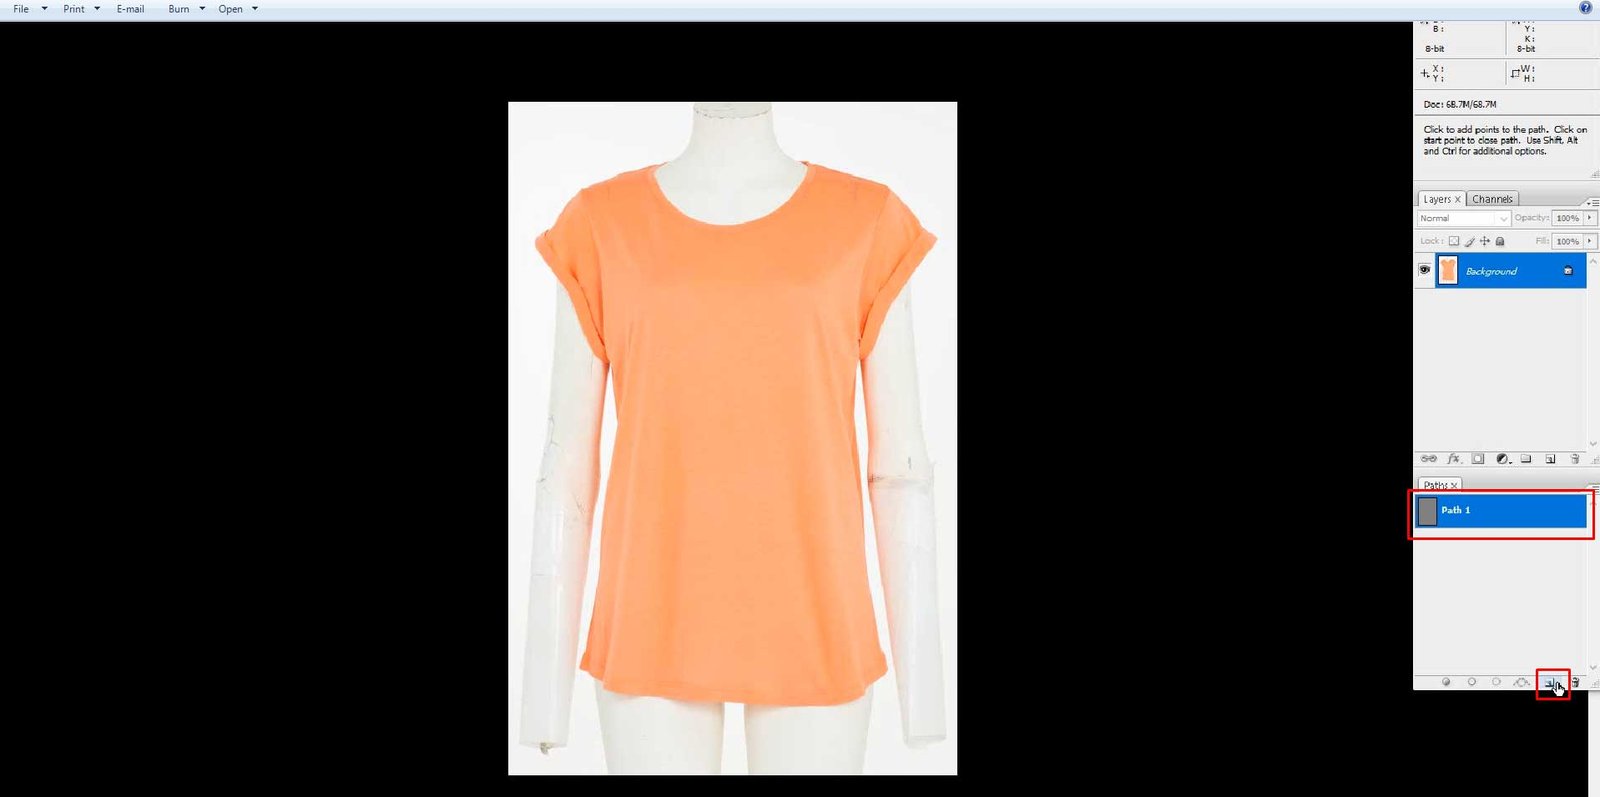
Create a new path, as shown in the image below.
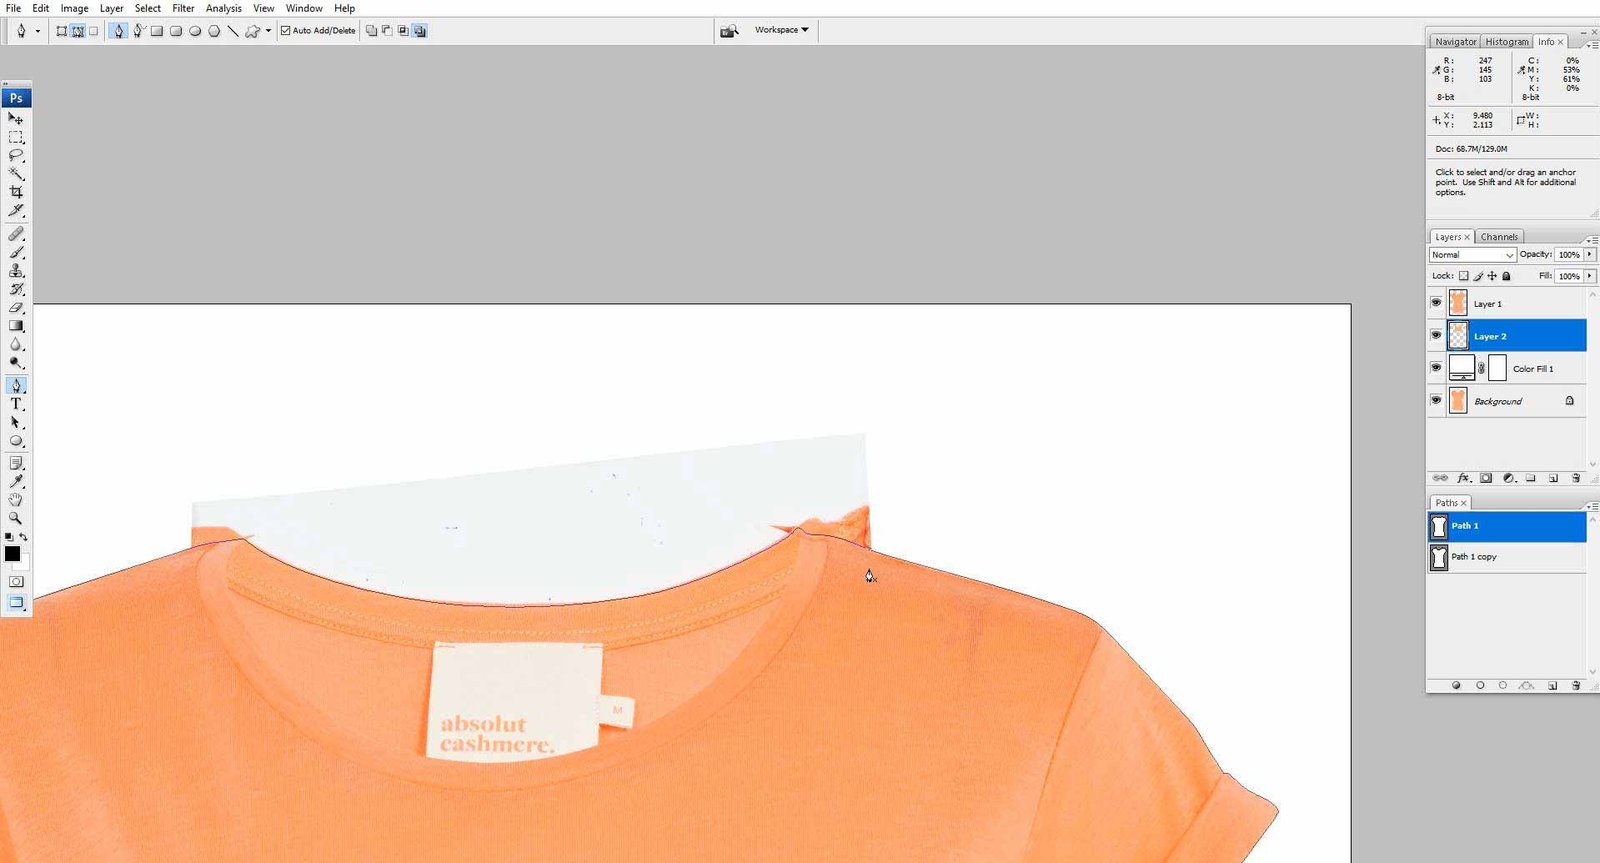
Step 4: Create a Clipping Path Around Your Product
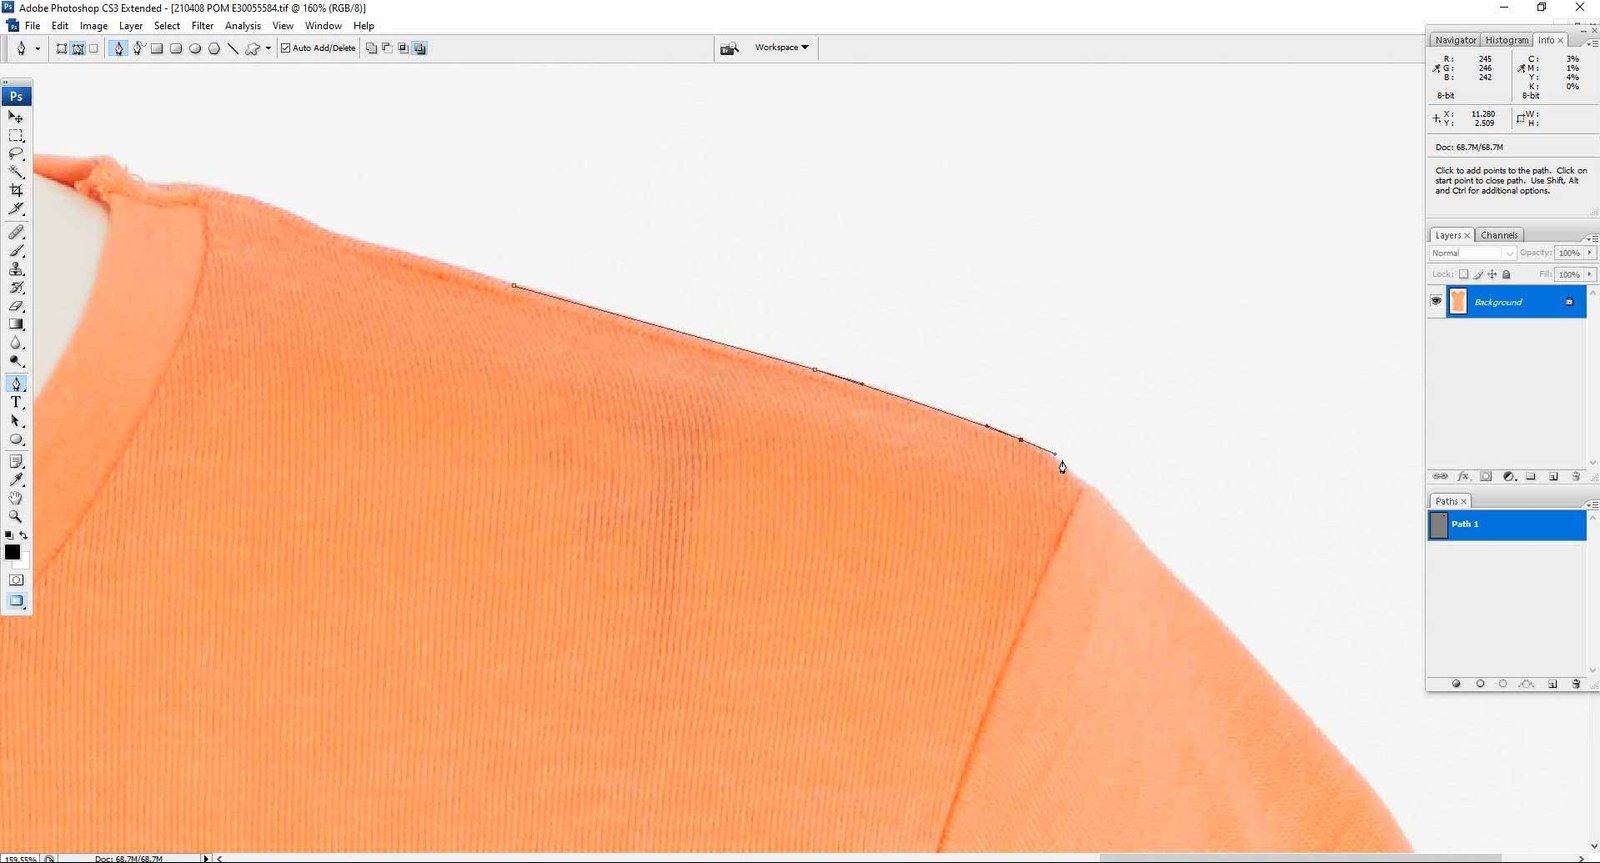
Draw a clipping path around your product by using the Pen Tool. Leave the unwanted or unnecessary parts in the image, and draw a line around the subject. You can start from the top of the dummy’s collar.
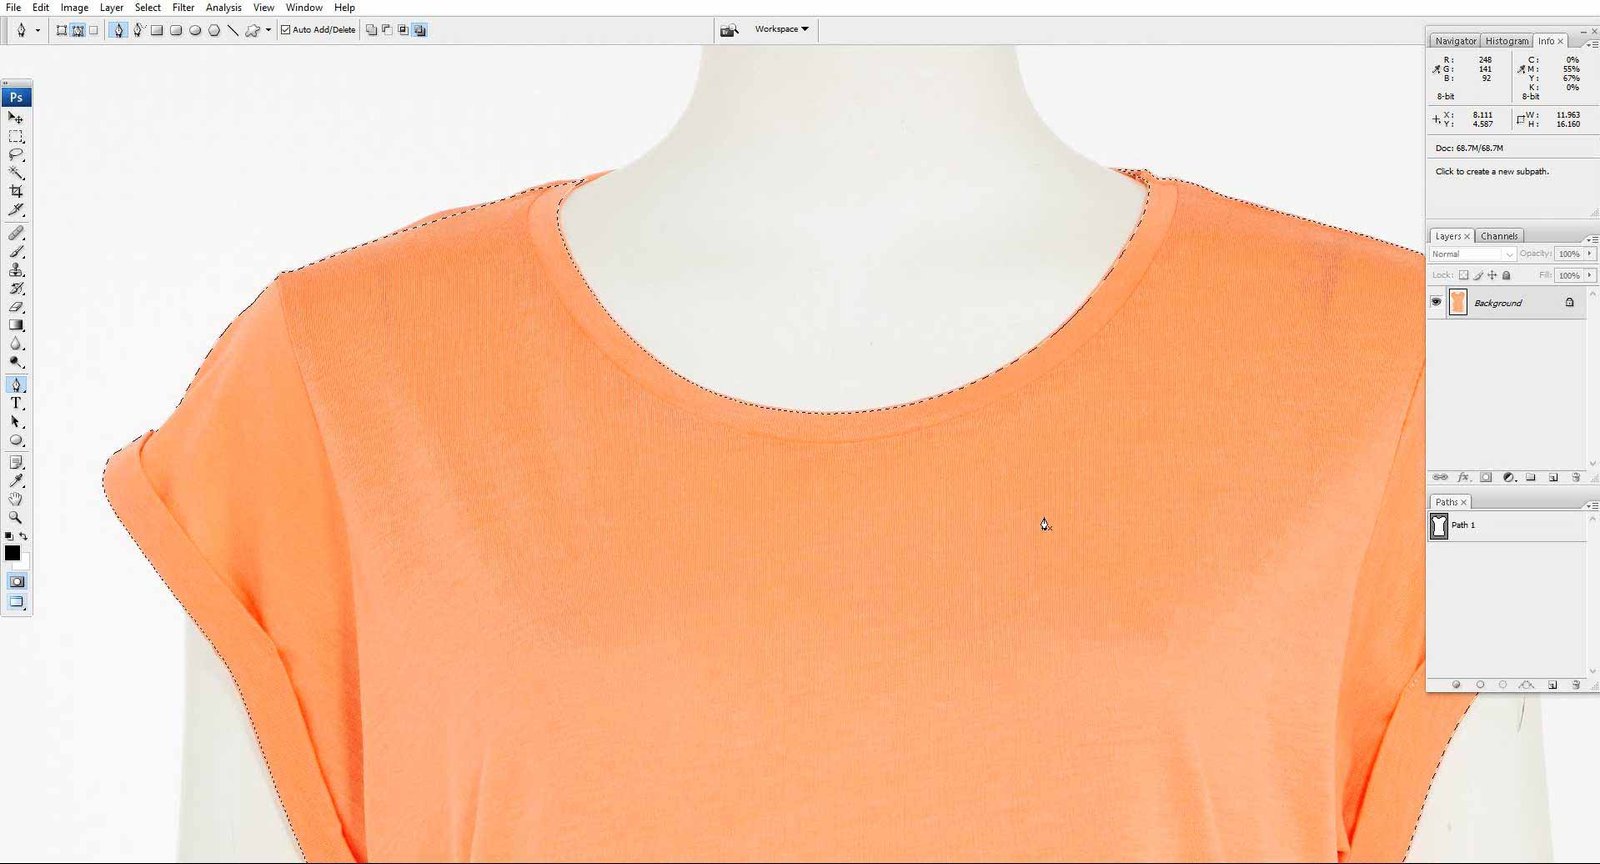
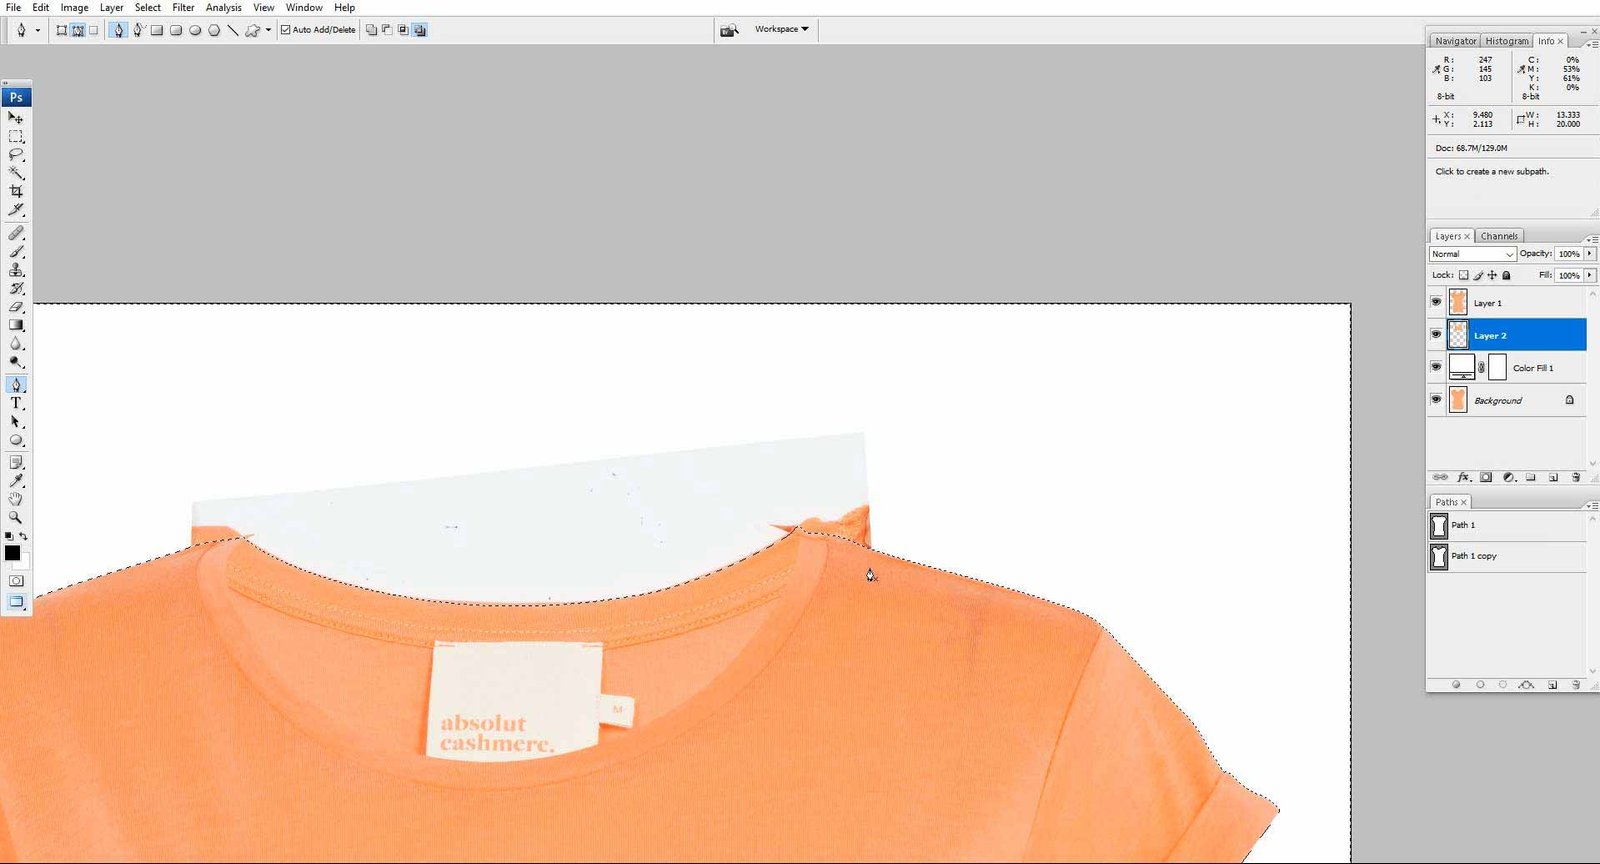
Step 5: After creating the Clipping Path, press ‘Ctrl + Enter’ for the Quick Selection.
When creating a clipping path around the product, use the shortcut ‘Ctrl + Enter‘ to select the clipping path.
Step 6: For smoothness, go to ‘Select > Modify > Feather’
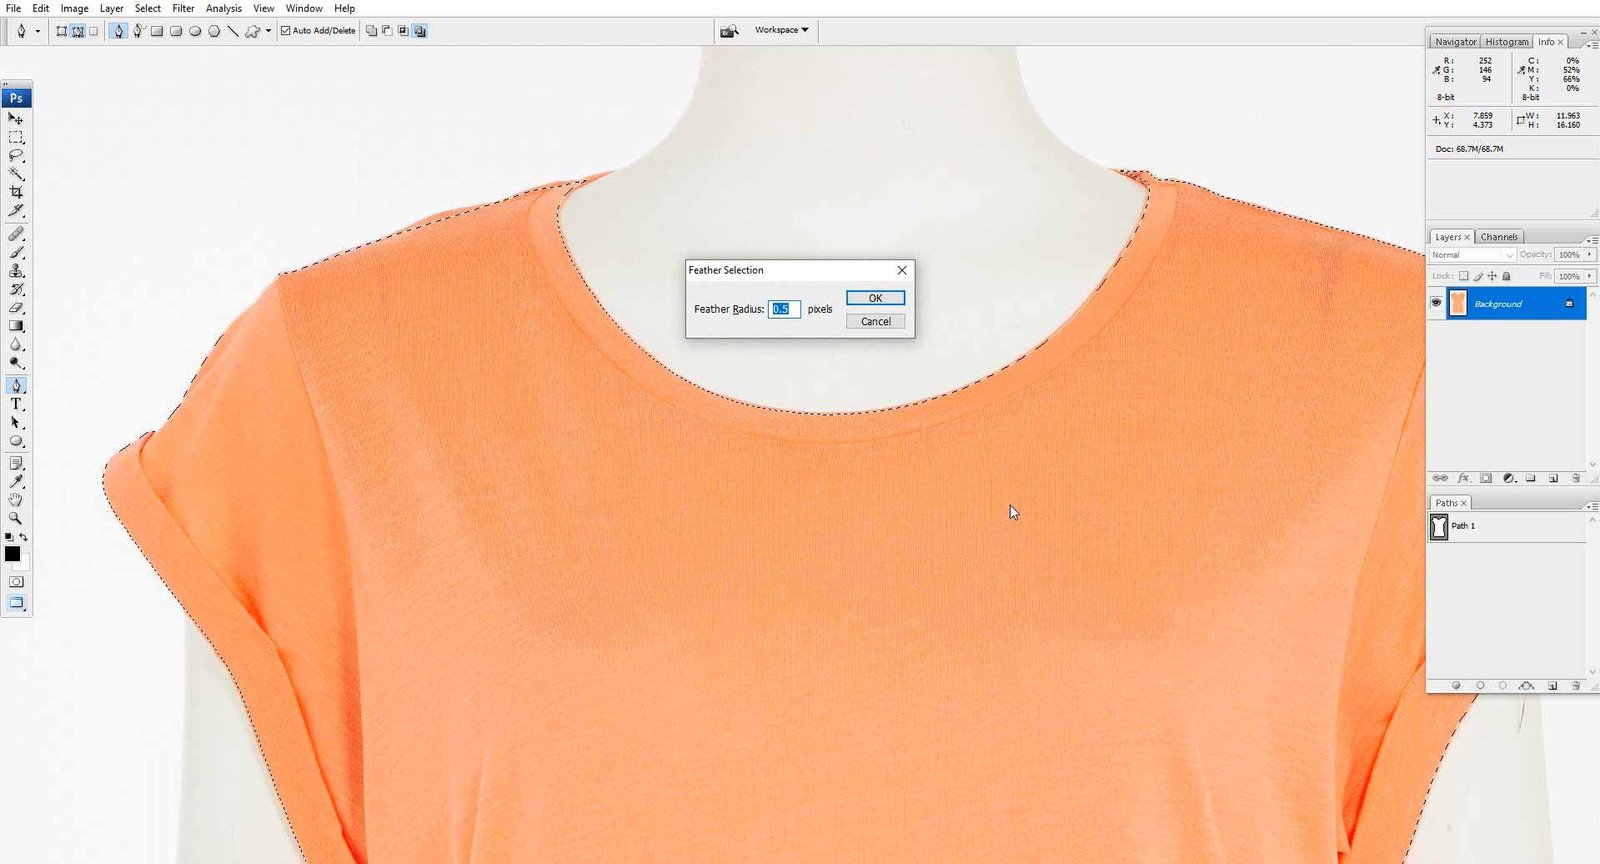
For smoother edges, apply a 0.5mm feather. To do so, go to ‘Select > Modify > Feather’ or use ‘Shift + F6.’
Step 7: Create a New Layer
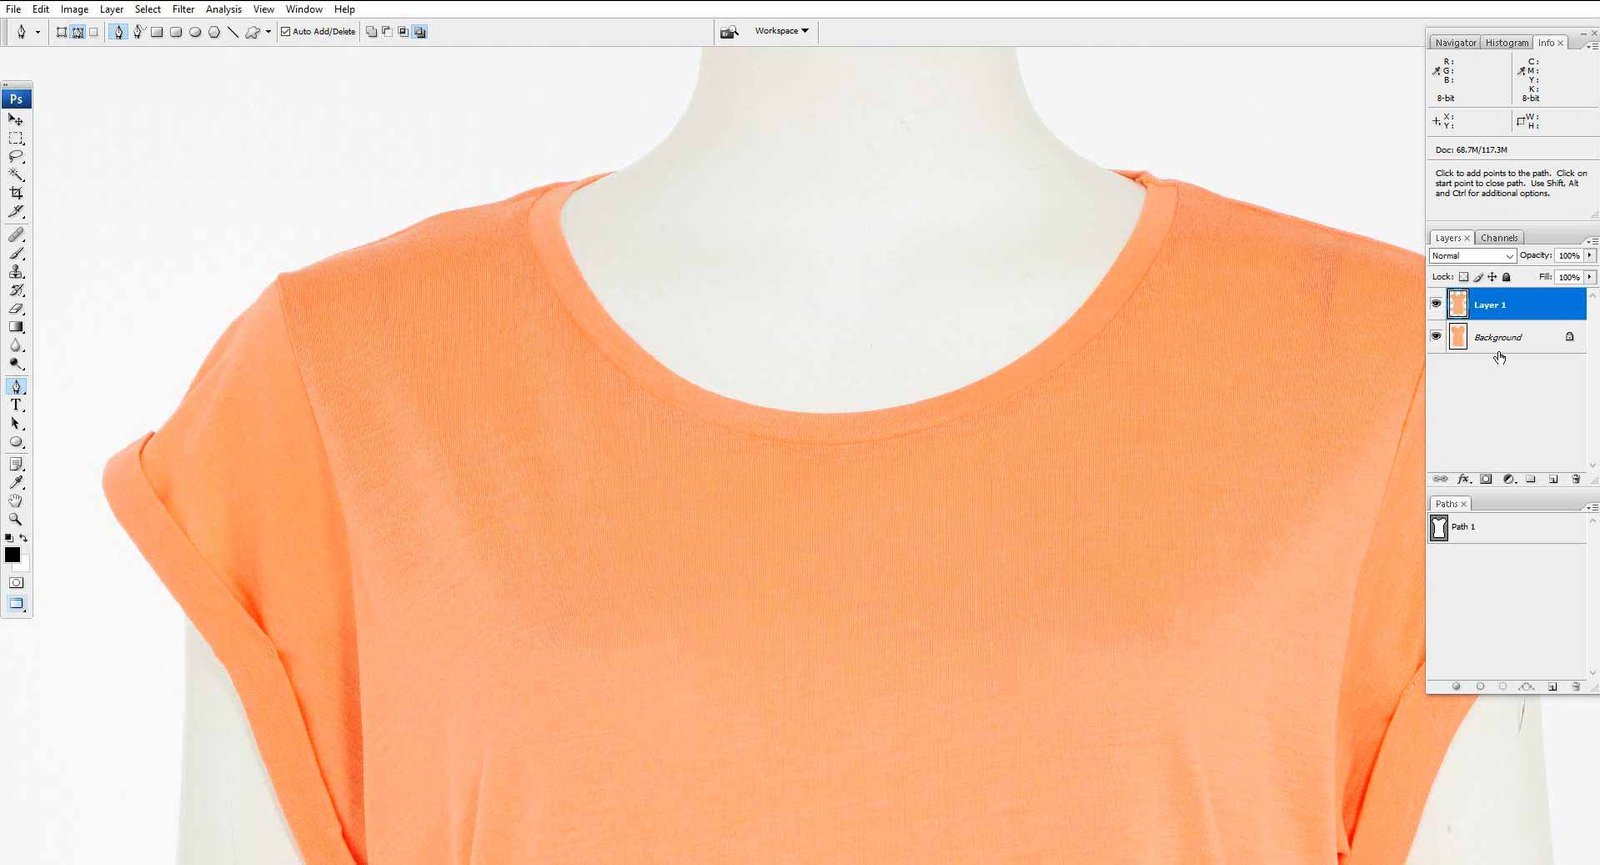
Make a new layer, Layer 1, as shown below, using ‘Ctrl + J.’
Step 8: Make a copy of the background layer and mask the copy layer. Select a solid color layer in the medial position.

Step 9: Select Another Image and Open it in Photoshop
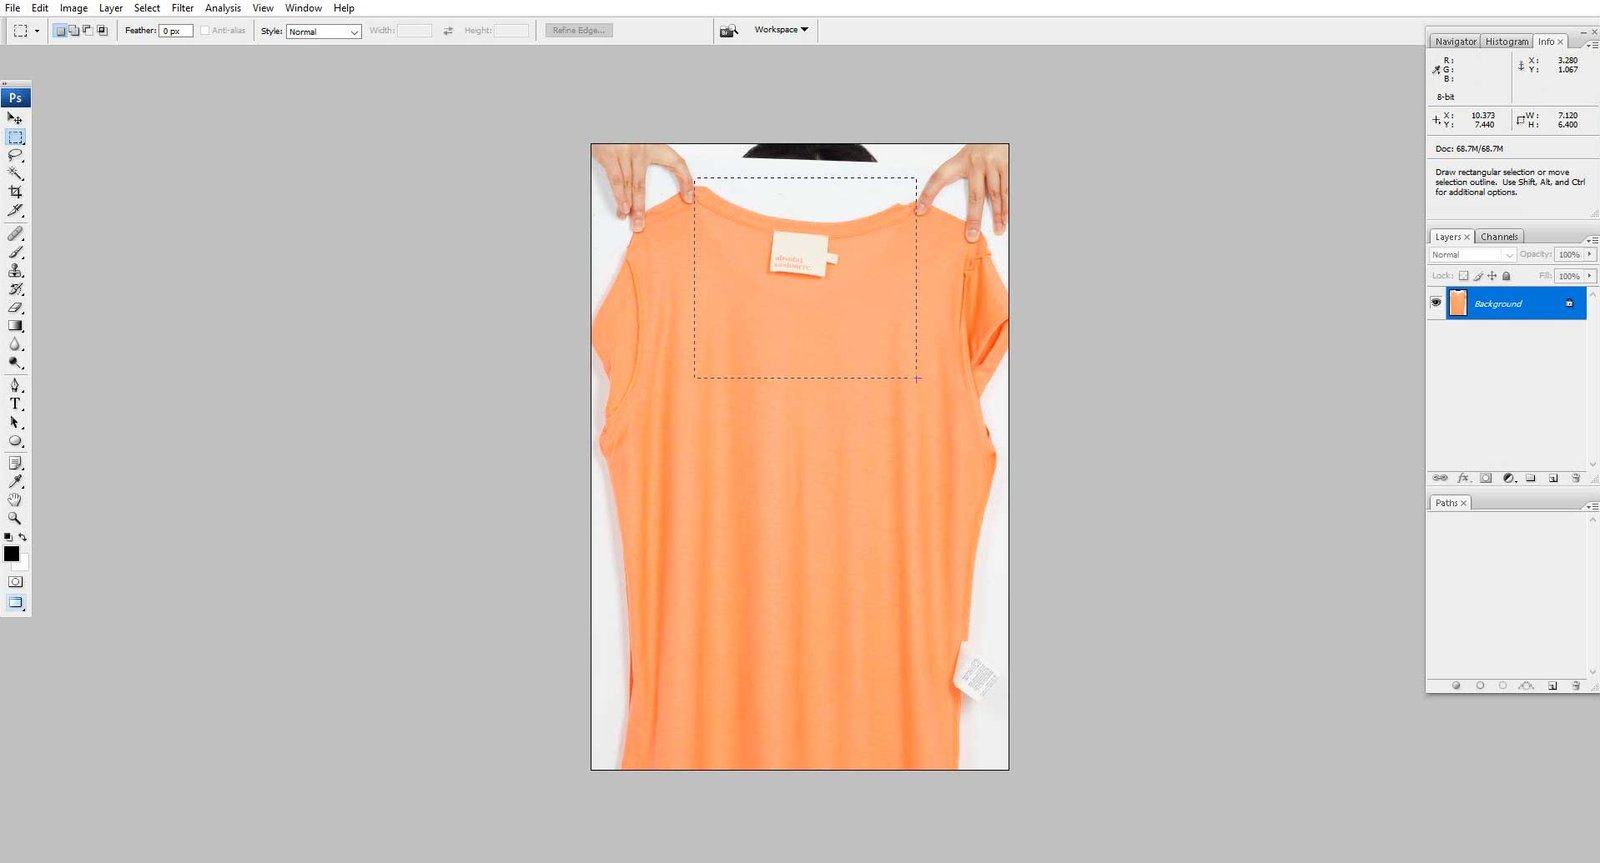
Take another image with the collar and label, and crop it to the specific part.
Step 10: Adjust this layer in Your Main Layer
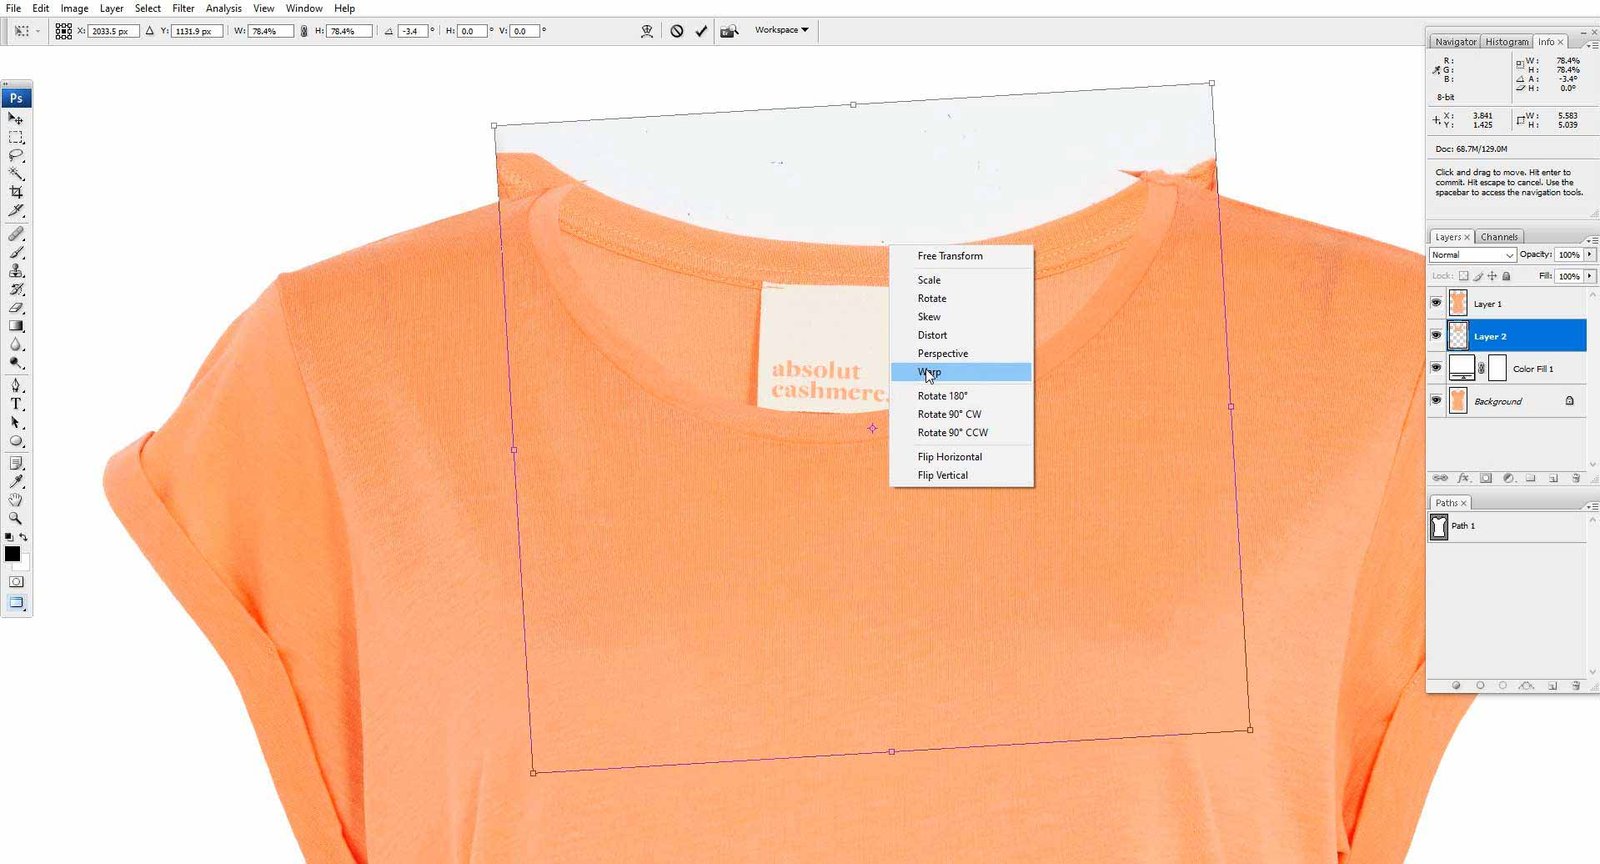
Take the cropped collar position and move it underneath the first layer, Layer 1, below.
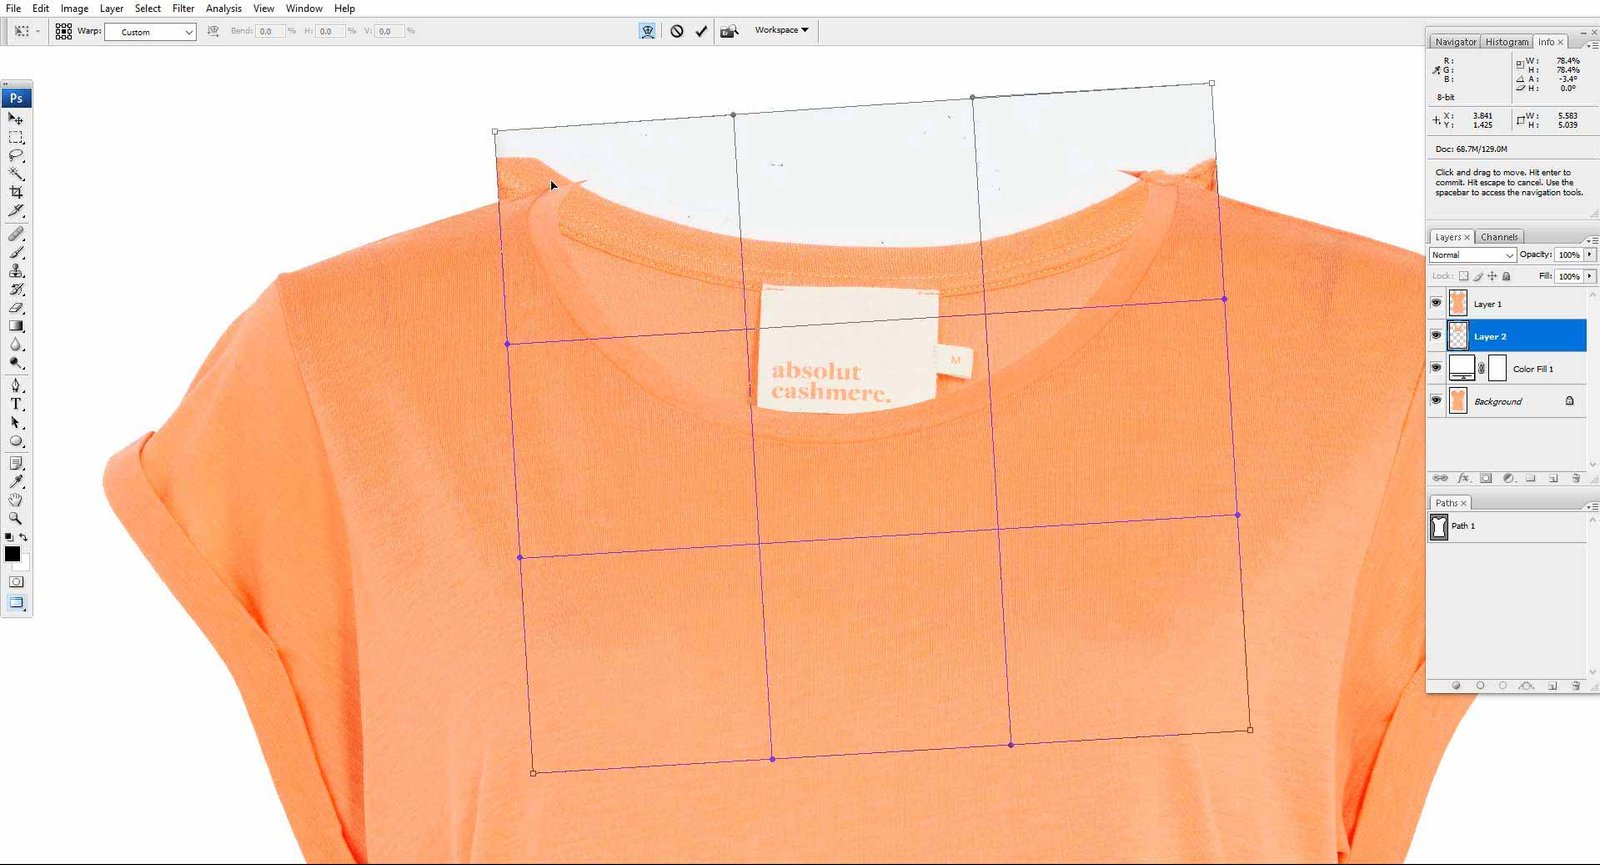
Step 11: Adjust this Layer via Warp
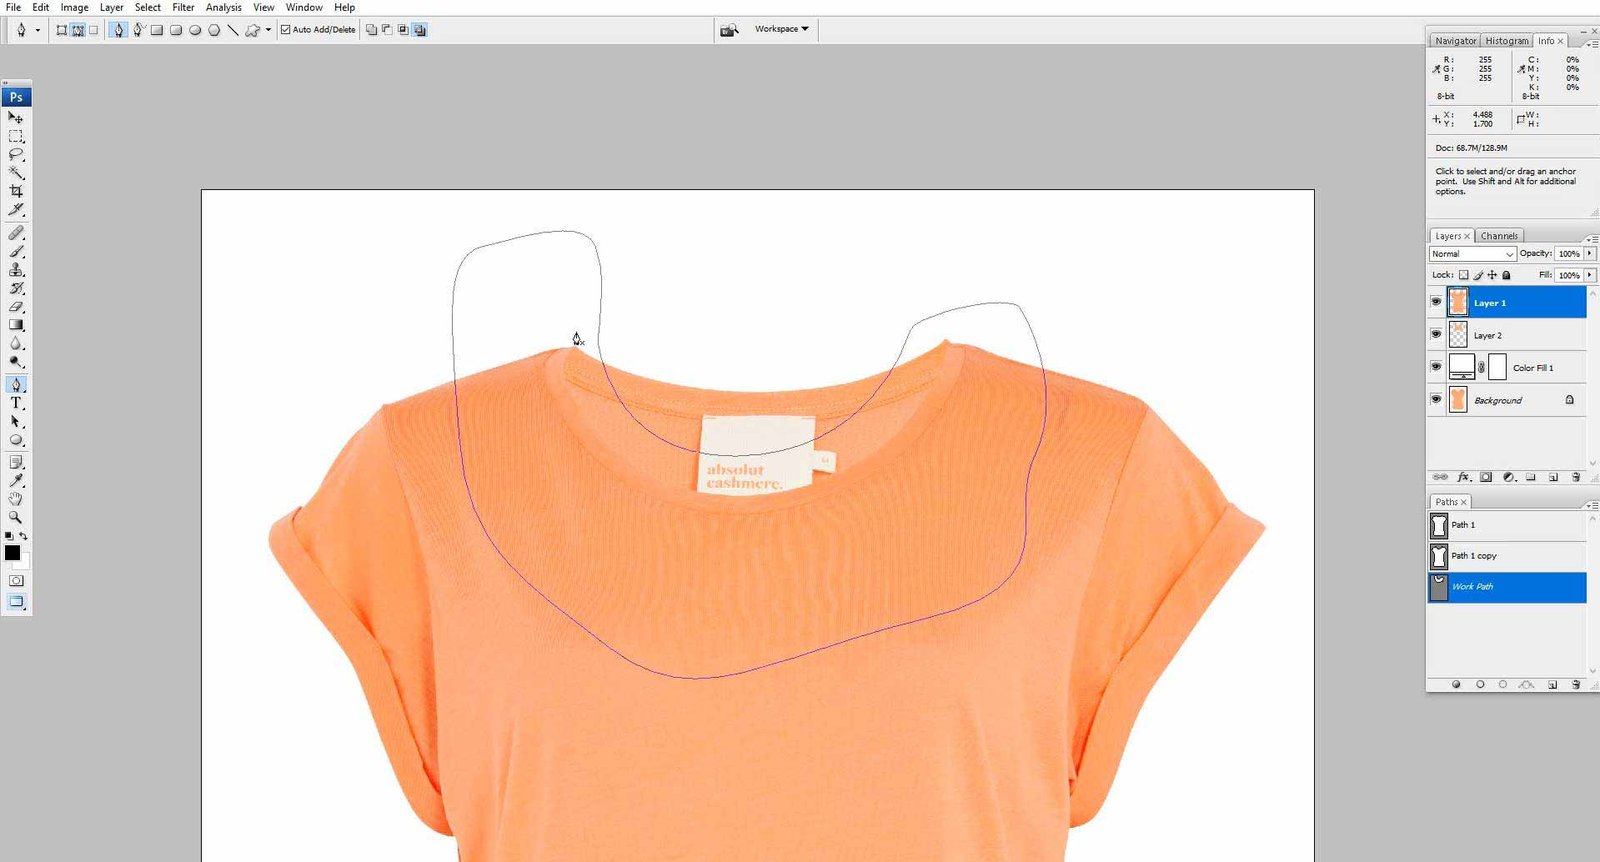
Step 12: Create a Clipping Path Again to get rid of the Unwanted Parts
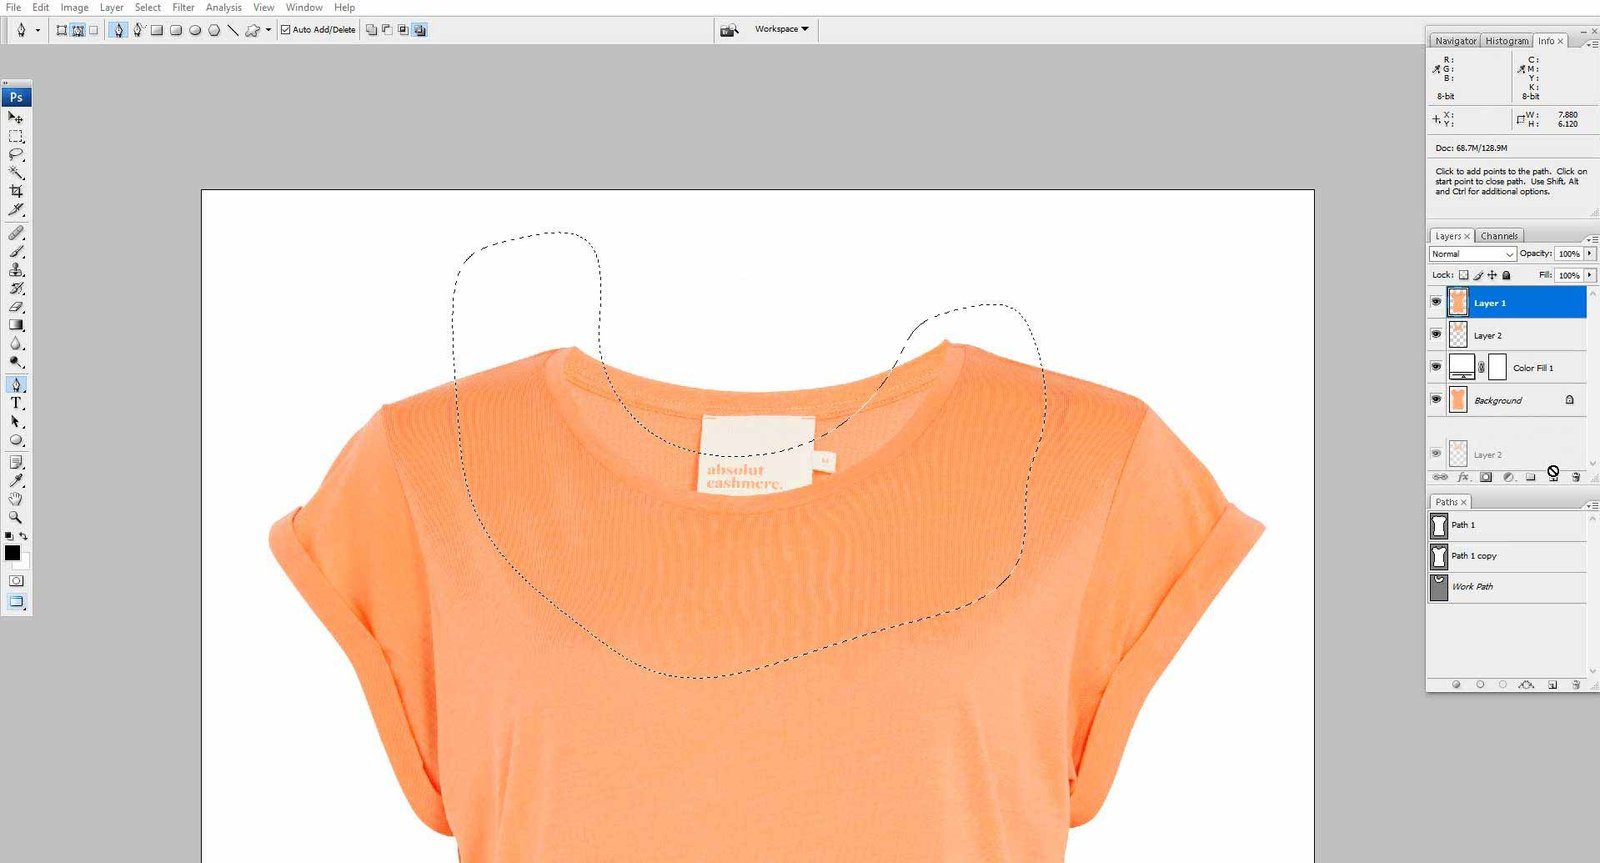
Step 13: Apply ‘Select > Modify > Feather’ or ‘Shift+F6’ and Ctrl + I for smoothing out edges and inverting.
Step 14: Apply Shadow in the Back part by creating a Path.
Step 15: Use ‘Select > Modify > Feather’ or ‘Shift+F6’ for Smoothness
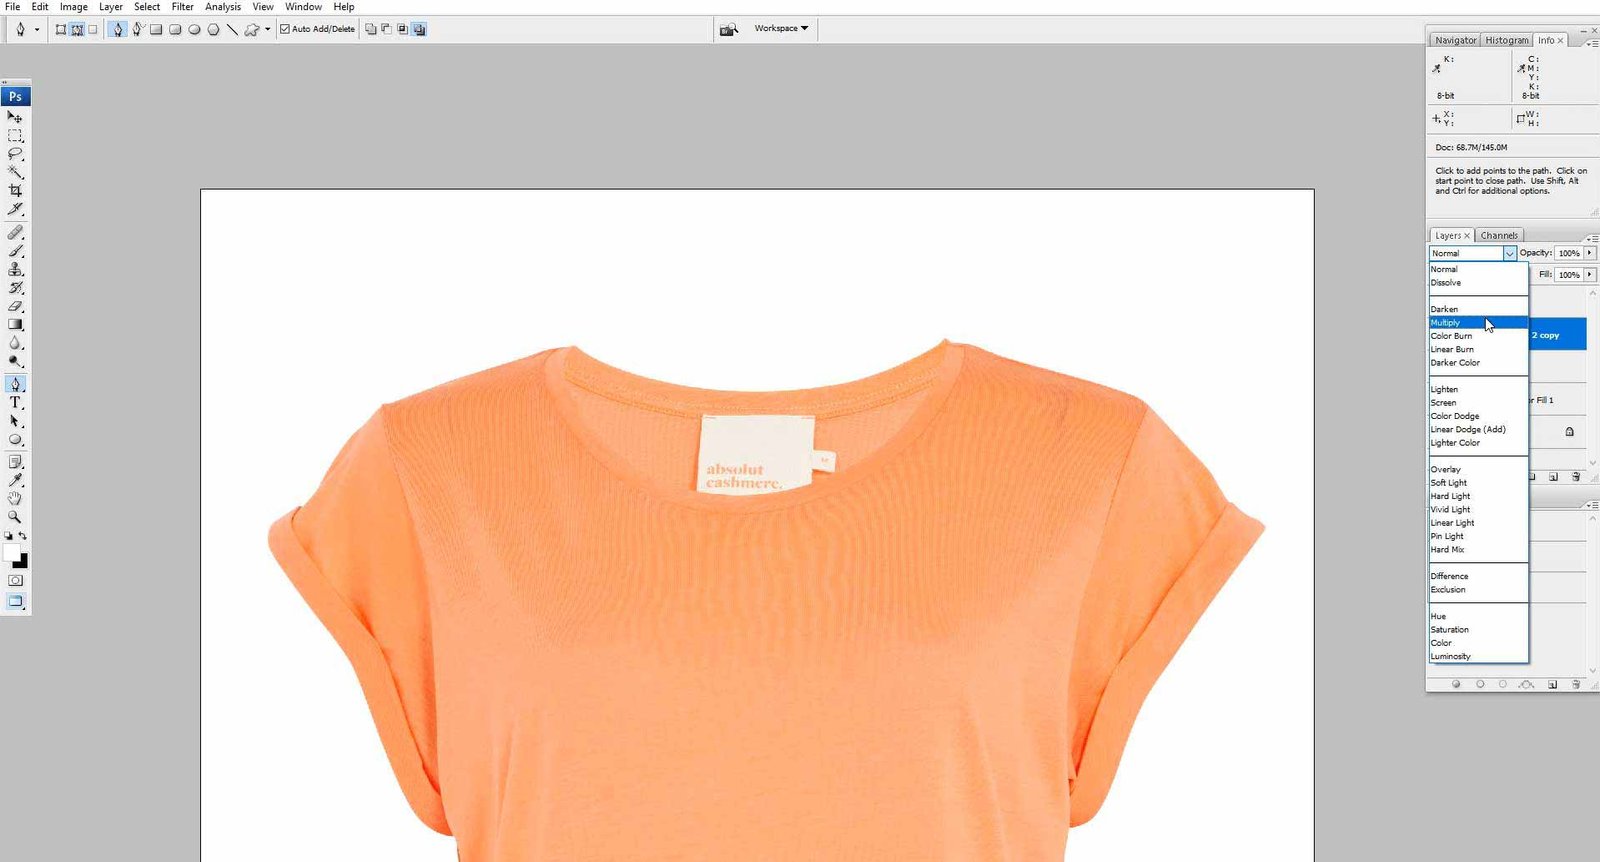
Step 16: Create a Copy and Mask the Layer and Multiply the Layer.
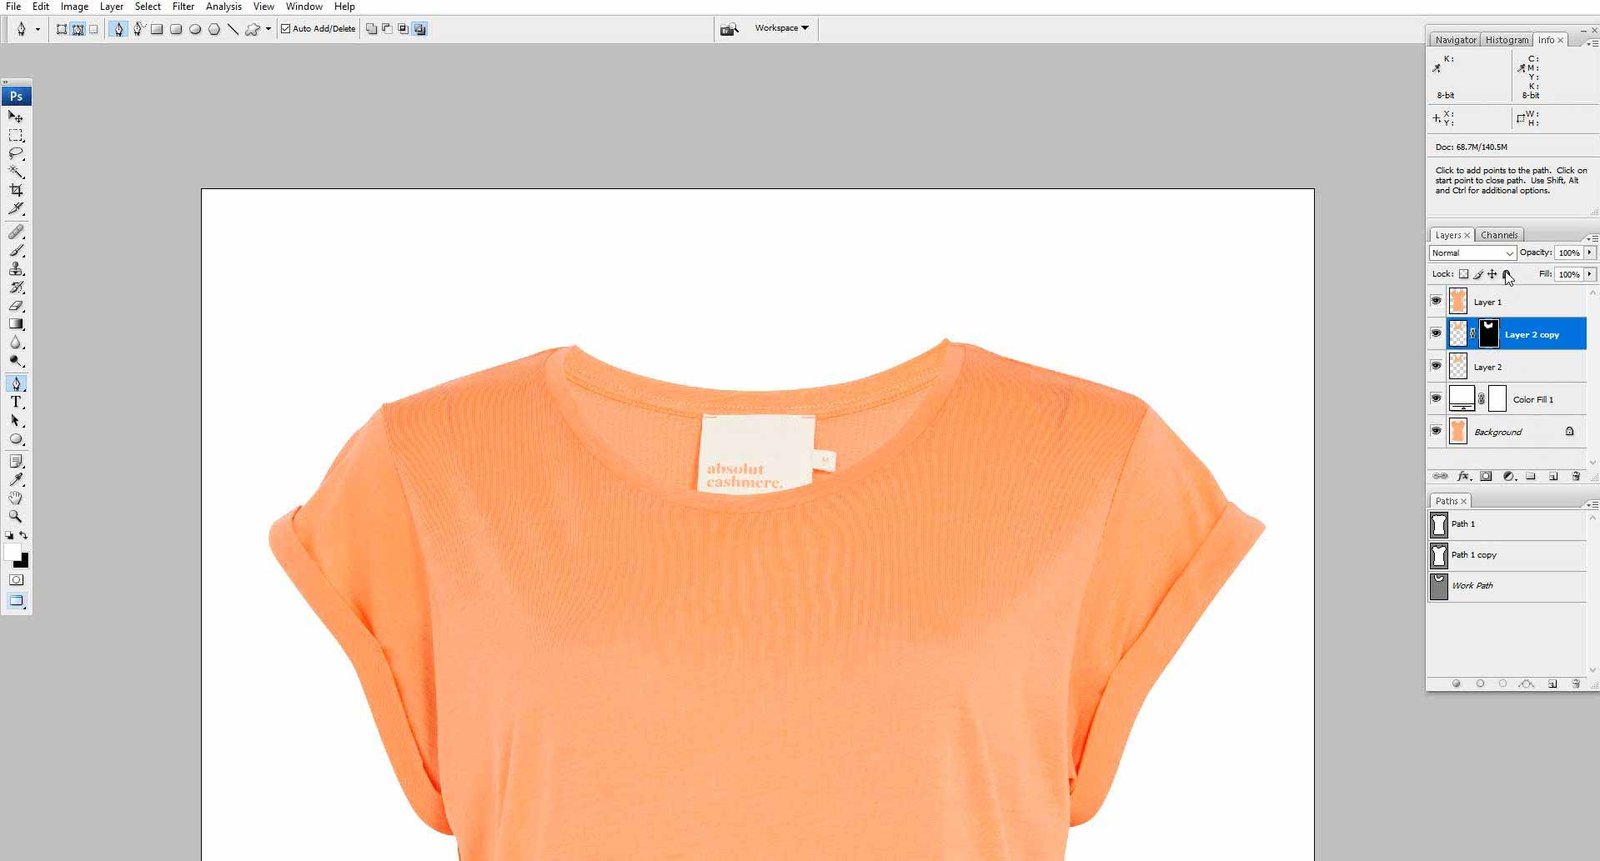
Step 17: There you go! The perfect shadow and Ghost Mannequin are done in Photoshop.
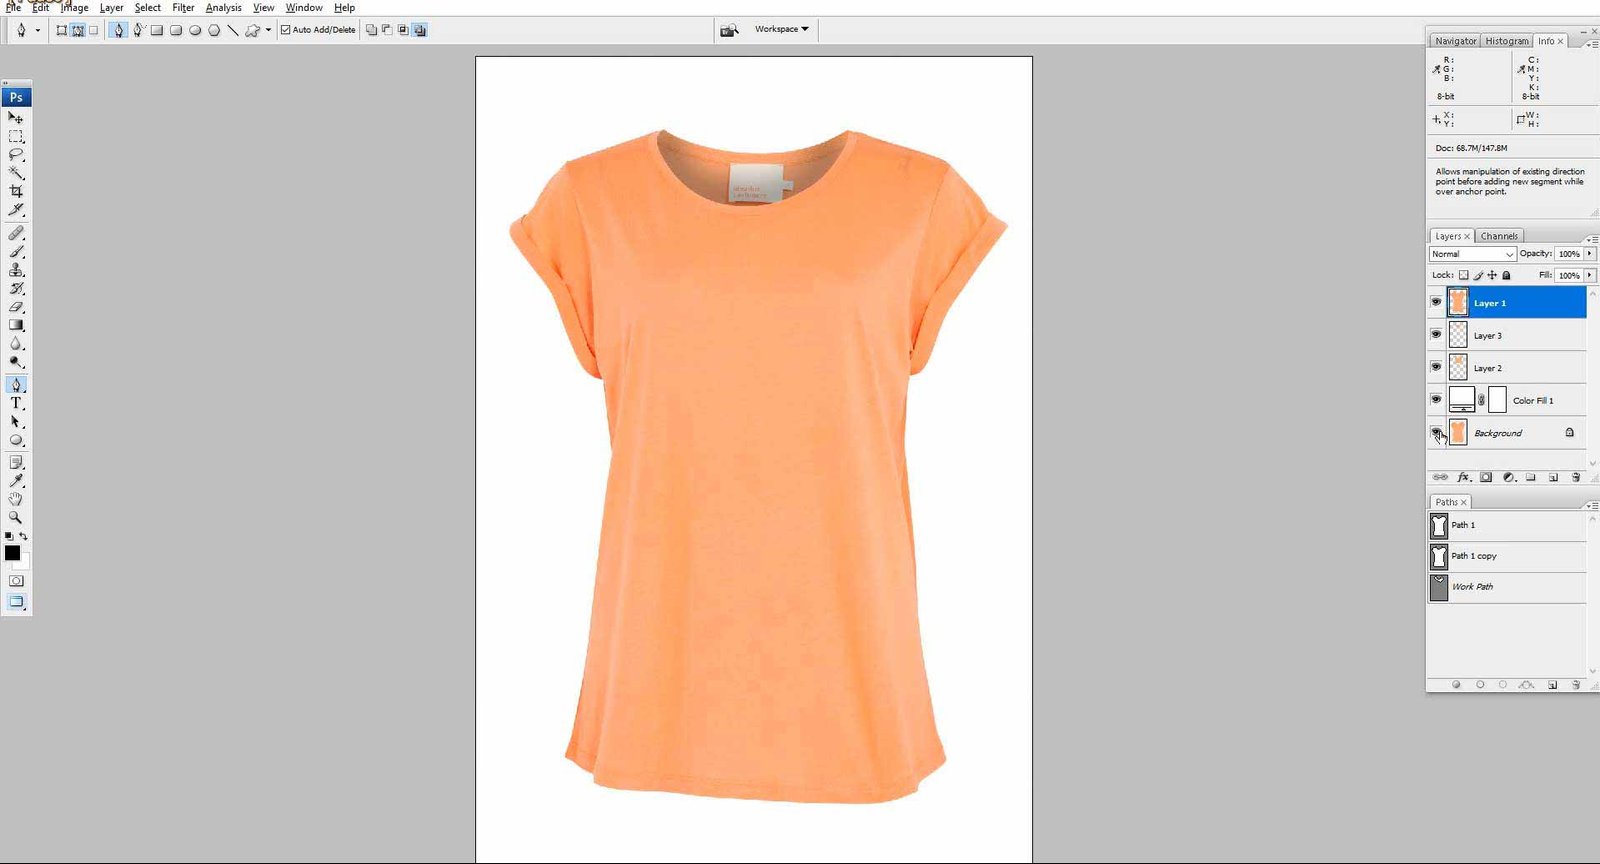
After following the step-by-step guide above, you have learned how to make a ghost mannequin effect for your products. Finally, your edited images are ready to show online. Let’s try it yourself and create your own ghost mannequin.
You may use this effect for marketing purposes for your products online through social media or your website. In addition, the mannequin effect will help you push your sales up due to the appealing look of your product.
Watch the full process in the video
Importance of the Ghost Mannequin Effect
In the world of online retail, showcasing clothing products effectively is paramount to success. The ghost mannequin service, also known as the invisible mannequin effect, is a game-changer for clothing product photography.
With some Photoshop editing skills and the right tools from the toolbar, any photographer can learn how to create stunning images that make clothing items pop on a white background. A little bit of invisible mannequin photography knowledge can boost your mannequin image result.
E-commerce businesses such as Amazon, Alibaba, and eBay use this effect to represent their products to their customers. The ghost mannequin effect is highly efficient for driving the attention of buyers if done correctly. When you add a ghost mannequin effect to your product, the impression will be outstanding.
Getting it done by a professional can be another option you can keep in mind. After all, it is the quality of the work that matters the most when you apply the ghost mannequin effect.
Conclusion:
The ghost mannequin effect is a high-value skill for professional editors. It is widely used in the appeal industry. Online sellers use it to make their product images look realistic with 3D shapes. This helps to engage with customers.
Now, learn how to make a ghost mannequin effect in Photoshop by following the article. This will help you to create an appealing ghost mannequin image that stands out.
Let’s practice as much as possible; this will help you to be an advanced ghost mannequin editor.
FAQs:
Which Photoshop tools are most commonly used for ghost mannequin editing?
For ghost mannequin editing, the most commonly used Photoshop tools are the Pen tool, layer masks, the Clone Stamp/Healing Brush, the Warp tool, and the Brush tool.
What are common mistakes to avoid in ghost mannequin editing?
Some common mistakes are oversmoothing, wrong proportions, misaligned labels or tags, inconsistent backgrounds, and skipping quality checks.
Can ghost mannequin effects be applied to all types of clothing?
Yes, you can apply ghost mannequin effects to all types of clothing, from simple t-shirts to complex jackets, athletic tops, and others.
What is the best ghost mannequin or flat lay image?
Ghost mannequin images are better than flat lay images. It gives you a 3D look that adds context. Customers check the image details better than the flat lay image.
Is outsourcing ghost mannequin editing worth it?
Yes, outsourcing ghost mannequin editing is worth it if you have a lot of images and a lack of time or skills. Also, you need enough budget to hire a professional.