

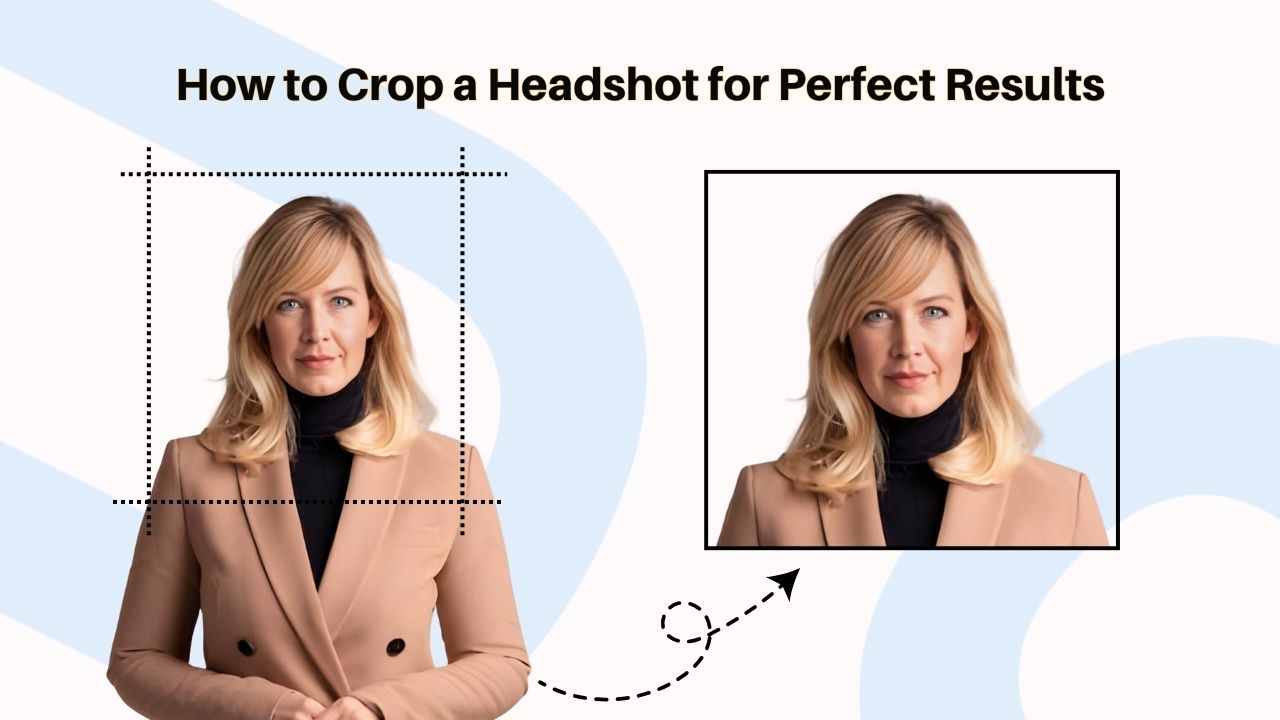
A good headshot should make the face clear, natural, and easy to recognize. But even a sharp photo can look unprofessional when the crop is too wide, too tight, or badly balanced. Knowing how to crop headshots helps you frame the face properly for any professional use.
The best approach is to keep the eyes near the upper third, include the head and shoulders, and leave enough space around the face. This creates a clean, balanced image for LinkedIn, resumes, websites, portfolios, and business profiles. Use these simple cropping tips to make every headshot look more polished.
What Is the Best Way to Crop a Headshot?
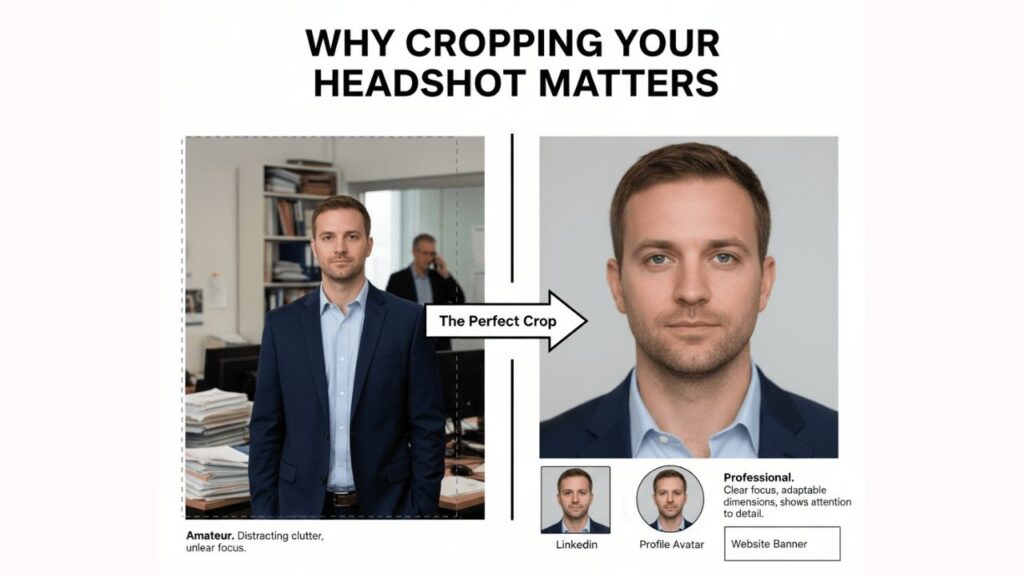
To get a headshot keep the face clear. Place the eyes near the top of the picture. A good headshot includes the head and shoulders in a way.
- For pictures a square shape works well.
- For resumes, websites and portfolios a taller size is often better.
The goal is to make the person look confident and easy to recognize. They should look balanced in the picture. The best headshots make it easy to see who the person is. A good headshot is clear and simple. It helps the person look approachable.
Why Headshot Cropping Matters?
Cropping is not about making an image smaller. It actually changes the way people look at the photo. A good headshot crop is important because it helps the face stand out and gets rid of things that take attention away from the person in the photo.
For people in the USA who are looking for a job, own a business, sell estate to become doctors or work with companies, headshots are usually the first thing people see. If the photo is not cropped well it can make the person look like they do not pay attention to details.
Good cropping helps you:
- Keep attention on the face
- Remove extra background space
- Make the image clear on small screens
- Fit LinkedIn, websites, resumes, and email signatures
- Keep team photos consistent
This is why any guide on cropping headshots should talk about how to frame the photo, what size it should be, how to balance everything and what the final photo will be used for.
What Is the Best Crop For Headshots?
The thing is, there is not one crop for headshots. It really depends on where you’re going to use the photo.
For things like LinkedIn, company profiles, email signatures and business pages a head and shoulders crop is a safe choice. This way your face is clear in the photo. It still looks natural.
If you are making a website bio, speaker page or working on your branding, a mid-chest crop is a good idea. It gives the photo a bit of space around you.
A close crop can be really good for profiles or if you want to make a bold statement with your personal branding. With this style your face takes up more of the picture. You might even crop out a bit of your hair but it should look like you meant to do it that way.
Using a crop can be really helpful too. That way you can make a bunch of versions of the photo later on. You can make a crop, a vertical crop or a tight crop all, from the one wider original photo of your headshots.
Basic Rules for Cropping Headshots
Before you start cropping here are some tips to follow. These rules will help keep your headshot looking natural and professional.
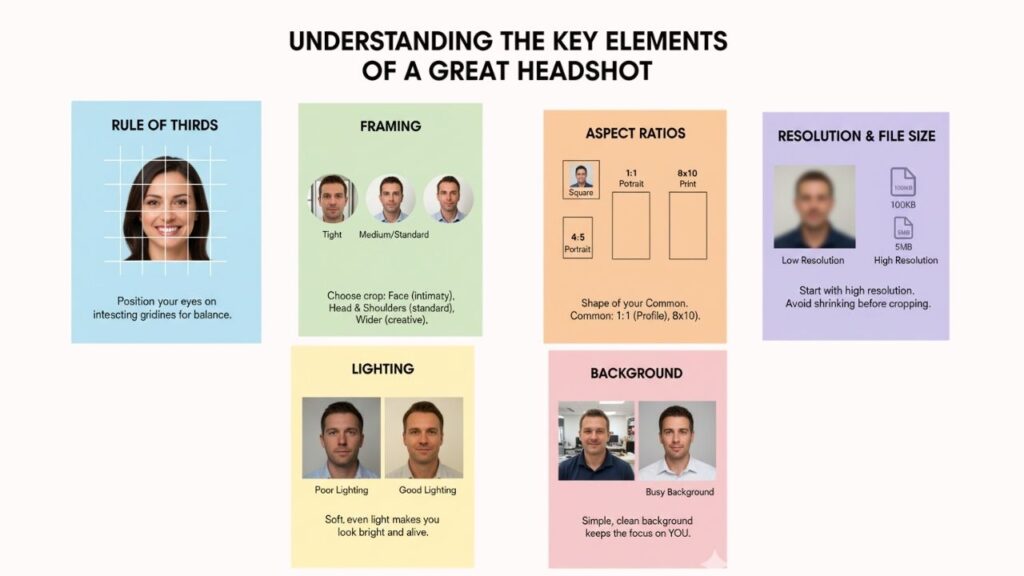
Keep the Eyes Near the Upper Third
The eyes are the important part of a headshot. When you crop, imagine the image is divided into three parts from top to bottom. The eyes should be near the third line. This makes the image look balanced. If the eyes are too low there will be much empty space above the head. If they are too high the photo will look too tight. The eyes are what make a headshot great so make sure they are in the place. Keep the eyes near the third.
Keep the Face Centered
For professional photos the face should be in the middle from left to right. A slight turn is okay. The face should not look like it’s being pushed to one side. This is more important when you crop a headshot for a profile picture because many platforms show profile photos in small circles. The face is the focus so keep it centered.
Leave Enough Headroom
Headroom is the space between the top of the head and the top edge of the image. Much headroom makes the face look small. Little headroom makes the crop look cramped. For a business look, leave a small space above the hair. For a close crop you can cut into the hair a bit but avoid cutting into the forehead. Leave headroom to make the headshot look good.
Avoid Awkward Chin and Shoulder Cuts
Never crop, through the chin. It looks unfinished. Also avoid cutting at the neck or shoulder joints. A head and shoulders crop should include enough shoulder shape to support the face. If one shoulder is cut sharply, adjust the crop. The chin and shoulders are important so make sure you crop them correctly.
Best Headshot Crop Ratios and Sizes
The right headshot crop ratio depends on the platform. A LinkedIn headshot crop is not always the same as a resume or portfolio crop.
| Use Case | Best Crop Ratio | Best Framing |
| LinkedIn profile | 1:1 square | Head and shoulders |
| Company website | 1:1 or 4:5 | Consistent team crop |
| Resume or CV | 3:4 or 4:5 | Formal vertical crop |
| Portfolio | 4:5 or 8×10 | Portrait-style crop |
| Email signature | 1:1 | Tight and clear face |
| Social media profile | 1:1 | Space for circular frame |
A square headshot crop is usually best for LinkedIn and social media. A vertical headshot crop often looks better for resumes, portfolios, and website bios.
Also, check your headshot size and dimensions before saving. If the original file is too small, cropping can make it blurry. Always start with the sharpest image you have.
A Step-by-Step Guide on How to Crop a Headshot
Since you are armed with the basic concepts now, let’s traverse the process. If you follow the steps, cropping a photo will be very simple. Here is a very straightforward way to crop a headshot so you get the most effective results.
1. Tool Selection for Editing
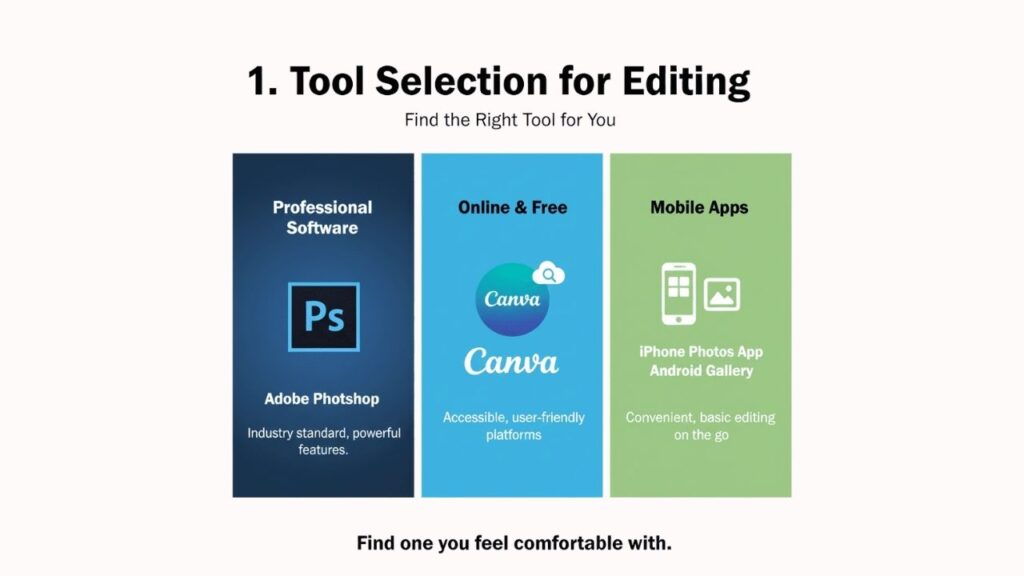
First, you will need to find a tool for photo editing. You do not need to be concerned about software that is expensive. While Adobe Photoshop is considered professional, there are excellent free options as well.
For example, Canva is an online tool that is very commonly used. Even the basic photo app on your iPhone or Android phone has cropping tools that function well. Just find one that you feel comfortable with.
2. Pick Your Aspect Ratio
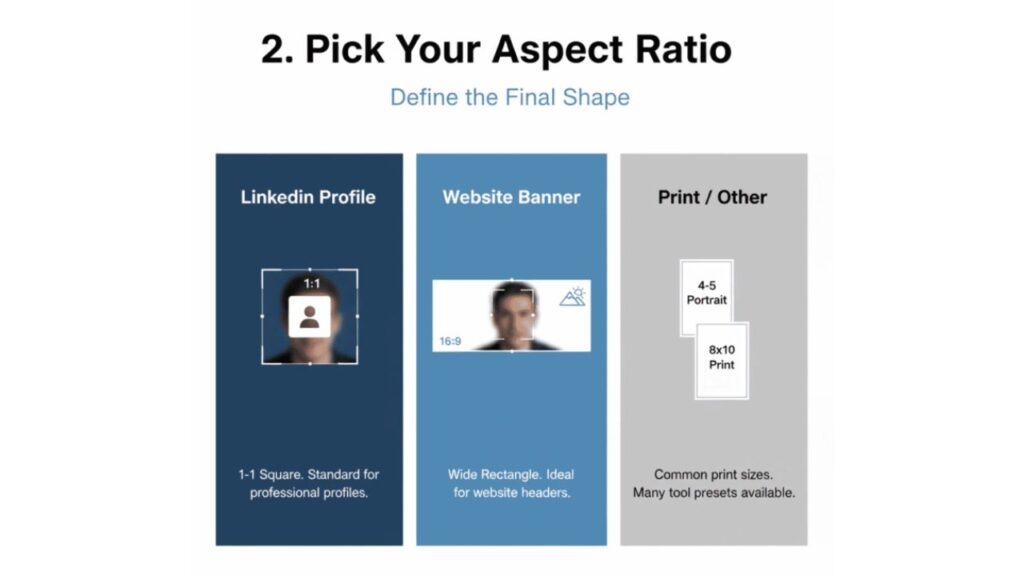
Before dragging the crop box, consider the final shape. Where will this headshot be utilized? If it’s for LinkedIn, have a 1:1 square aspect ratio.
If it’s for a website banner, you might need a wide rectangle. Most tools offer presets for a lot of categories that will make this step easy.
Setting the aspect ratio first will ensure that your crop is the correct size from the start.
3. Use the Rule of Thirds
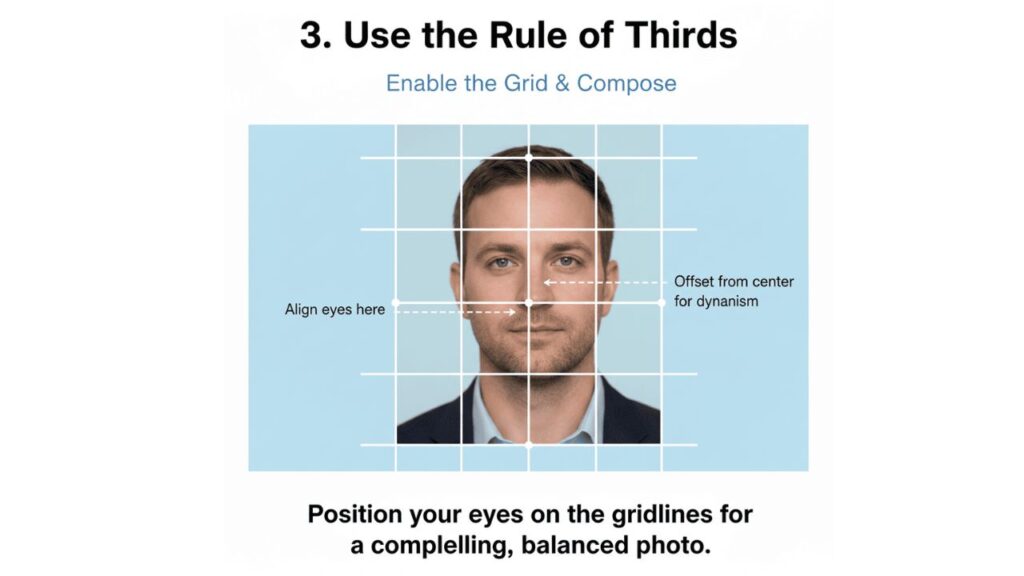
Next, let’s shift to composition. Enable the grid overlay in your editing software. This allows you to see the tic-tac-toe lines on your photo.
Position the crop box with your eyes on or near the top horizontal line. This helps the viewer’s eyes gravitate there and creates a compelling connection.
If possible, try to place your face just outside of the center to add some dynamic energy.
4. Purposeful Cropping
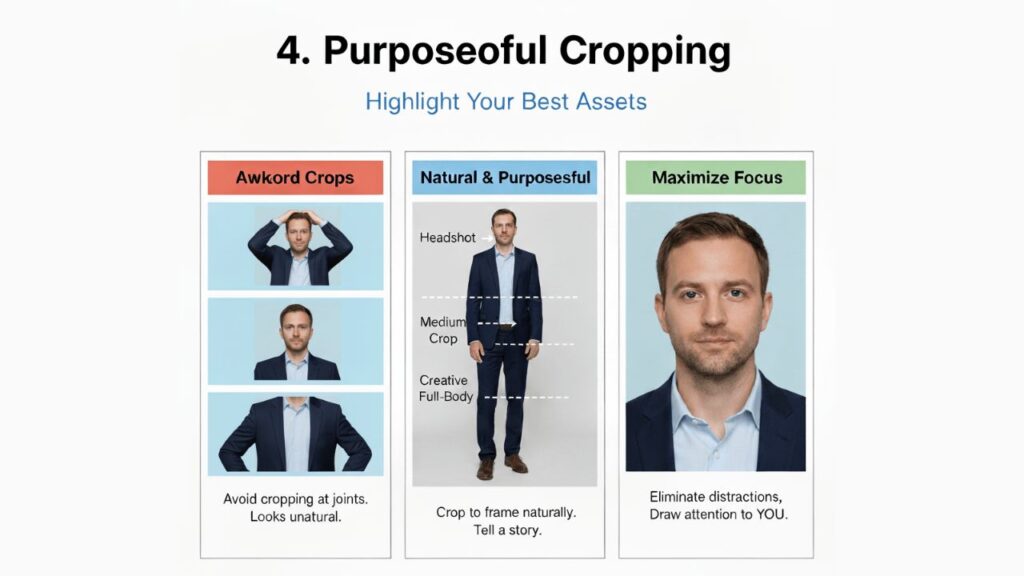
Consider what to max out on and purposefully remove. Your goal is to draw attention to yourself. Make deliberate decisions when cropping!
Note that if you’re showing more than your shoulders, you shouldn’t crop at your joints, such as your elbows or wrists, because it can look off.
A natural and purposeful crop is the goal! Final cropping highlights your greatest assets.
How to Crop Headshots for LinkedIn?
For LinkedIn use a crop with equal width and height. Since LinkedIn shows profile photos inside a circle, leave some space around your head and shoulders. A good LinkedIn crop should:
- Show your face clearly
- Include your head, neck and upper shoulders
- Keep your eyes a bit above the middle of the photo
- Avoid cutting off your chin or hair
- Leave some space around you for the frame on LinkedIn
Avoid using full-body photos because your face will look too small. Also, avoid tight crops that cut into your face. You want to look good on LinkedIn so make sure your headshot is cropped well. LinkedIn headshots need to be cropped in a way that looks good in a circle. Use a 1:1 crop, for your LinkedIn headshot.
How to Crop Headshots for Websites, Resumes and Portfolios?
For a website bio I think a simple head-and-shoulders or mid-chest crop works best. The picture should look friendly and clear.
When it comes to a resume or CV go for a vertical crop. A 3:4 or 4:5 ratio usually looks good. If you’re creating a portfolio try a 4:5 or 8×10 crop. This gives a polished look to your portrait.
For company team pages it’s all about being consistent. Every photo should have a head size, crop ratio, background style and brightness. This is where editing headshots can make the whole page look more professional.
Common Headshot Cropping Mistakes to Avoid
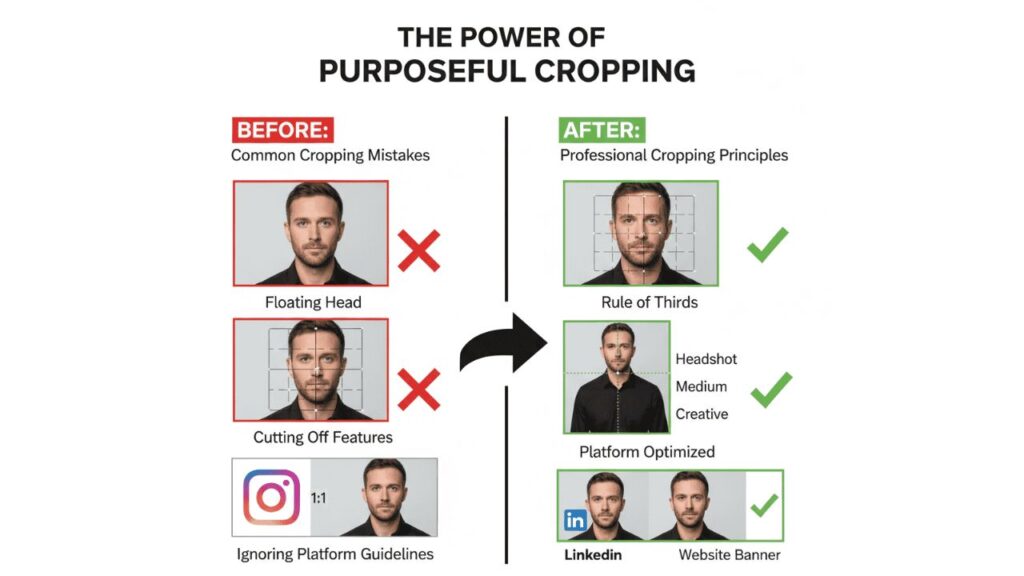
Small cropping mistakes can make a headshot look less polished. Try to avoid these problems:
- Too much empty space above the head
- Cropping through the chin
- Cutting the neck too tightly
- Making the face too small
- Ignoring circular profile previews
- Using different crop ratios for team photos
- Cropping a low-resolution image too much
- Cutting one shoulder awkwardly
- Forgetting to save the original file
A good crop should feel natural. If the crop itself grabs attention, the framing probably needs work.
Best Tools for Cropping Professional Photos
You can crop professional photos with many simple tools. The tool is not as important as the framing.
Common tools include:
- Photoshop
- Lightroom
- Canva
- Fotor
- Microsoft Photos
- Mac Preview
- iPhone or Android photo editor
For basic cropping, simple tools are enough. But if the photo also needs skin cleanup, color correction, background cleanup, or resizing, a photo retouching service can help create a cleaner result.
Frequently Asked Questions
Do you still have questions about headshot cropping? These quick answers cover extra details that can help you prepare cleaner, platform-ready portraits.
Should I crop a headshot before or after editing?
Crop the headshot before final resizing, but after basic corrections. This helps you frame the face properly before detailed retouching or export.
What background works best after cropping a headshot?
A plain, soft, or lightly blurred background works best. It keeps attention on the face and makes the headshot look clean and professional.
Can the same headshot crop be used on every platform?
Not always. Different platforms display images differently, so it is better to create separate crops for LinkedIn, websites, resumes, and profiles.
How much of the shoulders should show in a headshot?
Show enough shoulder area to support the face naturally. Usually, the upper shoulders or upper chest gives the most balanced professional look.
Should I crop a headshot differently for men and women?
No fixed rule is needed. The crop should depend on face shape, pose, hairstyle, clothing, and where the final image will be used.
Final Verdict
Learning how to crop headshots helps you turn a simple portrait into a cleaner and more professional image. A good crop keeps the focus on the face, improves balance, and makes the photo ready for LinkedIn, resumes, websites, portfolios, and business profiles.
Start with a high-quality image, choose the final use first, place the eyes near the upper third, and avoid awkward cuts around the chin, neck, and shoulders. For one image, DIY cropping may be enough. For team photos or business use, professional editing can help keep every headshot clean and consistent.