

Photo editing has become a necessity in the digital age for professional photographers, content creators, business owners, or hobbyists. Photo editing allows people to improve their images, edit out mistakes, and produce visually captivating content that pops. Mastering photo editing can greatly enhance the results, regardless if you want to kickstart your career in photography, improve your social media images for sharing, or simply love editing photographs for fun.
We have created this ultimate guide to help you on the path towards mastering photo editing! We’ll cover the basic tools that anyone can use, advanced tips and tricks, common blunders to avoid, and resources for continuing education. So, if you’re ready to elevate your photo editing capabilities, let’s get started.
Photo Editing Master: An Introduction
Photo editing is the act of adjusting and manipulating images using different techniques and tools. Understanding the basic principles of photo editing is crucial before diving into advanced editing techniques.
Types of Photo Editing:
- Retouching : As in correcting imperfections, smoothing skin and accentuating features in portraits.
- Color Correction: Changing the color settings to make the images appear more natural or introduce a creative color grading effect.
- Exposure Adjustment: To increase/decrease the brightness and contrast of the images.
- Sharpening: Adjusting sharpness to sharpen an image.
- Cropping and Resizing: Modifying the size or composition of the image.
Key Tools in Photo Editing:

- Photoshop: The industry standard in photo editing, Photoshop offers powerful tools for any type of editing.
- Lightroom: Awesome for color correction, exposure adjustment, and batch editing. Editing software similar to Photoshop.
- GIMP: Photoshop — Paid Software: GIMP — Free & Open-Sourced
- Affinity Photo: A powerful and affordable photo editing software.
- Tweak: Online tool for photo editing and design.
Which Software to Use – Starting Off on the Right Foot
To become a master, you should choose the right photo editing software. Photoshop and Lightroom are the industry standards for professionals, but find a program that works for you if you aren’t as experienced.
For Beginners:
- Canva: Best for Beginners or Basic Edits including Cropping, Filters & Resizing Images
- Snapseed: An excellent mobile app for basic editing.
Intermediate to Advanced Users:
- Adobe Lightroom: Great for users who need stout but intuitive tools for gluing up piles of images and editing color, exposure, and contrast.
- Affinity photo: The best for people who want the features of Photoshop, minus the cost.
- GIMP: A free but powerful alternative that can tackle complex editing jobs and could be good for those learning the ropes.
Photography Master: Understand the Basics
Become a professional photographer, you need to know some tips to edit your photos. Understanding how photos are captured gives you insight into what can be enhanced or remedied in post-processing.
- The role of Exposure: Exposure determines whether an image is light or dark. There are three main elements to exposure: aperture, shutter speed, and ISO.
- Composition: Knowing the rule of thirds, leading lines, framing, and symmetry can show you how to best crop or frame your photos.
- White Balance: Correcting your white balance is vital to getting the colors in your images to look right.
Understanding the basics of photography improves your editing skills, but it also makes your photos “edit-friendly” from the get-go.
Key Editing Techniques You Must Master
Now that you have the basic tools and knowledge for photo editing and photography, it’s time to take a look at some of the most important techniques you’ll need to learn on your path to becoming a photo editing master.
- Color Correction and Grading
Color is an indispensable element of photo editing. Regardless of whether you want a realistic or stylized effect, adjusting colors is key.
- Color correction: Adding the very first step in color correction. White balance can fix photos that are biased one way or the other if they have a yellow or blue cast.
- Saturation and Vibrance: These two tools allow you to make colors more vivid. Saturation applies the same amount to all of the colors, while vibrance applies more to the less-saturated colors.
- Color Grading: This process enhances creativity by changing the color tones to produce desired atmospheres. Cool, bluish light, for example, can impart a sense of calm while warm tones can make the image feel inviting.
- Exposure Adjustments
- Brightness: adjusts the overall brightness of an image (lightens or darkens an image)
- Contrast: This feature helps with making the darks darker and the lights lighter, giving the image more dimension.
- Highlights and Shadows: These let you tweak bright and dark parts of your photo to achieve a better-exposed image.
- Retouching Portraits
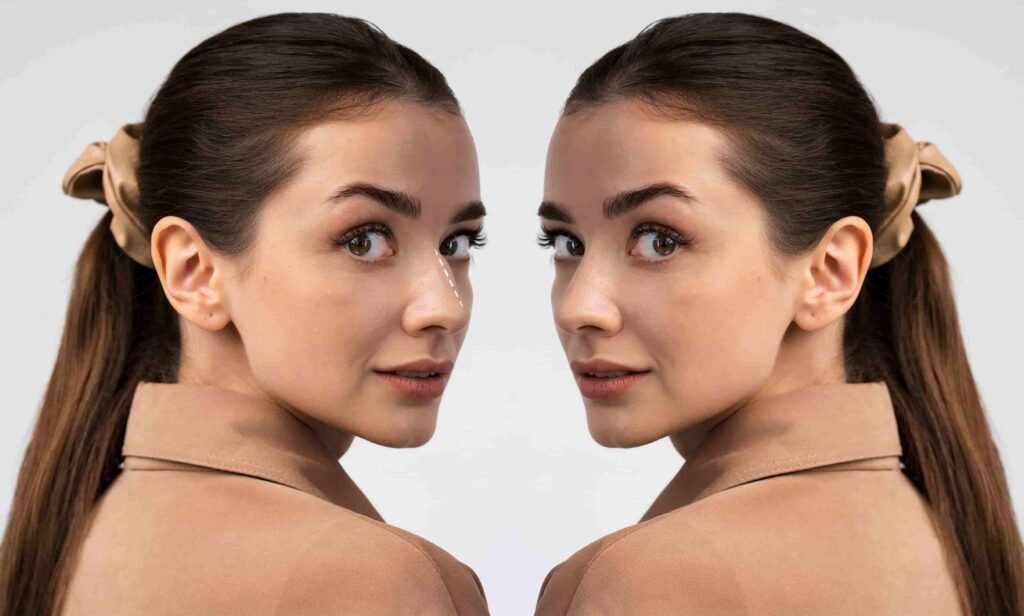
Photo retouching in portraits is one of the most sought-after photo editing skills. This includes fixing skin blemishes, plumping up creases, whitening teeth and defining features.
- Skin Smoothing: You can use something like the healing brush in Photoshop to eliminate blemishes.
- Teeth Whitening: Use the selective color tools to brighten teeth without adjusting the rest of the image.
- Eyes to Wake Up Photos: Another way to use it is to lighten and sharpen eyes so portraits photograph better
- Advanced Layering and Masking
- Layering: This approach enables you to make multiple adjustments to distinct components of an image without altering the entire picture. Photoshop layers work in a stack, where each layer applies only to part of an image.
- Masking: You have the ability to apply adjustments to only certain parts of the image, while keeping the others untouched with masking. This image masking method is great for targeted adjustments, like brightening the subject but not the background.
- Cropping and Resizing
Sometimes a photo needs to be cropped to enhance its composition or to fit in a certain space. Cropping can also remove distracting elements from the frame or center the subject more effectively.
- Aspect Ratio: Maintaining the right aspect ratio is essential when resizing photos, particularly if it’s for printing purposes or social media platforms.
- Straightening: You can fix photos that are not exactly straight and improve their professional image by straightening them.
Advanced Photo Editing Tips
So you’ve learned how to do the basics of photo editing.
- Composite Photography
This is called composite photography where you have to combine multiple images in one full image. This could be useful for artistic effects, such as mixing elements from multiple photos to create a surreal or imagined scene.
- As you can combine multiple frames in a single exposure, the High Dynamic Range (HDR) Photography can be achieved very easily.
- High-dynamic range (HDR) photography allows a range of light and shadow details to be captured by merging several exposures together. This technique is useful for shooting high contrast scenes like landscapes with bright skies and dark foregrounds, for example.
- In this study guide, let’s create our own DOF effects.
Depth of field is how much of the image is sharp in focus. You can attract people’s attention to your subject by blurring the whole parts of the image (back or front). In post-processing, this effect can be intensified further.
Common Mistakes to Avoid

Even seasoned photo editors can make mistakes. Here are a few common ones to know about:
- Over-editing: The most important thing in photo editing is subtlety. Excessive editing makes images appear unrealistic and adversely affects their charm.
- Not Using Layers: Editing straight on the image instead of using layers makes for messier changes. Work non-destructively using layers and masks at all times.
- Resolution is Ignored: Export your images keeping high resolution if they are for printing or professional projects.
Learning Material: How to Get Better at Photo Editing
Mastery requires practice and learning continually. So we’ve gathered some resources to help you:
- Share Online Courses: Online course sites, such as Udemy, Coursera, and LinkedIn Learning, have in-depth classes on photo editing.
- Self Directed Tutorials: The internet is filled with fantastic free tutorials on both YouTube and other online sites.
- Blogs and books: There are a lot of photography books discussing photo editing. There are useful tips and techniques on blogs like PetaPixel and Fstoppers.
How To Create Your Portfolio as a Photo Editing Expert
After you’ve managed to learn some basics of photo editing, it’s time to be able to show your work with a portfolio. A well-designed portfolio can assist you in getting work, whether for freelance jobs, professional teamwork, or personal development.
- Select for Your Best Work: Show a range from portraits to landscapes to commercial, to creative edits.
- Establish a personal brand: Know your style and your editing signature. This makes you stand out as a unique photo editor.
- Get on Social Media: Social channels such as Instagram, Behance, and 500px are perfect for showing your skills at photo editing.
Creating a Workflow for Fast Photo Editing
A key component to mastering photo editing is creating a workflow that enables you to work quickly without sacrificing quality. Not only does this save you time and money, but also it keeps your editorial style uniform across all your projects.
- Organizing Your Files
To create an effective workflow, making sure that your files are organized is often step number one. This is especially important when you are editing images for clients or for your own purposes; good file management will save you much time and prevent confusion.
- Folder Structure: Keep a neat, logical fold structure to separate your raw images, edited images, and final exports. For instance, you might set up a single top-level folder per any project or client, and under that a series of subfolders for raw files, edited versions and final output.
- Naming Conventions: By using consistent naming conventions, you can quickly locate your files and prevent overwriting the wrong images. Date or version based clear, descriptive names
- Backup Your Work: Always backup your original files and edited photos. Backup to external hard drives or use cloud storage to prevent data loss.
- Non-Destructive Editing
Almost every photo editing golden rule dictates that you edit non-destructively. That’s the ability to make changes, without permanently modifying the original picture. Here’s how to do it:
- Use Layers: As we mentioned before, you must always work with layers. It allows you to change elements separately without the need to modify the whole picture.
- Use of Adjustment Layers: Avoid putting edits directly on the image by using adjustment layers in Photoshop or Lightroom. It lets you modify settings such as exposure, saturation, and contrast in a non-destructive way without changing the original pixels.
- Smart Objects: Use filters non-destructively by applying them to a converted smart object layer in Photoshop.
- Keyboard Shortcuts
Keyboard shortcuts can vastly cut the amount of time it takes you to edit. All your photo editing software contains a number of shortcuts, and by memorizing some of the more common ones, you can avoid constantly having to go through menus. But here are some important shortcuts to know:

- Zoom in/out:Ctrl + (Plus/Minus)
- Undo: Ctrl + Z
- Copy/Paste: Ctrl + C / Ctrl + V
- Photoshop: Ctrl + J, Duplicate Layer
- Show/Hide Layers Panel: F7
These shortcuts, along with others you can customize, are going to save you a ton of time during the editing process, especially when dealing with large batches of images.
Creating a Signature Editing Style
As you get better at editing photos, one of the best things you can do is find your own editing style. Whether you are doing commercial work or designing personal branding, a signature style will help distance you from other photographers and editors.
- Define Your Aesthetic
- Data: Up to October 2023. Your individual taste and your own vision, personal touches which brings signature editing style must reflect in your work. You can create your style by testing, trying different techniques, and settings like:
- Color Palettes: Are you drawn to warmer tones or cooler hues? Do you lean towards bright, bold colors, or subdued, pastel shades? Create a color palette that is true to who you are.
- Textures: Some editors like to add grain or texture overlays to their images, giving their work more of a cinematic vibe. Some may be focused on giving a sleek, polished end.
- Mood and Lighting: Are your images dark and moody, or do you favor bright, clean looks? Experiment with different lighting effects and tones until you find what feels right to you.
- Consistency in Editing
Being consistent will help you create an identifiable style. Whether you edit images for customers or simply for your social media feed, you need to make sure the edits reflect your style. Consistency in this way, helps to create a professional brand which your clients can come to recognize and trust.
- Apply presets: If you are working in Lightroom or Photoshop, you can create or download editing presets to apply them all to your images to create a uniform look.
- Batch Edit: Processing multiple images from the same photography session will enable you to achieve a similar look throughout your entire collection.
- Practice and Experimentation
Finding an editing style that works for you takes experimentation. Don’t be afraid to experiment with different methods, indulge in unconventional filters, or to bend some rules in the process. You will find your true editing identity by trial and error.
Making Eye-Popping Visual Effects In Image Altering
You’ll not only be expected to make basic edits but also learn about creative visual effects as a photo editing master. Check it out for some advanced techniques to help take your images to the next level.
- Luminous Leaks and Lens Flares
Light leak and lens flare is the holy grail when it comes to creative effects, adding a dreamy, cinematic quality to your images. These effects replicate the inadvertent light that can creep into a camera lens, often resulting in a burst of color or a flare spilling across an image. For light leaks or lens flares:
- Use overlays: You may find free or paid (Adobe) light leak overlays online which you can place on your photos in Photoshop with the use of layer blending modes.
- Brush In Your Own Effects: You can paint in some light leaks using the brush tool and soft light layer mode to get a more natural and custom feel instead.
- Dramatic Black & White Photography
Turning images into black and white is one of the most classic and timeless photo editing techniques. Masking is important to get a really dramatic black and white result.
- Adjust Red, Green and Blue Channels: When converting the image to black and white (the images shown above are black and white or grey shade), individually adjust these (highlighting makes them grab) channels to control how much of each color may be represented in grey.
- Dial up the Contrast: Black-and-white images benefit from increased contrast adding emphasis to textures and shadows for greater effect.
- Adding Motion Blur for Motion Action Shots
Motion blur is a technique to fake movement in your photo. This makes it especially effective for action or sports photography, in which a subject may need to look dynamic and fast-moving.
- Use the Motion Blur Tool: You can use the Motion Blur filter in Photoshop to blur a section of the image. By the angle and distance of the blur, you can imitate different types of motion.
- Create a Sense of Speed: In order to give the illusion of speed, you can blur the background, stitch fast moving motion together or introduce some kind of radial blur to the frame centering around your moving subject.
- Computer Art and Illustrations
To step up your photo editing, milk your pictures for some digital paintings or illustrations. A technique that also requires knowledge of photo editing and digital art software.
- Apply the Smudge Tool: In Photoshop, one frequently used technique to achieve a painted effect is using the smudge tool, which can help to blend and manipulate pixels together. You can also make some artsy things by painting over the image. You can also make a ghost mannequin for your product.
- Use of Brushes and Textures: Make use of custom brushes or downloaded ones to add texture, strokes or some visual element in your digital art.

Creating a Portfolio and Promoting Your Skills
As a photo editing expert, your portfolio is the single most impactful marketing tool in your toolbox. It is a way of displaying your skills and getting new clients or projects. So here is how you can build a great portfolio and promote your photo editing skills.
- Curating Your Best Work
Do not include everything you’ve ever edited in a portfolio. Bio: Pick your best stuff meaning pictures you’re technically proficient at taking and that have your own unique flair to how they are edited.
- Vary Your Selections: As an editor experiments with different styles, both natural color corrections and more dramatic black and white conversions. Showcase both commercial and creative work to display versatility.
- Update It: As you progress and change as a photo editor, continue to update your portfolio with your most recent and finest work.
- Establishing a Website and Social Media Presence.
- Step 1: Establish your online presence So, in order to attract potential customers, you have to reach a wider audience.
- Dating Yourself: Create a personal website to present your portfolio, describe your services, and include a contact form for potential future clients. You can use platforms such as Squarespace, Wix or WordPress to launch a professional-looking site in minimal time.
- Social Media: You can post your retouched images on Instagram, Facebook and Pinterest. Engage with other users, use hashtags, and participate in photography communities to increase your visibility.
- Networking and Collaborations
In the photography and photo editing industry, Networking is a must. This can include partnering with other photographers, designers or brands to put your name out into the world and find an audience.
- Partner with Photographers : Several photographers might require someone to assist them with editing. Contact photographers whose work you like and ask if you can work on projects together.
- Network with Photography Associations: Connecting with photography organizations can provide you with valuable contacts and advice.
Continue Learning and Advancing Your Skills
As a photographer, you are always on the lookout to improve your skills. Learning should be a lifelong pursuit to keep scope of improvement in your arsenal.
- Invest in Learning: If you have the ability, consider taking advanced courses on platforms like Skillshare or MasterClass that offer in-depth tutorials on specific techniques.
- Follow Trend Events: Follow events and news of online communities, blogs, and YouTube channels of the field, increasing your knowledge of visual illustrations of the updates in photo editing tools and software.
- Edit Often : You Improve the More You Do It Dedicate time every day or week to edit different styles of pictures.
Conclusion
To become a photo editing master, you require technical skills, creativity, and knowledge. You can instantly improve your photography skills and take better photos by familiarizing yourself with the tools, understanding basic photography concepts, and learning advanced techniques. With consistent effort and dedication, it is possible to master the skill of photo-editing and create impressive images that will leave a lasting impact.
UK Clipping Path can take off your complex photo editing chores for seamless professional results. We provide services like ecommerce photo editing services, ghost mannequin services, multiple clipping path service, jewelry retouching service and many more. Want top-notch service at an affordable price? Try us for free and see the difference.
This guide is to serve as a roadmap for all the burgeoning photo editors out there. So whether you’re new to the game, or you’ve been doing this for a while, there’s always
This is all space for improvement and new techniques to try.