

This tutorial is aimed at teaching you how to do color correction using Photoshop
Taking a photo is only half of the battle; the other half is involved in post-processing.
Along with other photo editing techniques, tweaking and adjusting elements such as color balance, brightness, contrast, and saturation play a huge role.
This article is a beginner’s guide to using Photoshop for the tricks of color correction.
Color has the power to make or break a first impression. When a photograph is overexposed, the color is washed out as well, and vice versa.
It will be difficult to find the subject of a poorly edited photo if the colors are not properly set.
With this knowledge, we can conclude that one of the most important outcomes of photo editing is the addition of color. Color correction in Photoshop is not difficult.
Let’s start learning.
What is Image Color Correction?
Image color correction is a photo manipulation technique that adjusts the colors in an image to ensure that they appear as lifelike and accurate as possible.
This can include adjusting color temperature, saturation, and contrast to manipulate tint, vibrancy, brightness, etc.
This process often involves rectifying overexposed or underexposed images. Then Photo editors fix the image using photo editing software like Adobe Photoshop or Lightroom.
Depending on needs, they can try different methods such as hue, saturation, and luminosity corrections.
Basic Color Correction Techniques in Photoshop

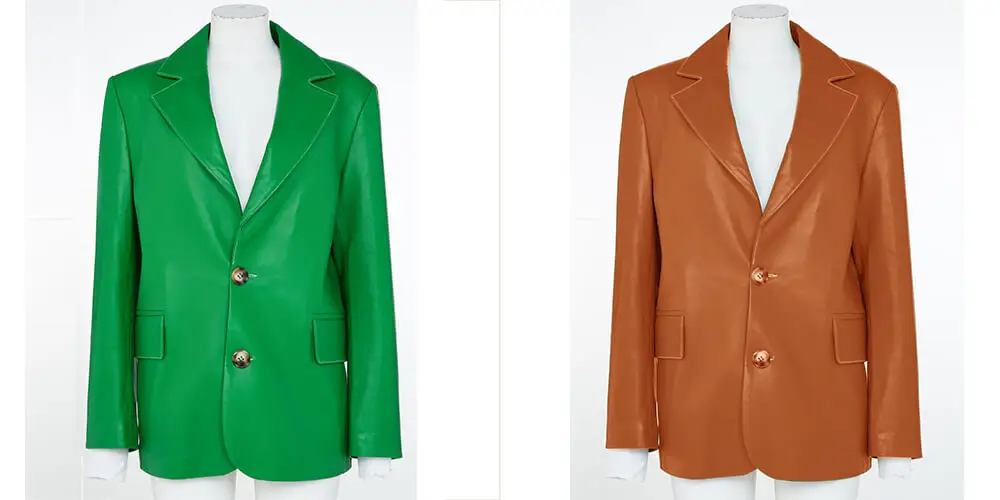
Find the opposite color
The simplest way to color correct is to find the opposite color in Photoshop. The best part about finding opposite colors is that if you find the right combination of colors, they will appear as realistic as possible.
Once you’ve discovered the opposite color, you can describe or visualize it using the color conversion process. Invert the color by pressing CTRL + I to find the opposite color.
- Open your image in Photoshop.
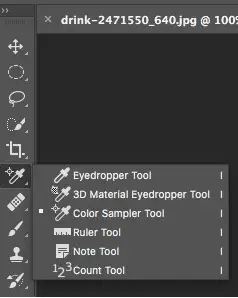
- Then, to find the opposite color, select the Eyedropper Tool (shortcut: I) from the toolbar.
- Click on the area of the image that you want to correct. This will sample the color.
- Once you’ve sampled a color, you’ll need to find its opposite on the color wheel. You can do this manually or by using a color picker tool.
- To invert the color, press CTRL + I (Command + I on Mac). This will give you the opposite color.
Starting Correcting Colors
It’s time to start color correction once you’ve identified a color to remove from your image.
Now that you’ve identified the color to remove, it’s time to start color correction. Here’s how:
- Go to the Layers panel.
- Add a Color Balance adjustment layer by clicking on “Layer” > “New Adjustment Layer” > “Color Balance.”
Use the Midtones settings in the Color Balance adjustment layer because this will cancel out the color in a 50/50 ratio, leaving you with a neutral color tone.
Use Midtones Settings
To balance the color effectively, focus on the mid-tone settings within the Color Balance adjustment layer. This will cancel out the color in a 50/50 ratio, leaving you with a more neutral color tone.
Balancing Light Between Highlights and Shadows
You can light up the dark areas of the image to achieve the right balance of light and dark.
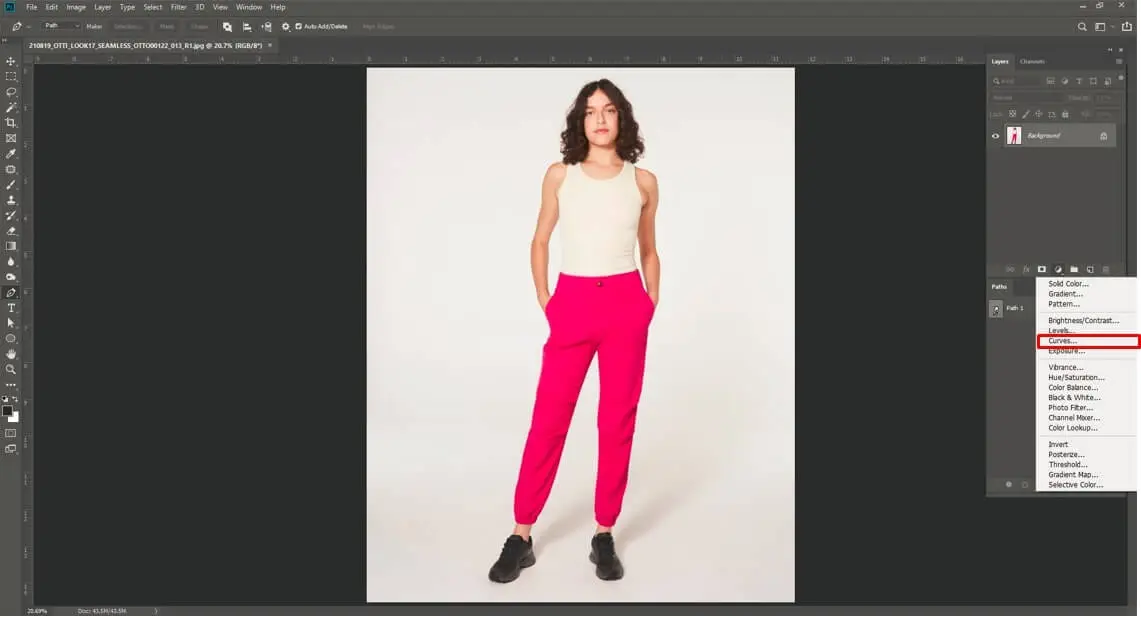
- To do so, go to Layer > New Adjustment Layer > Curves and create a Curves Adjustment Layer.
- Ese Blend IF to only affect shadows. Blending Options can be accessed by right-clicking on Curves and selecting Blending Options.
- Split the white slider in the Underlying Layer Section by holding down the ALT key and clicking and dragging to the left. Drag the white slider to the left until you see Curves starting to affect the image’s shadows.
Refining Color Correction
Now refine the color correction by adjusting the opacity of the filter adjustment layer based on your needs.
Reduce the opacity of the filter adjustment layer based on your needs. You can experiment with the opacity slider and even blend colors using blending modes.
Besides, you can experiment with the opacity slider and explore blending modes to fine-tune the correction.
Adding Lighting Effects
Pick a color and use a soft, round brush to paint a new layer. Reduce the opacity and change the blend mode to Linear Dodge. Then you’ll see the color that you’ve been looking for.
If you need to add specific colors or lighting effects:
- Pick a color from the color picker.
- Use a soft, round brush to paint on a new layer.
- Reduce the opacity of the layer and change the blend mode to “Linear Dodge” to achieve the desired lighting effect.
Quickest Way to Accomplish Color Correction In Photoshop
Levels Or Curves In the Adjustment Layer
After you’ve opened an image, go to the adjustment layer section in the top right corner of your screen and select Levels or Curves.
Because they both have an Auto button, either adjustment will work for this quick fix. I start with the Auto button and make a few tweaks until I find a look that I like, then switch to Manual or Advanced on the right-hand side.
In the beginning, the Auto button will usually suffice, and you won’t have to worry about color shades. However, once you’ve reached a certain point in your editing, select Advanced and make your own changes.
Auto Color Correction
Hold down the Option key on a Mac or the Alt key on a PC and click directly on the Auto button to bring up auto color correction options in Photoshop.
Toggle on the third option, Find Dark & Light Colors, by checking the box. “What this tells Photoshop to do is look at the image and find the darkest part and convert it to black, and the lightest part to white.”
We can also take it a step further by enabling the Snap Neutral Midtones section.
Most images have mid-tones in the middle that aren’t quite as light or dark as the rest of the image, but they’re close. You could use this to enhance your images by brightening and sharpening them a little more.
Make It an Action
“We can save this as a default if we want to use it as a quick way to color correct a lot of images in the future. So, at the bottom of the page, there’s a check box; tick it, and then click OK.
Getting Professional Help
UK Clipping Path is a full-service image editing company that specializes in retouching, background removal, shadow creation, color correction, and other services.
We’ve been in business for over ten years and have a solid reputation. What sets us apart is that we always ensure quality at a reasonable cost.
If you’re looking for high-quality image color correction services, contact us today.
Conclusion
Color correction in Photoshop can make your photos look much better. You can fix colors, brightness, and shadows to make images clear and natural.
Tools like Curves, Levels, and Color Balance help you do this easily. Even beginners can learn it with a little practice. Try these steps and watch your photos come to life!
FAQ
How can I make my colors brighter?
Use the Vibrance or Hue/Saturation tool. Move the sliders a little. Stop when it looks natural.
How do I fix dark or bright areas?
Try the Shadows/Highlights tool. It brings out details in dark and bright spots.
Can I change one color only?
Yes. Use Selective Color or Color Balance. Pick the color you want to fix.
How do I make my photo look natural?
Don’t change too much. Compare with the original. Keep it soft and clear.
Should I use automatic or manual correction?
Automatic is fast and easy. The manual gives you more control. Use both when needed.