
Clothes without mannequin displays allow shoppers to better visualize how the fabric flows and fits naturally.
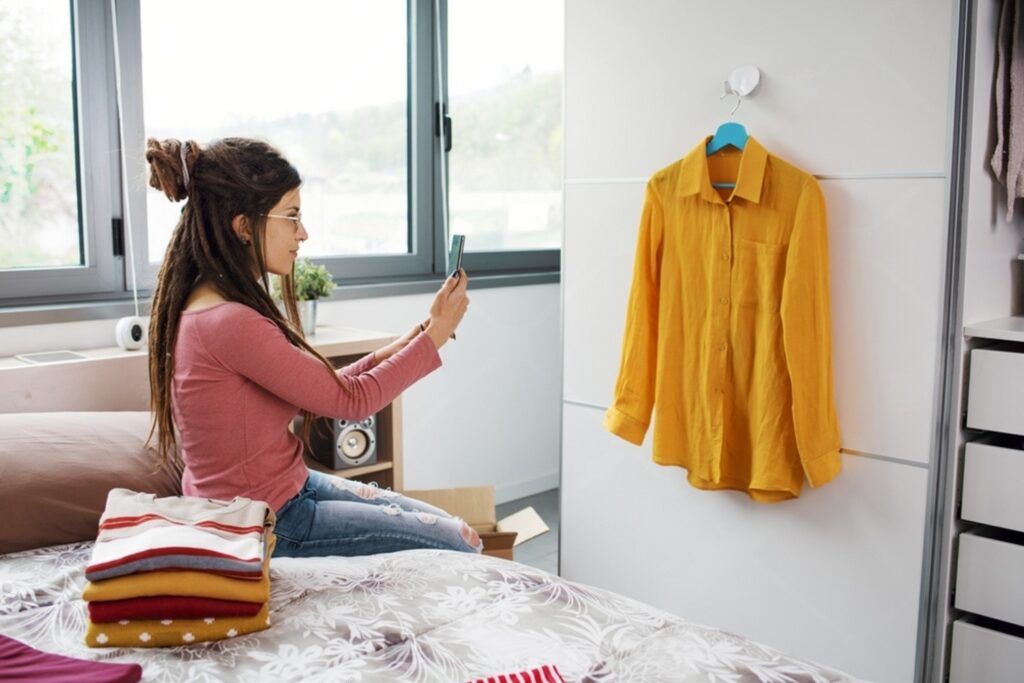
In the era of online shopping, you have to present your products in a way that entices your customers and distinguishes your products from the competition.
When it comes to clothing items, there’s a further challenge of presenting them due to the presence of the mannequin.
For this reason, clothing retailers often ponder how to take pictures of clothes without the mannequin. In this article, I’ll explore some creative ways of photographing clothing items without the need for mannequins.
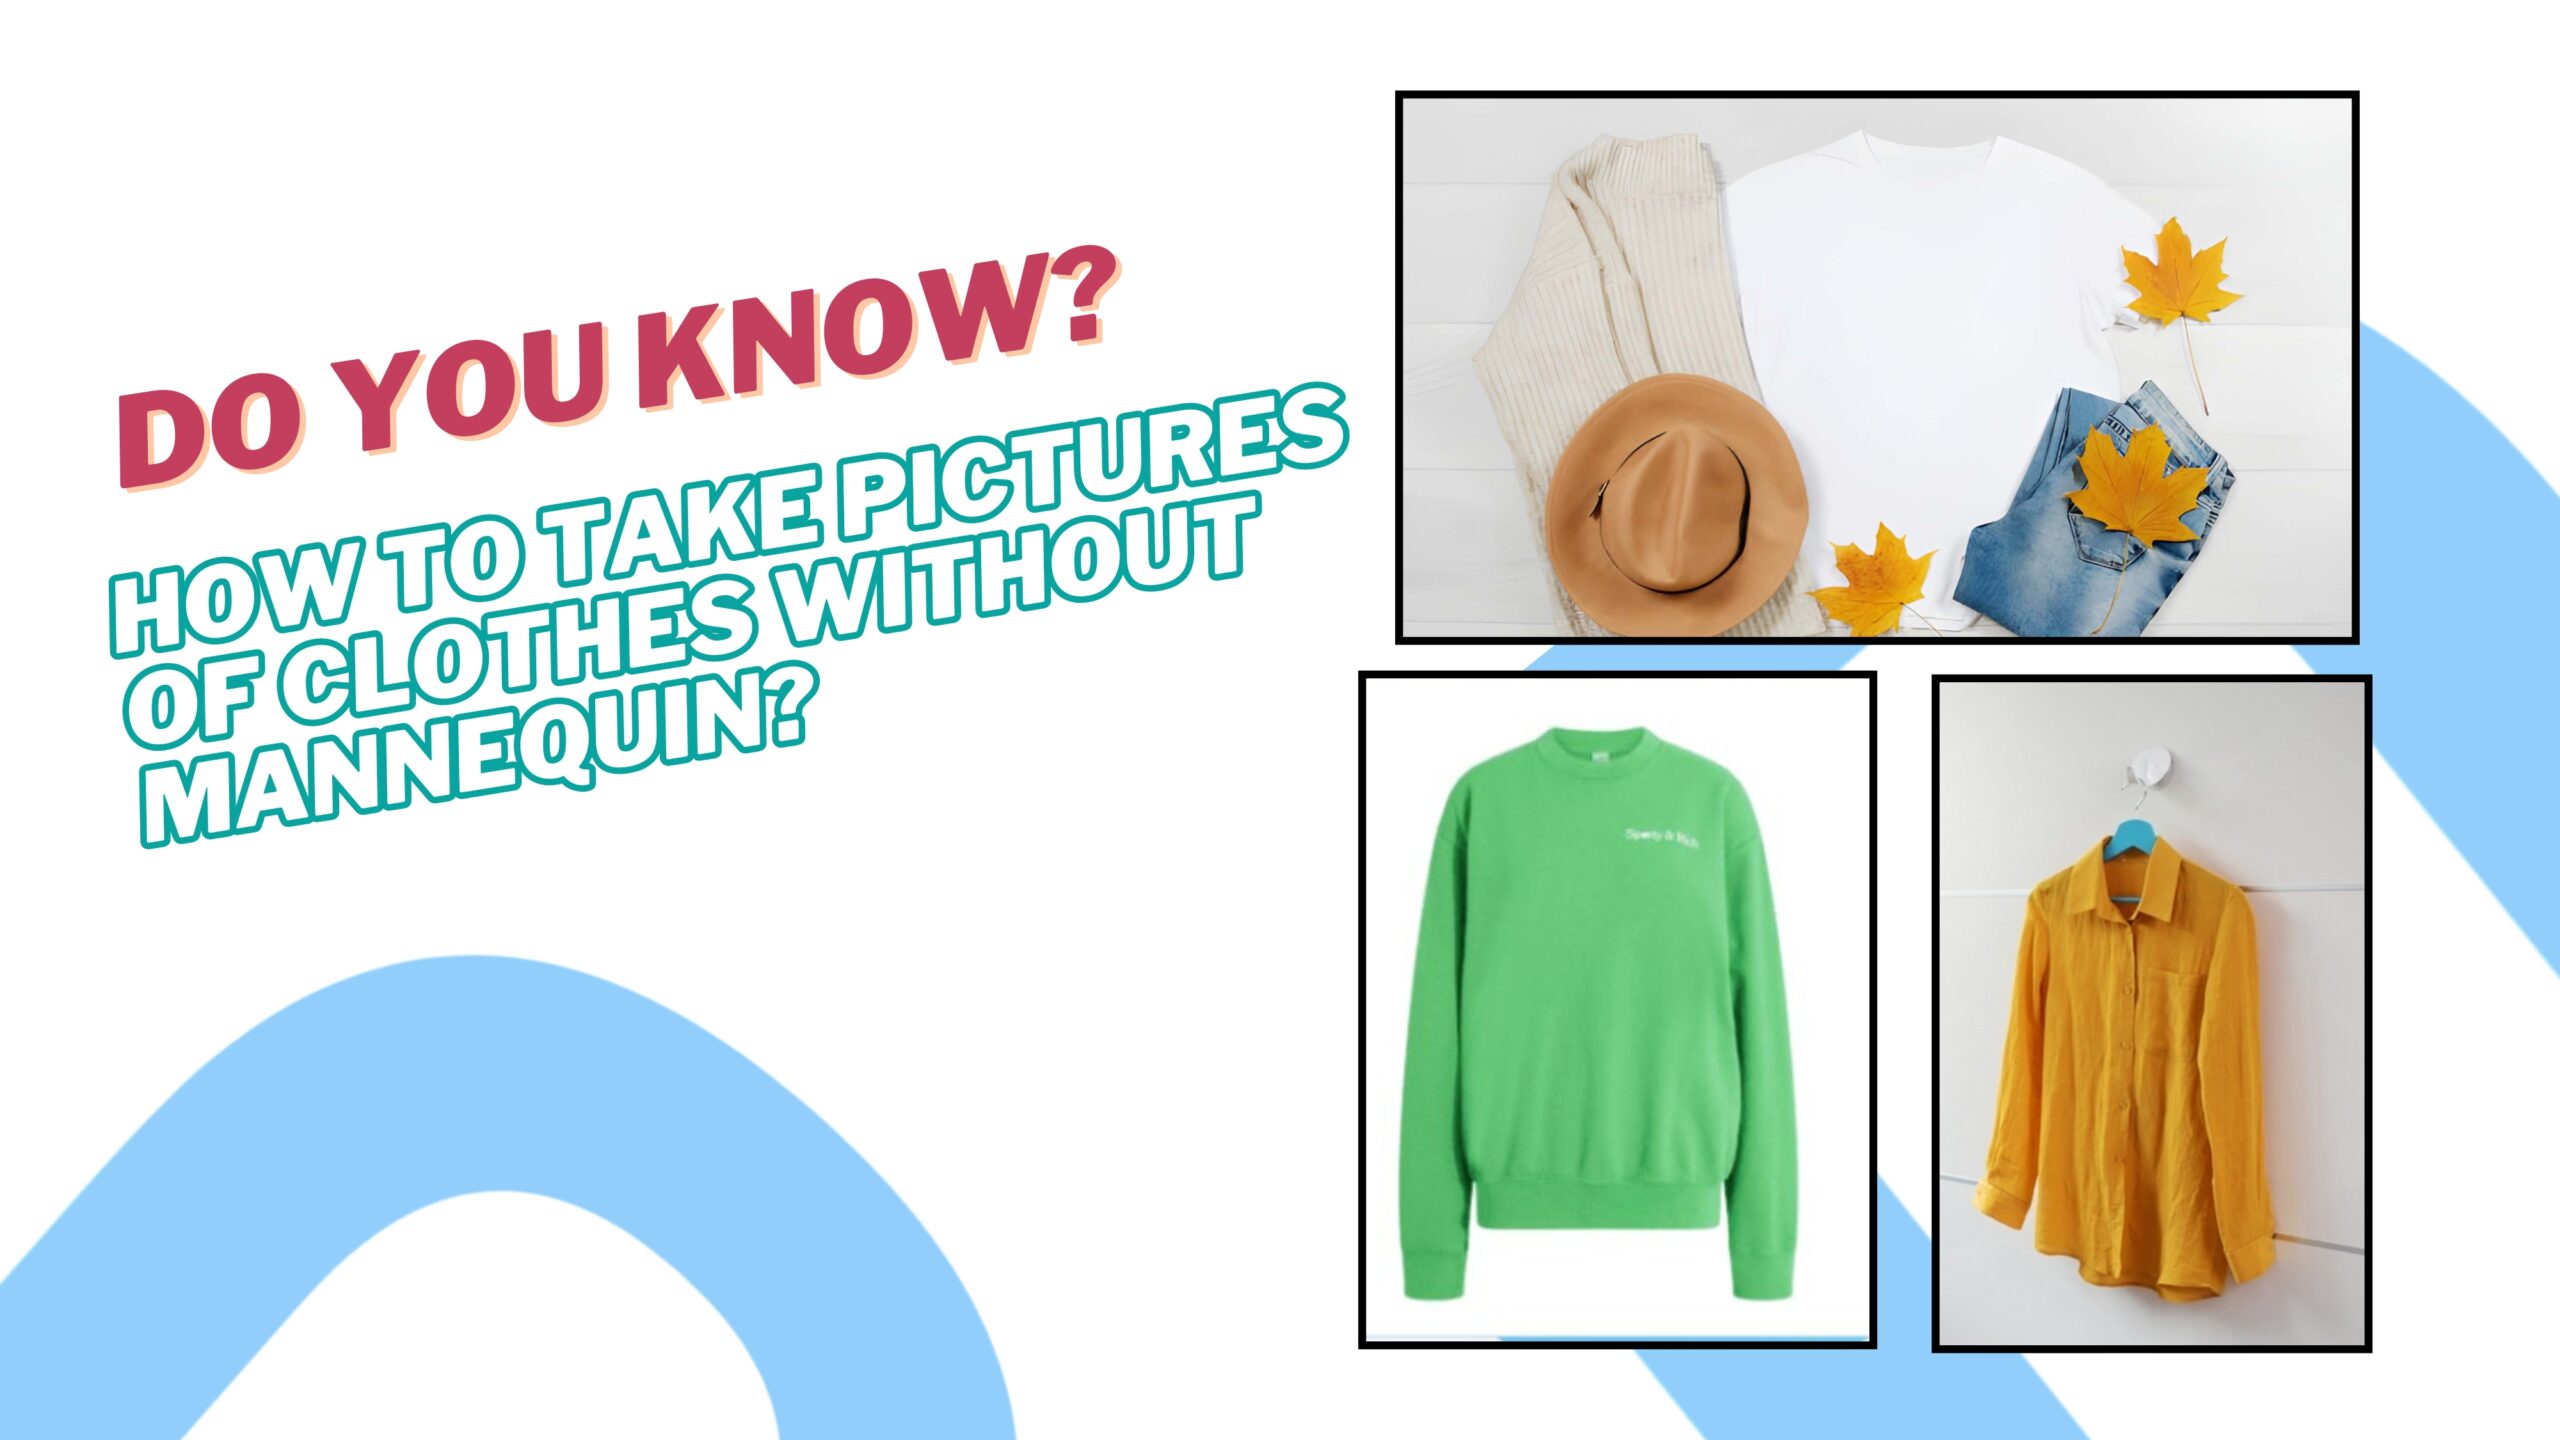
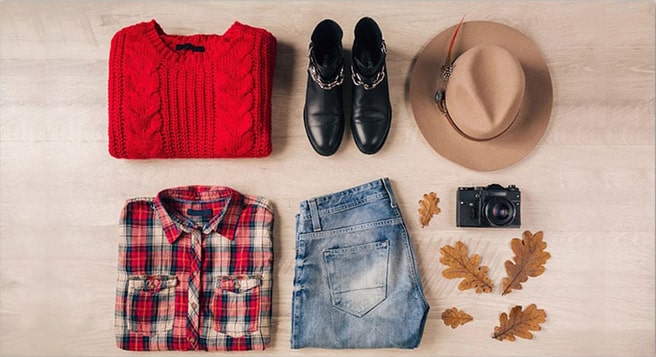
Flat lay clothing photography
Flat-lay clothing photography can be a great way of showcasing your clothing items without the presence of mannequins.
In this type of photography, you need to lay the product flat on a clean surface with a neutral and clear background. As the clothing lies flat on the surface, there is no need for a mannequin to give it a structure.
How to take flat lay photos for clothing?
Planning is the primary step of flat lay clothing photography. You need to plan your shooting arrangement, choose the clothing items that you shoot, and consider the props if necessary.
What message and style do you want to convey with your photoshoot? Decide on this as well, along with other necessary considerations such as lighting, camera angle, and overall composition.
After you have done with your planning, below are the subsequent tasks that are straightforward to execute.
Preparing the background

Before thinking of the background, you need to think about the flat surface where you are going to arrange your photography set.
A sturdy table can be an ideal platform for your job. However, you may also take the photos on any flat surface.
The choice of the background for the flat lay photography set is dependent on the style and your planning.
If you have planned for a clean and neutral background, then a solid white or gray color can be a good option, which can create a professional and minimalist look.
A piece of paper board can be a good option for creating a solid colored background for a flat lay.
Additionally, if you want a textured background, then you can use a wooden board, fabric, or paper with the desired pattern.
Make sure the background is large enough to accommodate your products and props. It should also be clean, smooth, and wrinkle-free.
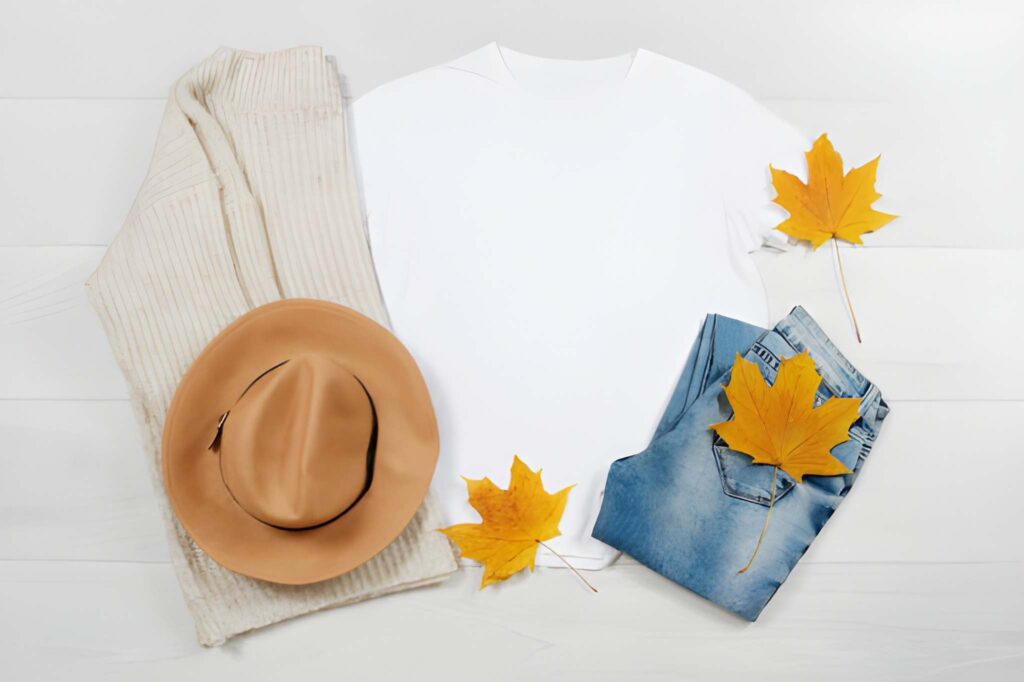
Light
The choice of light is dependent on the mood of the photo. Do you want a soft color or a bold color? Based on this, the illumination for flat lay clothes photography ideas can be with either direct light or indirect light.
If you choose to photograph in a soft color, then indirect window light can be a great way to illuminate your photography set.
Use a reflector or diffuser at the opposite side of the window for uniform illumination. If the window is not available, then cast a flashlight or LED light on a reflector to produce a soft light.
In case you want a vibrant, bold light for your flat lay photography set, then a window with direct sunlight can be a good option.
However, try to shoot just after sunrise or before sunset to offset the glare of the sun.
If sunlight is not accessible, then use an LED light source and cast the light at a 45-degree angle to your photography set.
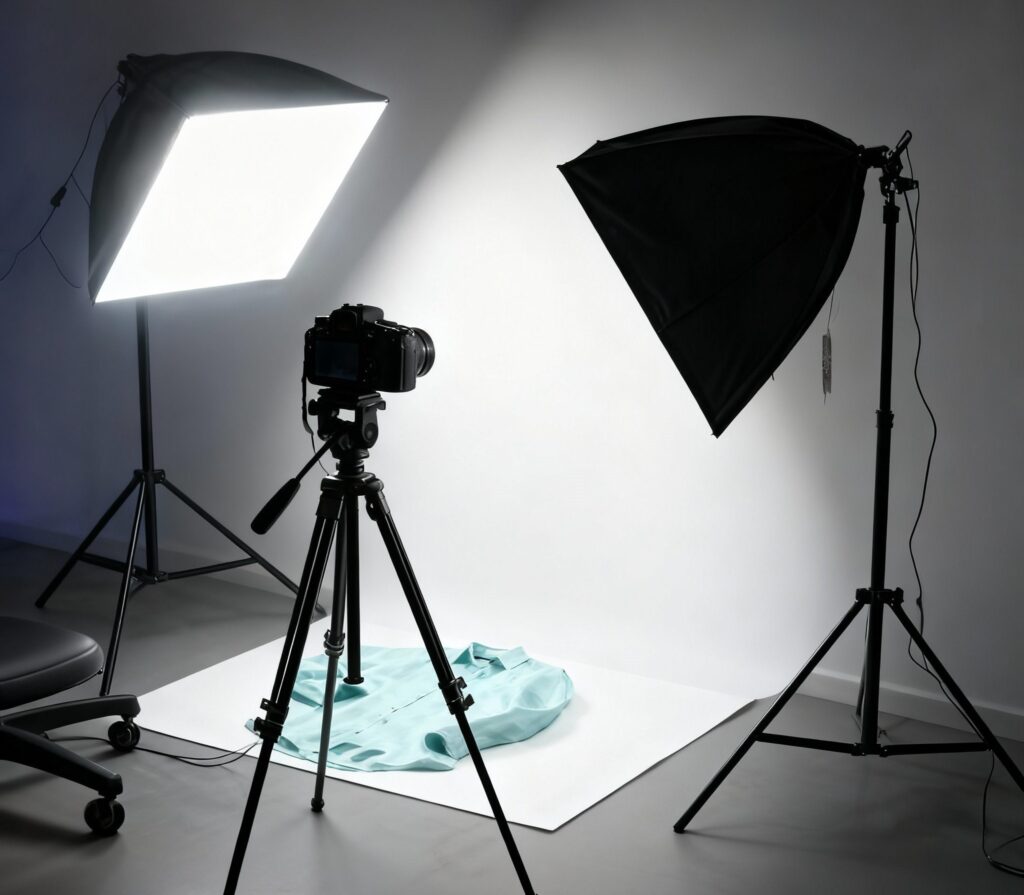
Camera
Using a professional DSLR camera will always give the best results for capturing your clothing photos without the mannequin in a flat lay style.
Use a sturdy tripod that has the capacity to shoot in a downward direction. If your tripod does not have this functionality, then you may use a C-stand and a camera adapter to set the camera just above the photography set.
If you do not have a DSLR, a mobile phone with a high-quality camera can also be usable for capturing flat lay photos.
I’d recommend using the iPhone 17 Pro Max, which has a 48MP main camera and 5X optical zoom.
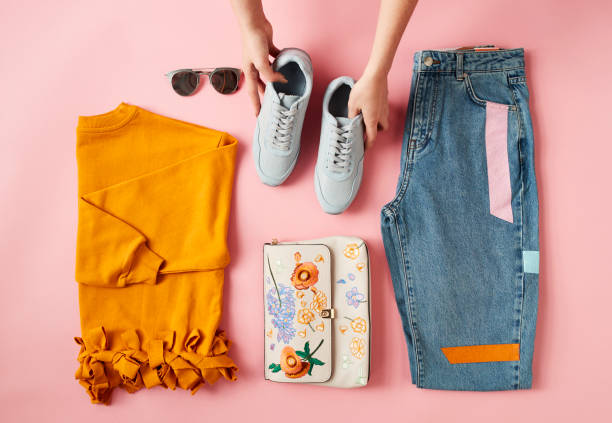
Clothing arrangement
Gather all the items you need for your clothes photography. The clothing and props should be clean and free from scratches and wrinkles.
The props should be chosen according to the style, mood, and color palette. Think about your story and make the composition accordingly.
When arranging the photography setup, choose one or two garment items as your focal points.
It is not a good idea to show the props prominently or arrange them in a way that creates a distraction.
Do not overlap too much. Keep a distance between the items. When choosing the props, consider your product, photography style, and message that you want to convey.
Finally, leave some empty spaces to ensure that the image looks less cluttered.
Taking the photo

Place your camera frame in a way that covers the entire area of your flat lay photography set. Use the zoom feature of the camera to adjust your frame.
Before taking the final shot, take some test shots and review them. Make necessary adjustments after reviewing the test shots.
Finally, take the shot and check it with your camera. You may change the composition of the photography set a little bit and take multiple shots to see which one works better for you.
Editing the photo
Flat lay clothing photography requires basic image editing, including color correction, exposure and brightness adjustment, contrast and shadow correction, sharpening, and cropping.
If you have an intermediate level of experience in image editing software such as Adobe Photoshop, then you can work on your images yourself.
After applying some final touches and adding a watermark and logo if necessary, you can use your clothing pictures that have been taken without a mannequin.
Flat lay photography advantages for clothing items
Although there are a few techniques for photographing clothing without models, the flat-lay technique has its own benefits. Below are a few of them.
Enhanced focus
In flat lay photography, the clothing product lies on a flat surface naturally. A garment item with a model or mannequin creates distractions.
Your clothes lay flat on the photography set. There’s no use of a mannequin to support them. Therefore, it keeps the viewers’ focus on the garment items only.
Detailed and clear presentation
With flat lay, you can show a clearer and more detailed view of the garment items. The texture and intricate details of the products can be highlighted in a good way.
Thus, the customers can see what they are buying clearly and make an informed decision.
Versatile arrangement
In flat lay, you have the flexibility of arranging the garment items and experimenting with them in different ways while taking photos.
To relate to your target audience, you can use props as needed and make the arrangement according to the mood and style of your viewers.
Flat lay is cost-effective
Compared to other clothing photography techniques without mannequins, flat lay is simple and less expensive. There’s no need for a professional photography studio setup for it.
You can even do it with your mobile phone camera. Flat lay also requires only minimal post-processing that you can apply with basic image editing knowledge.
Ghost mannequin effect for clothing
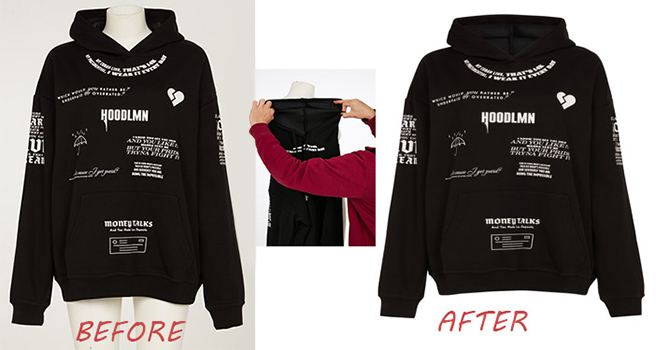
Applying the ghost mannequin technique is another way of presenting your garment products without the mannequin. For this technique, you have to take photos of your products with the mannequin and then edit them to remove the mannequin.
Taking the photo
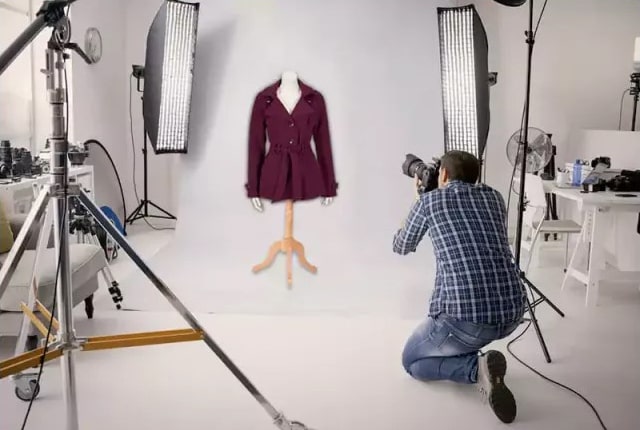
Dress the mannequin in the clothing you want to photograph. The dress should fit the mannequin properly and have the desired style.
Check whether the garment item you are shooting is clean and free from wrinkles.
After you have dressed the mannequin, it’s time to set up the light and camera. Use soft and diffused light to minimize harsh shadows.
You must use a tripod for your camera to ensure consistent framing.
Finally, take the photo from different angles. Make sure to keep the same camera frame while taking multiple images of your clothing.
Therefore, keep the camera stationary and take product photos from the front, back, and sides.
Applying the ghost mannequin effect
After you have taken the photos, it’s time to remove the mannequin and apply a ghost mannequin effect.
First, you need to import your images into a reliable image editing software such as Adobe Photoshop. Then, create different layers for images that you have taken from different angles.
Remove the mannequin from the images by selecting it with the help of clipping paths or using any other appropriate tool.
Now you need to adjust the layers and make a perfect composition. Finally, refine the edges of the cloth to make it seamless. Give extra attention to the collar, cuff, and seam.
After you have removed the mannequin and assembled different parts of the mages, apply retouching techniques to make the final image vibrant and attractive.
Advantages of the ghost mannequin effect
- Showing your clothes without using a mannequin ensures a realistic presentation of the product. It shows how the garment items will look on an actual human being. On the other hand, a garment with a mannequin creates distractions.
- You can highlight the fitness of the product and show how the product will conform to the bodies of the customers.
- It will set your brand apart from the competition through the professional presentation of your clothing.
- It will create a human connection between the product and the customer. Thus, it’ll enhance the conversion rate.
Photograph clothes without mannequin
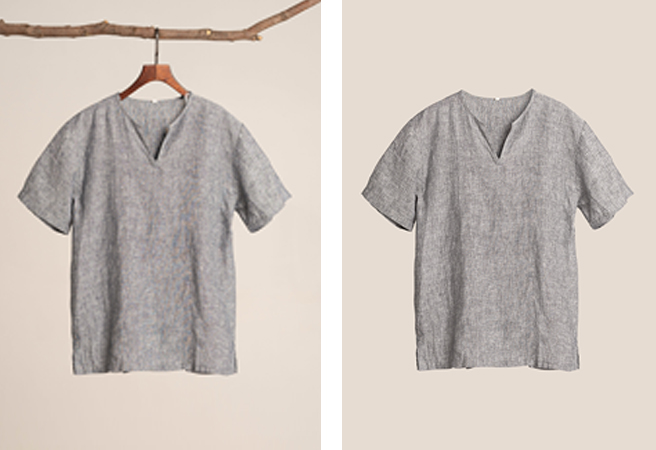
Capturing the fashion items on a hanger is another popular way of clothing photography, where you can avoid the use of a mannequin.
The process is pretty simple – take a photo of the garment on a hanger and delete the unnecessary background or object in post-production.
Taking the photo on a hanger
- Preparing the clothes is the first step to clothing photography on a hanger. The clothes should be clean, free from wrinkles and stains.
- Now, hang the garment on the hanger. Make sure the clothing is facing the camera. Additionally, before taking the shot, double-check whether the clothing is free from wrinkles and any unwanted blemishes.
- Set up your lights. Use one primary light source and one or two shadow eliminators.
- After you have completed your photography setup, take the shot, keeping optimum camera settings.
- Take multiple photos from different angles. Do not delete any photos from the camera if you do not like them.
Removing hanger in post-production
In the post-production, you have to remove the background, hanger, and any unwanted objects from the photo. Below are the processes to follow in the post-production:
- If you want to eliminate the wanted object but keep the hanger, then just crop the photo and get rid of the objects that you do not want. It can be an option for garment product presentation without the mannequin.
- However, if you feel that keeping the hanger with the garment does not look good, then you need to separate the whole clothing item from the photo.
- At photshop, use a selection tool to create selection paths around the clothing product. Do not select the cloth with the hanger.
- After the selection is done, separate the clothing from the background. Apply a new white or light-colored background.
- Apply necessary tools to correct and heal the missing parts that were created by eliminating the hanger area.
- Apply shadow and correct the color of the photo if necessary.
Conclusion
I have mentioned different techniques for taking pictures of clothes without a mannequin.
In short, if you want to do it by yourself with minimum experience in photography and photo editing, then the flat lay clothing photography technique is the right technique.
Applying the ghost mannequin effect requires an advanced level of image editing knowledge. Therefore, it may require taking a professional ghost mannequin service.