

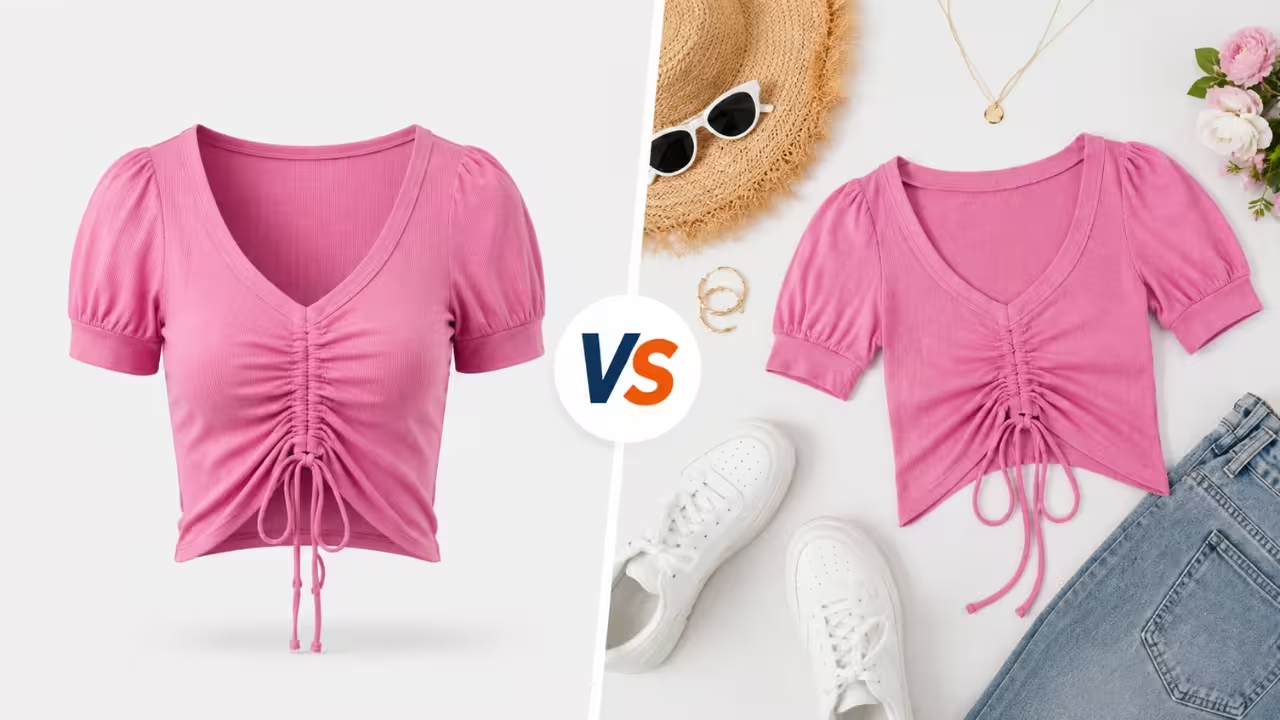
When people buy clothes online, they judge the item from the photos first. Not the description. Not the size chart. If the shirt looks flat, wrinkled, or unclear, most shoppers will not stop to imagine it looking better in real life.
That is where ghost mannequin photography vs flat lay photography becomes important. Ghost mannequin photos help clothing keep its shape, almost like someone is wearing it. Flat lay photos show the item from above, often with simple styling.
Both styles have their place. In this guide, we will look at the difference, how to light ghost mannequin photos, and the basic Photoshop steps used to finish the image.
Ghost Mannequin vs Flat Lay Photography
Before choosing a shooting style, it helps to understand how each one presents clothing. Both can work well, but they solve different product photography problems.
Ghost Mannequin Photography
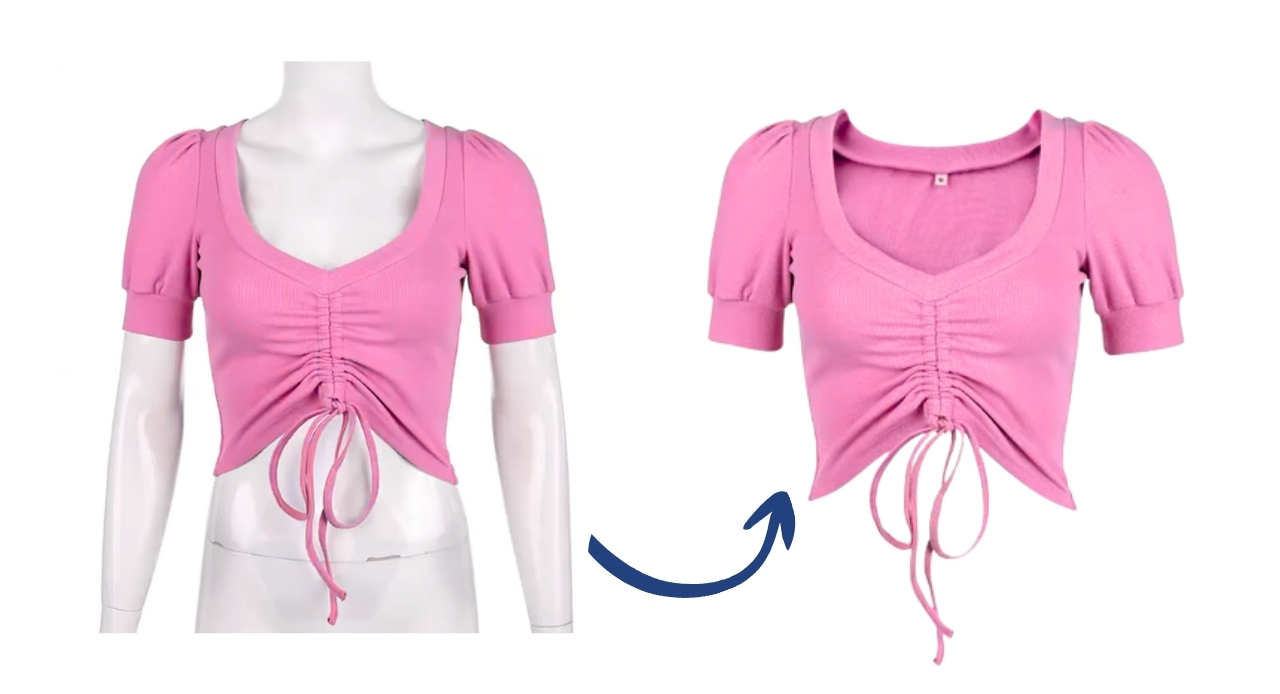
Ghost mannequin photography is a clothing product photography method where a garment is photographed on a mannequin, then the mannequin is removed during editing. The final photo makes the clothing look like it is being worn by an invisible person. This is why it is also called invisible mannequin photography.
This style works well for shirts, jackets, dresses, blazers, hoodies and coats because it shows shape. The shoulders, collar, sleeves and waistline stay visible. If you are learning how to photograph clothing on a mannequin, the most important thing is to keep the garment neat before you take the photo. Editing can clean up the image, but it cannot fully fix poor styling.
Flat Lay Photography
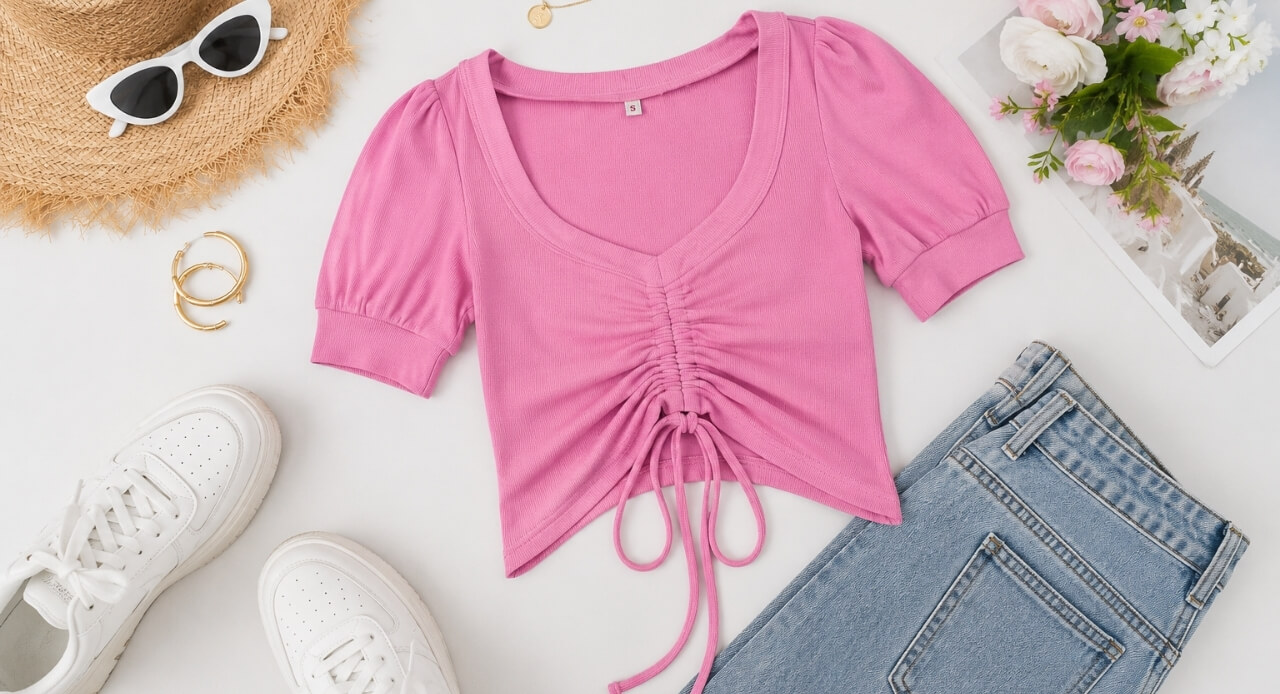
Flat lay photography is different. The product is placed on a flat surface and photographed from above. You can shoot the item alone or style it with shoes, bags, props, accessories or matching products. A clean approach like knolling can help keep the layout neat and easy to read.
Flat lay photography works well for T-shirts, sweatshirts, kidswear, socks, accessories and outfit sets. It is also useful for social media, lookbooks and campaign images. However, it does not show body shape or clothing structure as clearly as ghost mannequin photography.
Quick Comparison
So, when comparing ghost mannequin vs flat lay photography, the better choice depends on the goal. If the image needs to show structure and fit, choose a ghost mannequin. If the image needs to show styling, color, texture or product combinations, choose flat lay.
| Feature | Ghost Mannequin Photography | Flat Lay Photography |
| Best for | Structured clothing and main product images | Simple clothing and styled layouts |
| Shows shape | Strong | Limited |
| Setup | Mannequin, lights, clips, editing | Surface, lights, props, styling |
| Editing needs | High | Low to moderate |
| Best use | Ecommerce product pages | Social media, lookbooks, secondary photos |
The best photography style for ecommerce is often not one or the other. Use ghost mannequin photos for main product images and flat lay photos for supporting images. That gives shoppers both a clear product view and a styled idea of how the garment can be used.
Lighting for Ghost Mannequin Photography
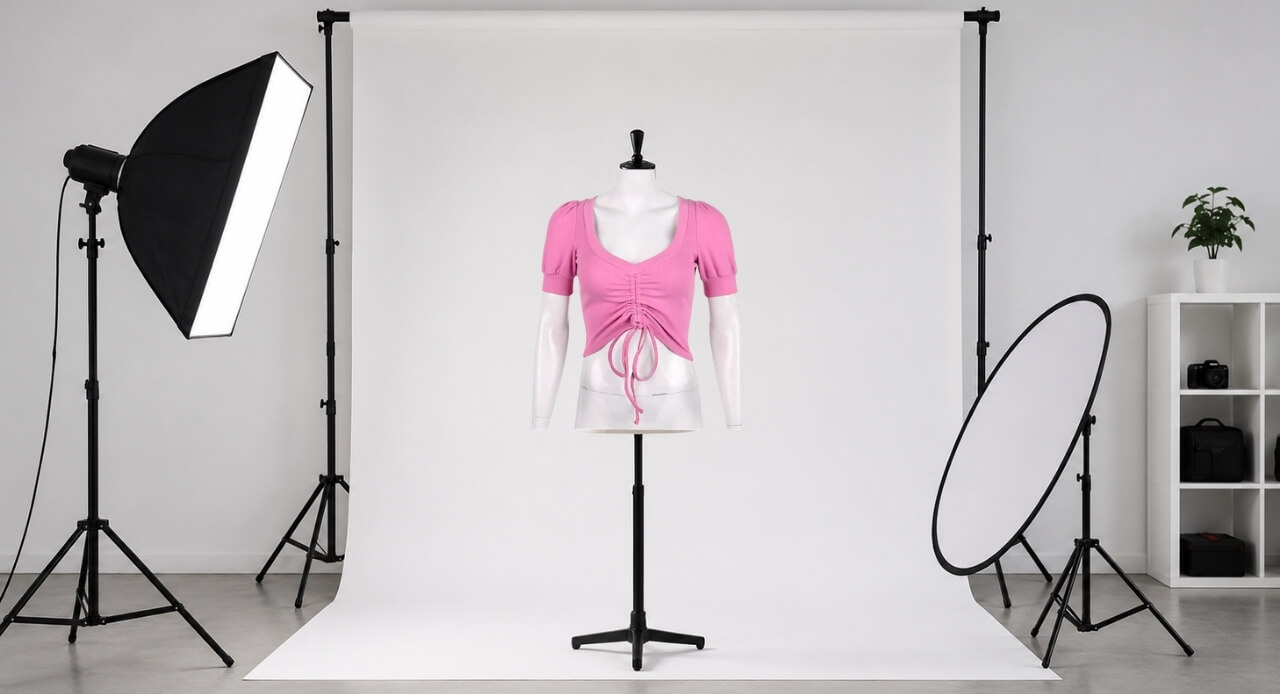
Lighting is where ghost mannequin photography starts to look professional, or painfully homemade. The goal is simple here. Proper lighting shows the clothing shape, texture, and edges without letting shadows steal attention.
Start with a clean setup
You do not need a huge studio, but you do need control. A simple product photography set helps manage the background, surface, and light so the clothing stays the main focus.
Use soft light first
A big softbox or a window with light works great for most clothes. Put the light a bit to one side of the mannequin not straight on. This helps show seams, folds and depth without making wrinkles look too bad.
Control shadows with reflectors
If one side looks too dark add a reflector on the side. You want a shadow, not a hard black line. Good lighting for products creates depth, form and interest which helps clothes look more real.
Watch dark and white clothing
For dark clothes use light from the side or a small light on the edge, so the edges do not get lost in the background. For white clothes lower the exposure a bit to keep details on the collar, sleeve and chest.
Choose the background carefully
White or light gray backgrounds work best for most ecommerce images. Clean backgrounds also make editing easier. That is why choosing the right background for product photos matters before you start shooting.
Good lighting should make the garment easier to understand, not harder to look at.
How to Edit Ghost Mannequin Photos in Photoshop?
The ghost mannequin effect is completed in editing. The shoot gives you the parts, and Photoshop helps combine them into one clean product image.
Step 1: Choose the main image
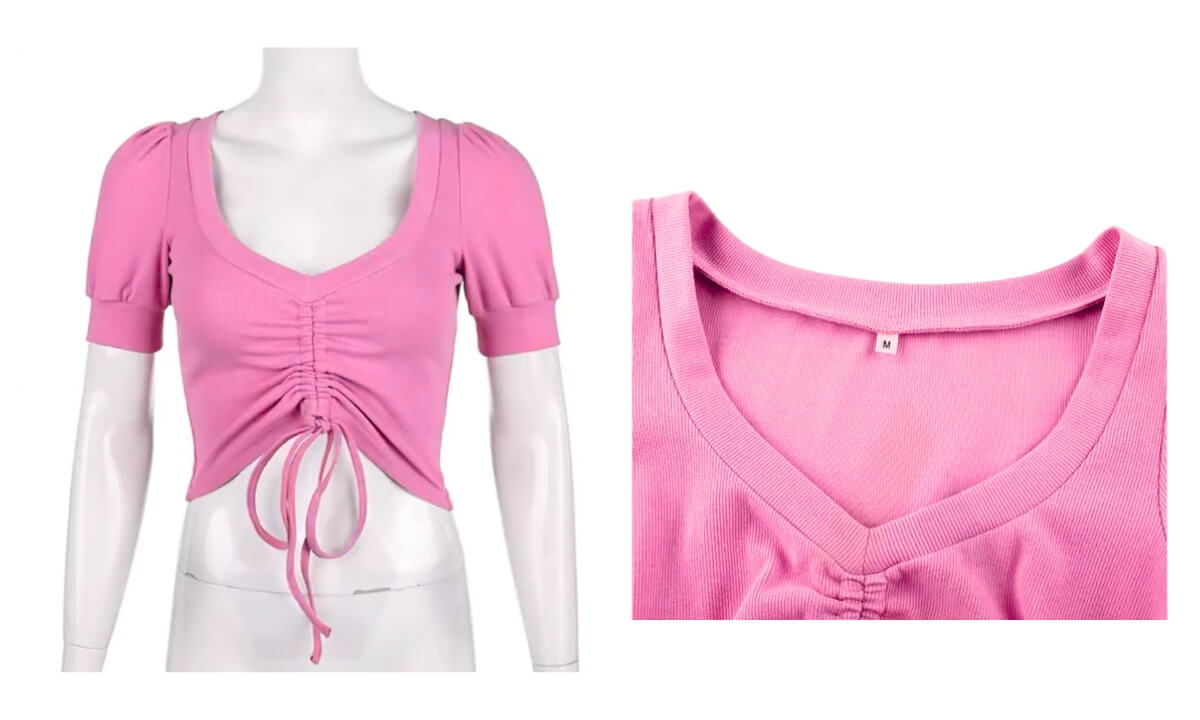
Start with the cleanest front photo of the garment on the mannequin. Then choose the inside shot, usually the neck, collar, or back label area. This second image fills the empty space after the mannequin is removed.
Step 2: Open both images in Photoshop
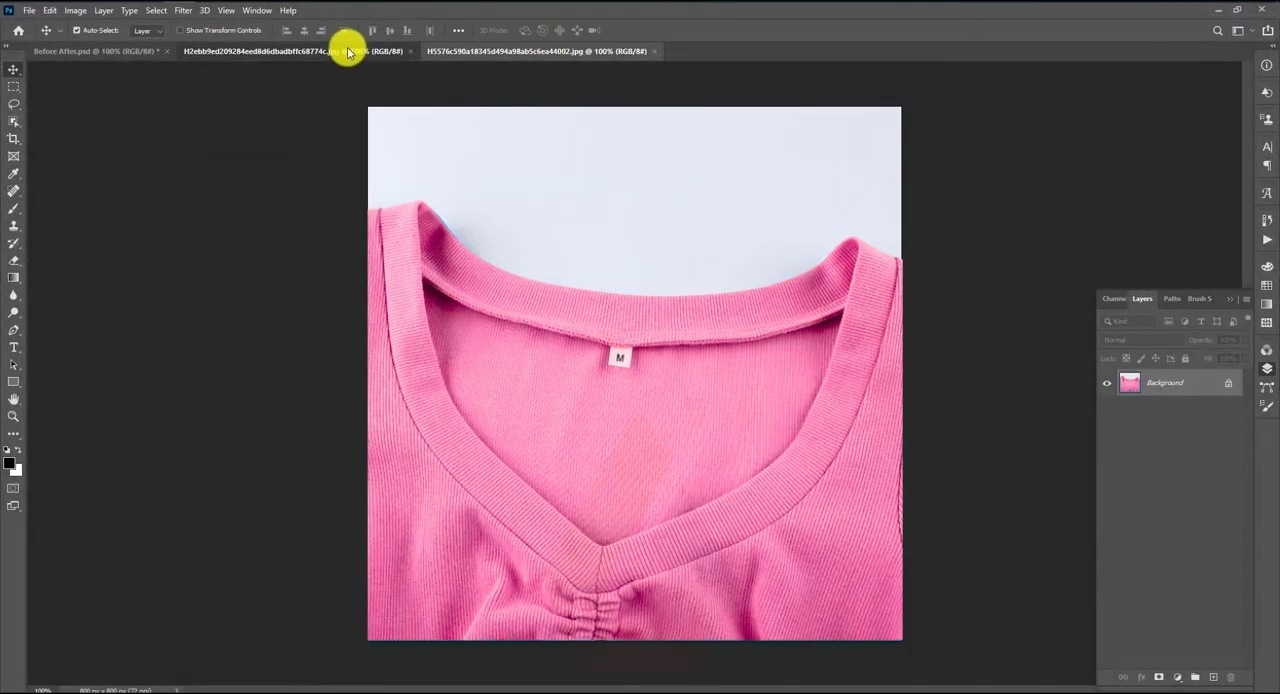
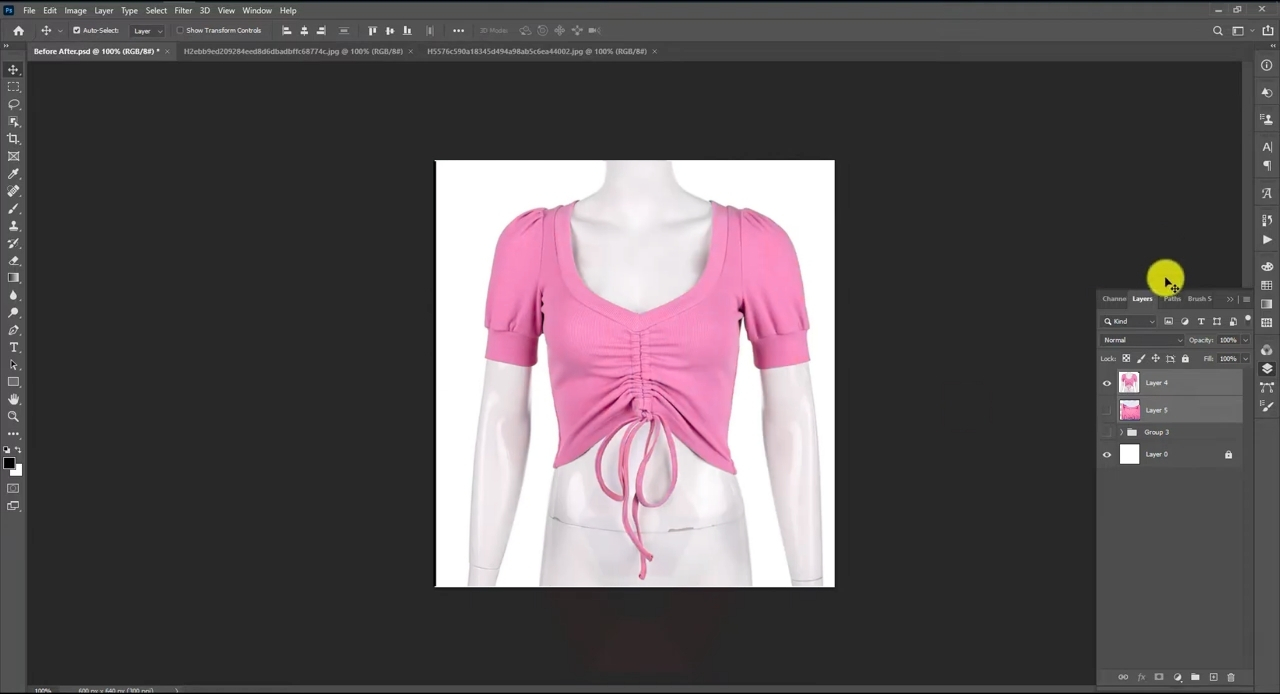
Place the inside image on a layer below the main garment photo. Keep both layers aligned as closely as possible before making detailed edits.
Step 3: Cut out the garment
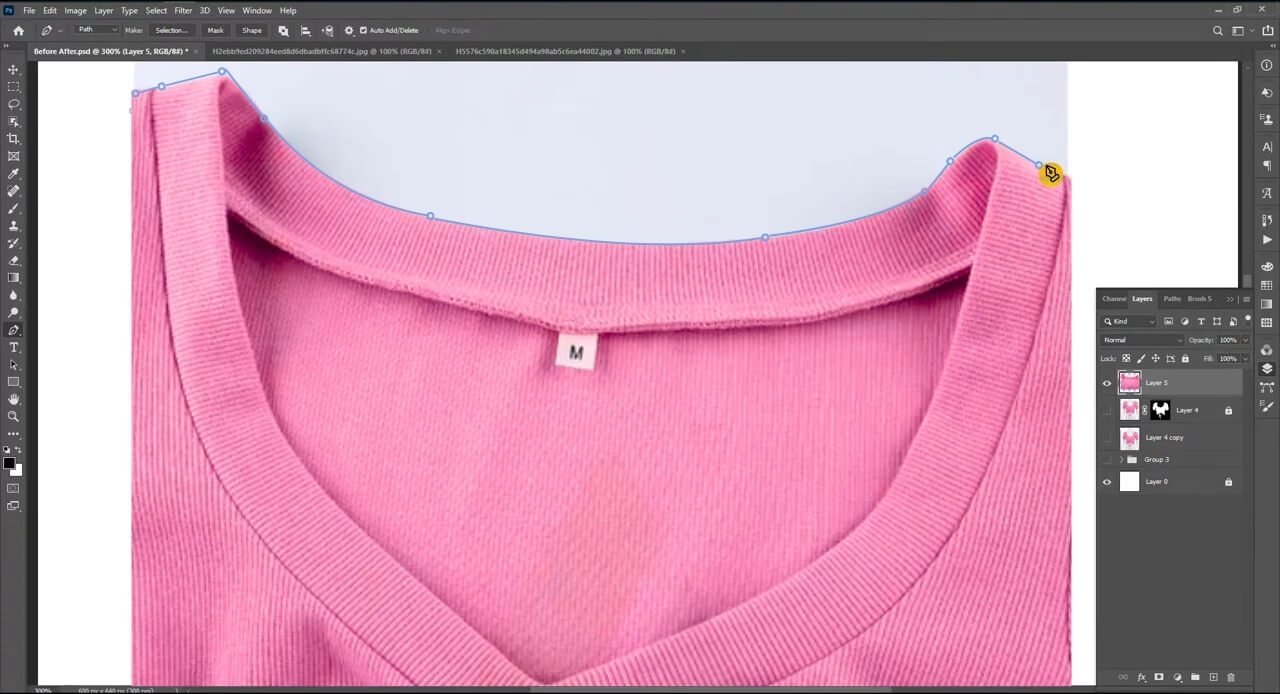
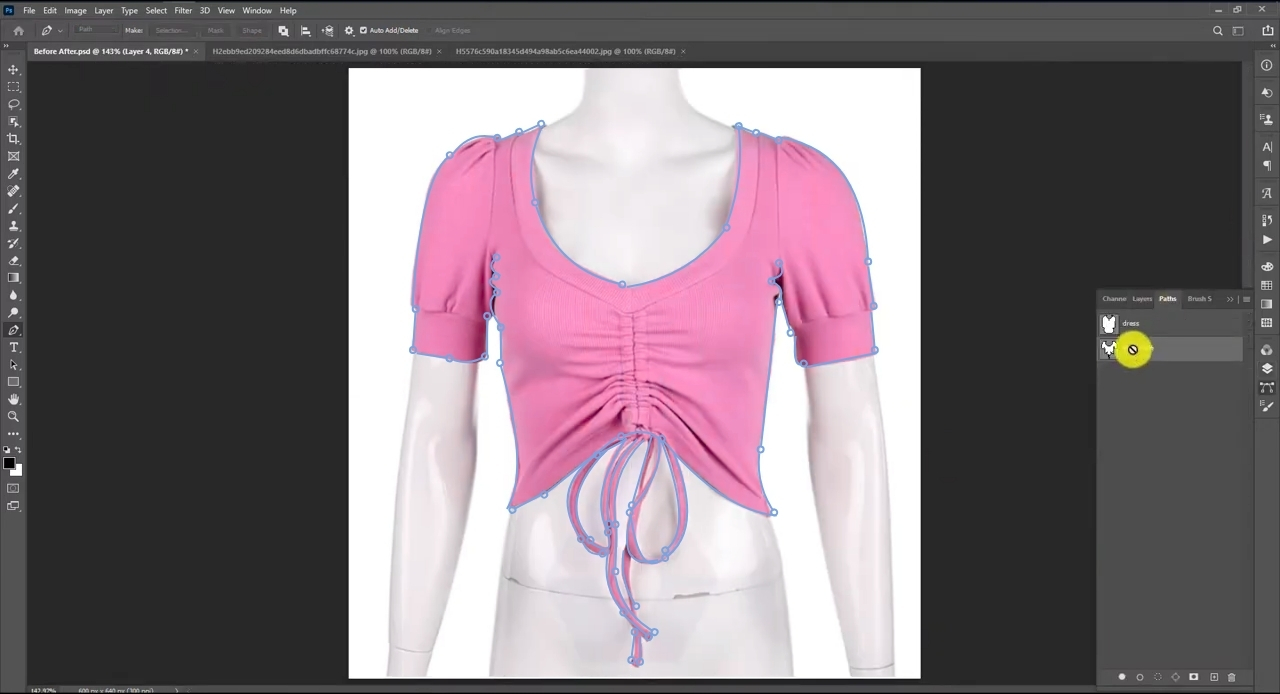
Use the Pen Tool or Select and Mask to cut around the clothing. Take your time around the neck, collar, sleeves, and bottom edge. These areas decide whether the final image looks polished or careless.
Step 4: Remove the mannequin
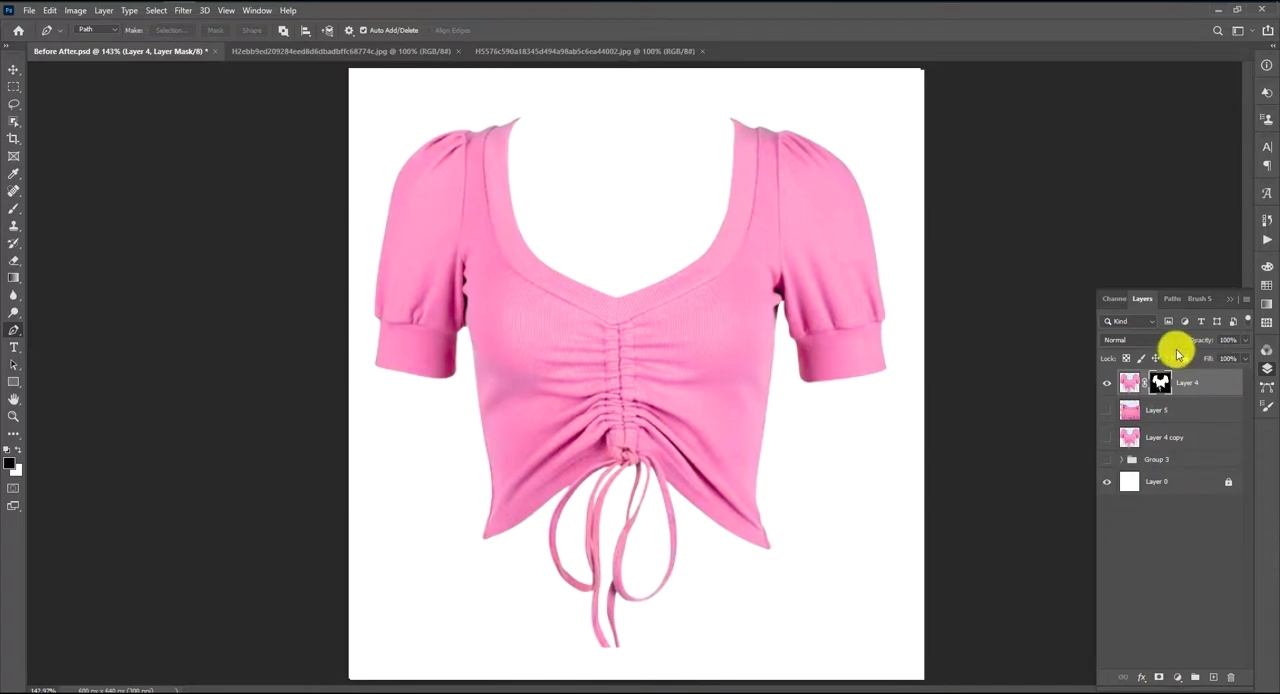
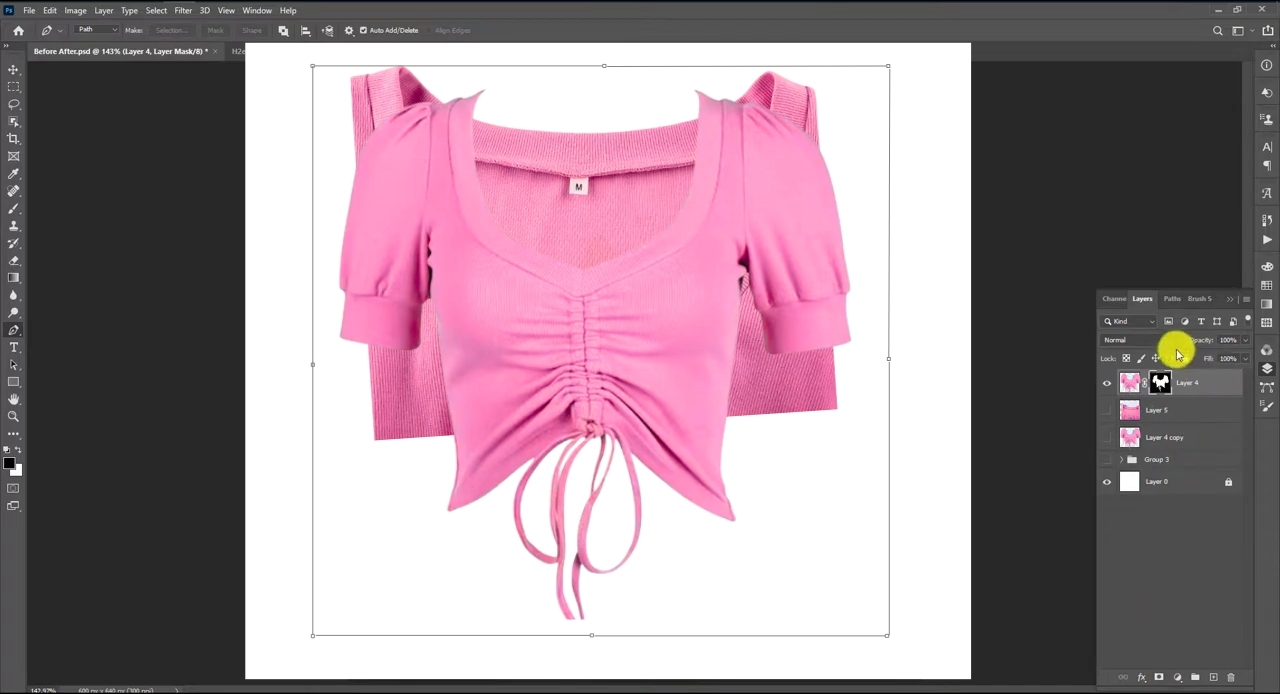
Mask the mannequin instead of deleting it. This lets you adjust the edges later. Then bring in the inside neck or label area from the second image and position it behind the front garment.
Step 5: Blend and clean the edges
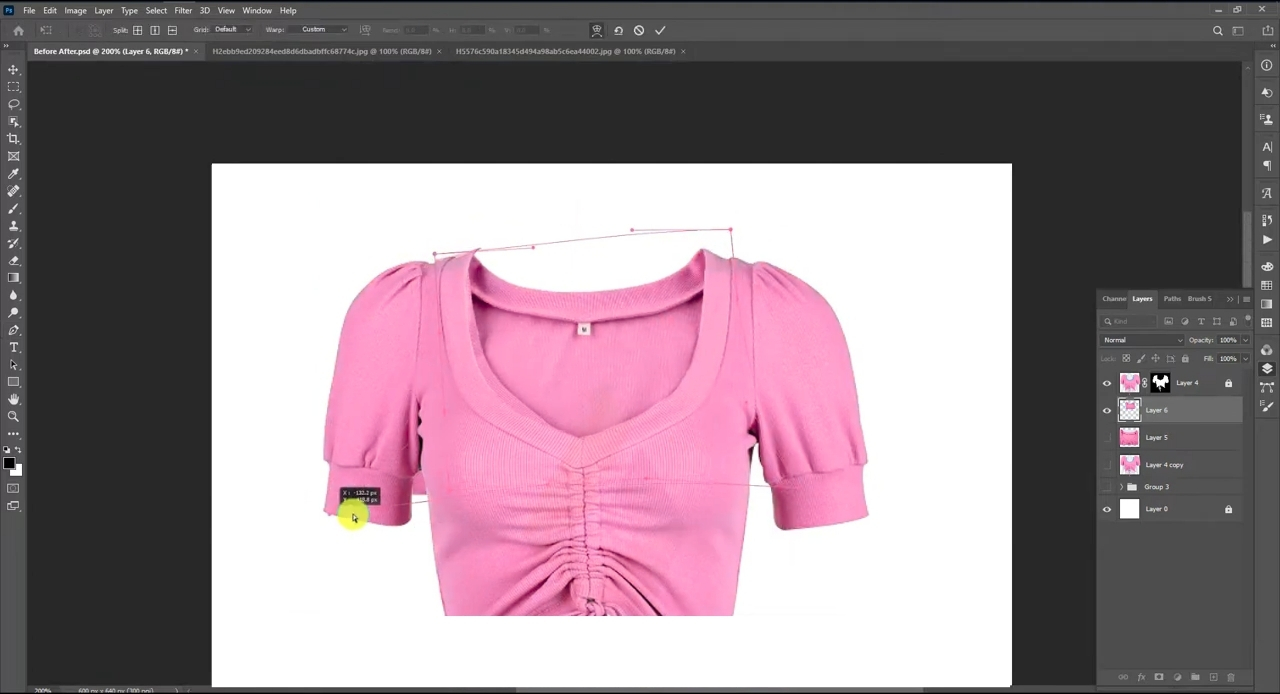
This is where ghost mannequin photo editing needs patience. Use a soft brush on the mask to blend the inside section. Check for rough lines, strange shadows, repeated fabric patterns, or uneven seams. Keep buttons, labels, stitching, and collars aligned.
Step 7: Final cleanup
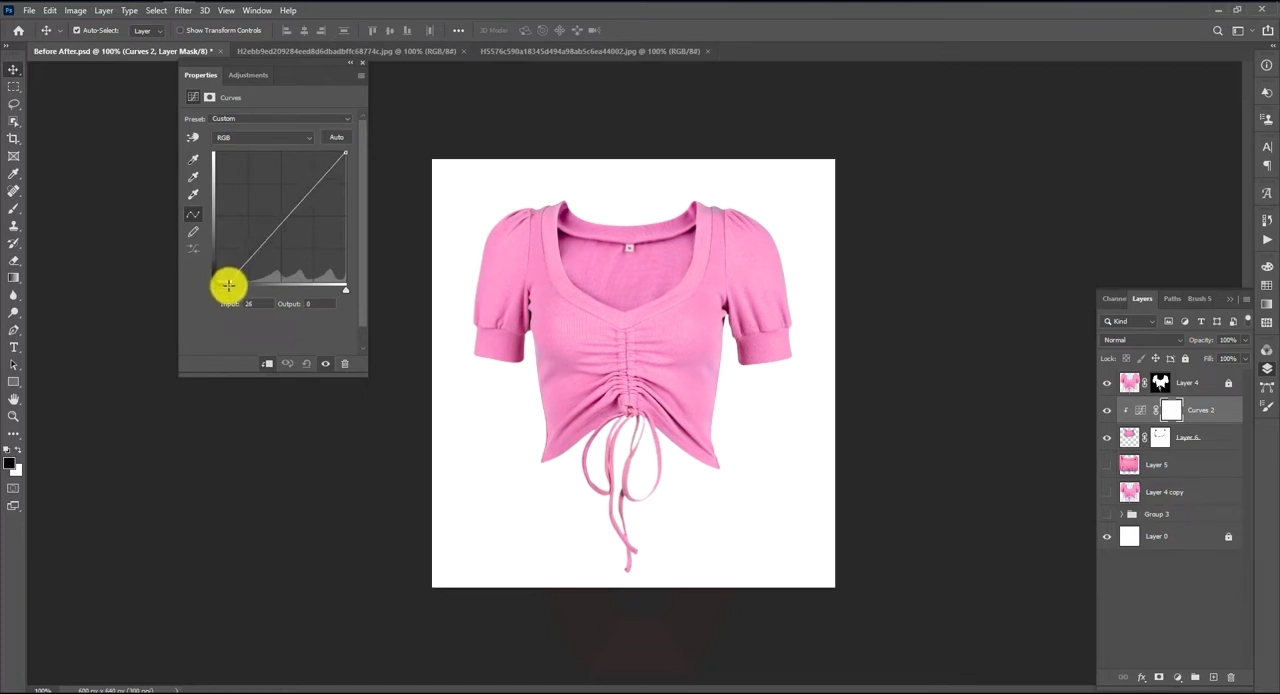
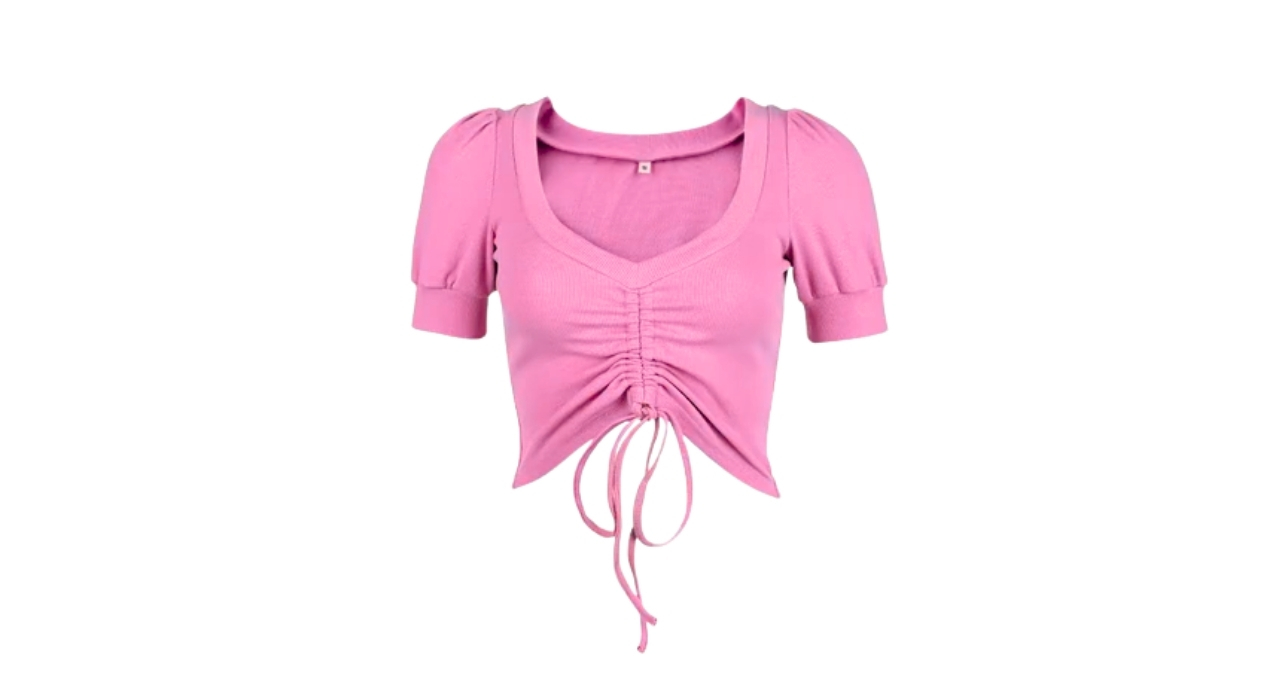
Add a soft natural shadow if the image feels too flat. For flat lay images, editing is usually simpler because strong product photo styling already does much of the work. You just need to clean dust, fix wrinkles, correct color, and crop the frame.
Frequently Asked Questions
These quick answers cover a few extra things regarding flat lay vs ghost mannequin photography that photographers and apparel sellers often think about before planning a clothing product shoot.
Do I Need A Model If I Use Ghost Mannequin Photography?
No, you do not need a model. The mannequin gives the garment shape, and editing removes it to create a clean product image.
Can I Shoot Ghost Mannequin Photos At Home?
Yes, you can shoot them at home with enough space, soft lighting, a clean background, clips, and a mannequin that fits the clothing well.
What Clothes Should Not Be Shot With Ghost Mannequin Photography?
Very thin, loose, sheer, or shapeless garments can be harder to shoot this way because they may not hold a clean structure on a mannequin.
How Do I Keep Flat Lay Clothing From Looking Messy?
Steam the clothing first, shape it carefully, keep props simple, and leave enough space around the product so the layout feels clean.
Should All Product Photos Use The Same Style?
No, not always. Keep main product photos consistent, but use supporting images to show texture, styling, details, or creative product combinations.
Concluding Lines
While comparing ghost mannequin photography vs flat lay photography, one must think about the job each photo needs to do. Ghost mannequin photography is better for shape, structure and main ecommerce images. Flat lay photography is better for styling, color, texture and supporting visuals.
For most clothing brands, the smartest approach is to use both. Shoot ghost mannequin images when the buyer needs to understand fit and form. Use flat lay images when you want to show style, combinations or a more relaxed brand feel. Together, they create a stronger set of product photos for clothing and fashion ecommerce photography.