
It’s no secret that the E-commerce industry has been booming for a couple of years and the competition is extremely increased. Not often, most of the time, people judge a brand based on its visual appearance, and as a result, product photography comes in. if your products have got the right shot and look eye-catching, it may increase your sales tremendously.
But product photography is not as easy as pointing and shooting. To stand out from the scratch, you need the most common essentials for your photo studio setup including the camera, lighting, and space. When you have a good product photography setup, it’s easy to produce stunning images that sell like crazy. In this article, I’m going to walk you through product photography tips for increasing eCommerce sales, and also share some amazing product photography tips for ecommerce success.
Why Product Photography Is Important
Customers are constantly on the lookout for better products and services online because shopping at an eCommerce store is completely hassle-free. They only select products that appear to be neat and professional. Product photos that are appealing to the eye build trust and encourage customers to make a purchase. As a result, your primary goal should be to improve the quality of your product images. Here are some of the most compelling reasons to invest in professional product photography.
- Increases the appearance of your product images
- Build your brand personality
- Attract more customers
- Boost your eCommerce sales
Before You Begin, Familiarize Yourself With The Various Types of Product Photography
1. Individual shots
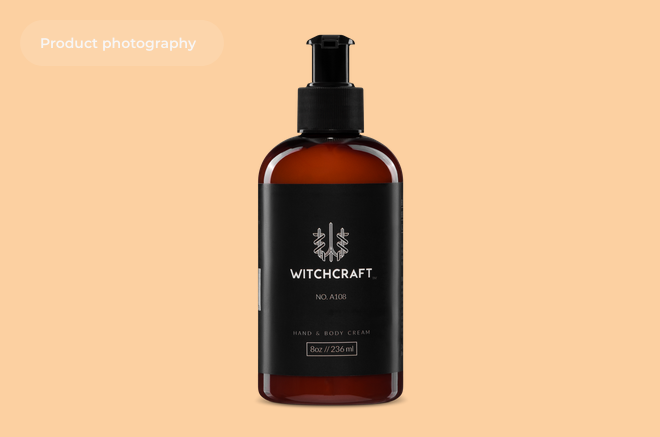
Image source: squareshot.com
Because it is more focused on the product, the individual shot appears more appealing. This is the most common type of proud photo that every eCommerce business owner thinks about. Other options include product catalogs, banner images, social media advertisements, and more.
The image above demonstrates how appealing a single shot can be by using a white background and a clean surface to create a simple and sophisticated look while keeping the focus on the product.
2. Group shots

Image source: travisduncan.com
A group shot is a product photo that features multiple products in one location. Frequently, the shot is intended to show various sizes and models so that customers can see a variety of products and select the ones they want. The Group shot is ideal for eCommerce website social media posts and advertising because it gives customers a sense of your entire brand rather than just one product. The image of the group shots serves to show variety, and it’s also a good idea to mention how many of your products there are or how big the product is so customers can see the images clearly.
3. Lifestyle shots

Image source: unsplash.com
The use of lifestyle product photography creates an air of excitement among viewers. When customers see lifestyle product photos, they may imagine themselves in a more interesting environment. Taking lifestyle photos also allows you to tell inspiring stories. This method can also be used to communicate your feelings to others.
This type of shot is frequently taken with a model, as in this example. When taking shots like this, make sure you have a clean outdoor or indoor location in mind to keep the consistency of your images clean and realistic.
Lifestyle photos are great for social media, emails, ads, and other visual channels because they catch the eye and make your products feel more personal.
4. Scale shots
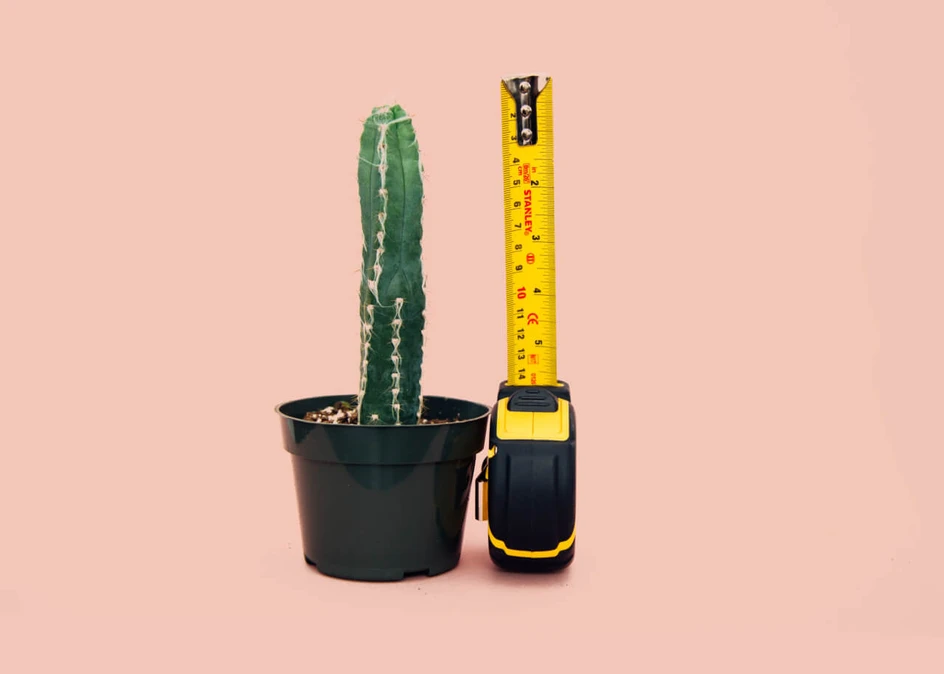
Image source: befunky.com
When it comes to purchasing products online, there are numerous concerns that arise. One of the most significant doubts is estimating the size of the products in the first place. Although a tough product description may list the dimensions, it is more important to visualize the size to determine whether it fits or not.
You can help your customers understand the actual size of a product by comparing it to other everyday items using scale shots. If you’re selling shoes, for example, you can compare the size of the shoes to the size of a pair of pants. You can also compare the shoes to your foot size, as well as a shoebox or bag. This is an excellent way to assist your customer in visualizing the scope of their purchase.
5. Detailed shots
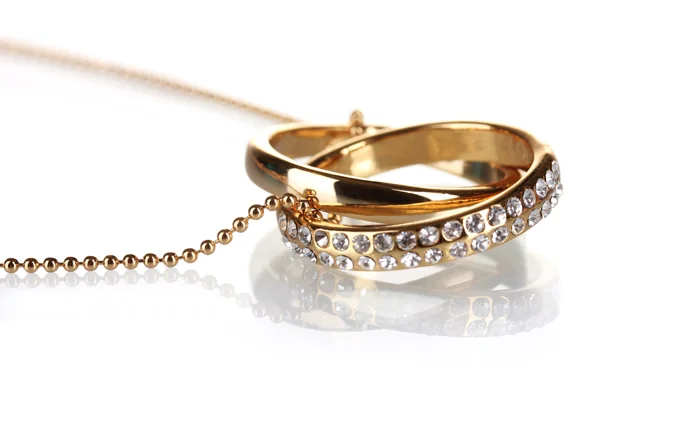
Image source: expertphotography.com
Some products, such as jewelry and other small items, require close-up shots, which are not always possible with product photography. The attractiveness of jewelry appears in close shots, which is why you should show more detail when photographing jewelry products. People are more comfortable purchasing online when they can see the products clearly. To capture those delicate shots, this type of photography frequently necessitates specific lighting equipment and camera settings, such as a macro lens.
6. Packaging shots

Image source: doopic.com
Selling online is all about piquing the customer’s interest as they examine the product’s packaging and other details.
It’s possible that you’re not focusing on the images that customers care about the most when making an online purchase if your eCommerce business and packshot photography aren’t working out. If your packshot or product photos don’t grab the customer’s attention, it’ll be difficult to increase overall sales.
Necessary eCommerce Product Photography Tools
Before you begin product photography, you should be aware of the various types of product shots that are essential. It’s time to gather all of the necessary equipment for flawless product photography, which is why we’ve compiled a list for you to keep in your notebook. A professional product photographer uses high-performing equipment, but if you’re just starting out, you can go the DIY route. To get started, you’ll need the following items.
1. Shooting table
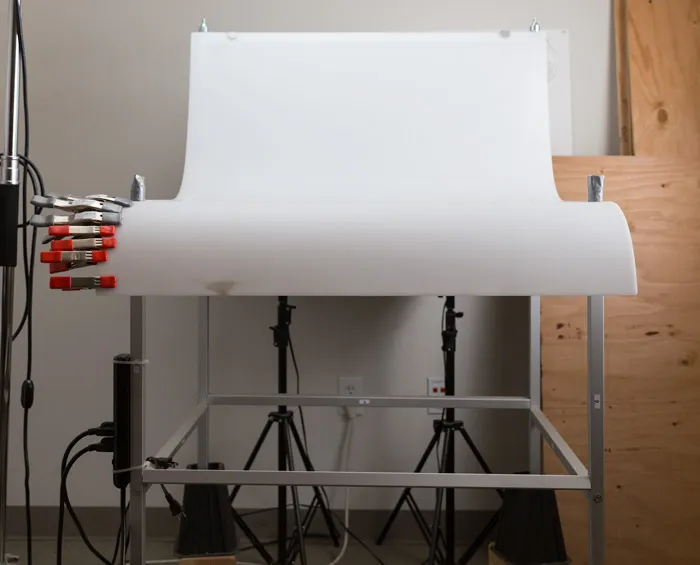
Image source: digital-photography-school.com
For product photography, you need a shooting table that is a stable and sturdy surface. You can also use a chair or table sweep to get a clear view of the clean surface and product placement. To get a clear view of the clean surface and to prevent product spills, you can also use a drop cloth or any table cloth.
2. Light tent
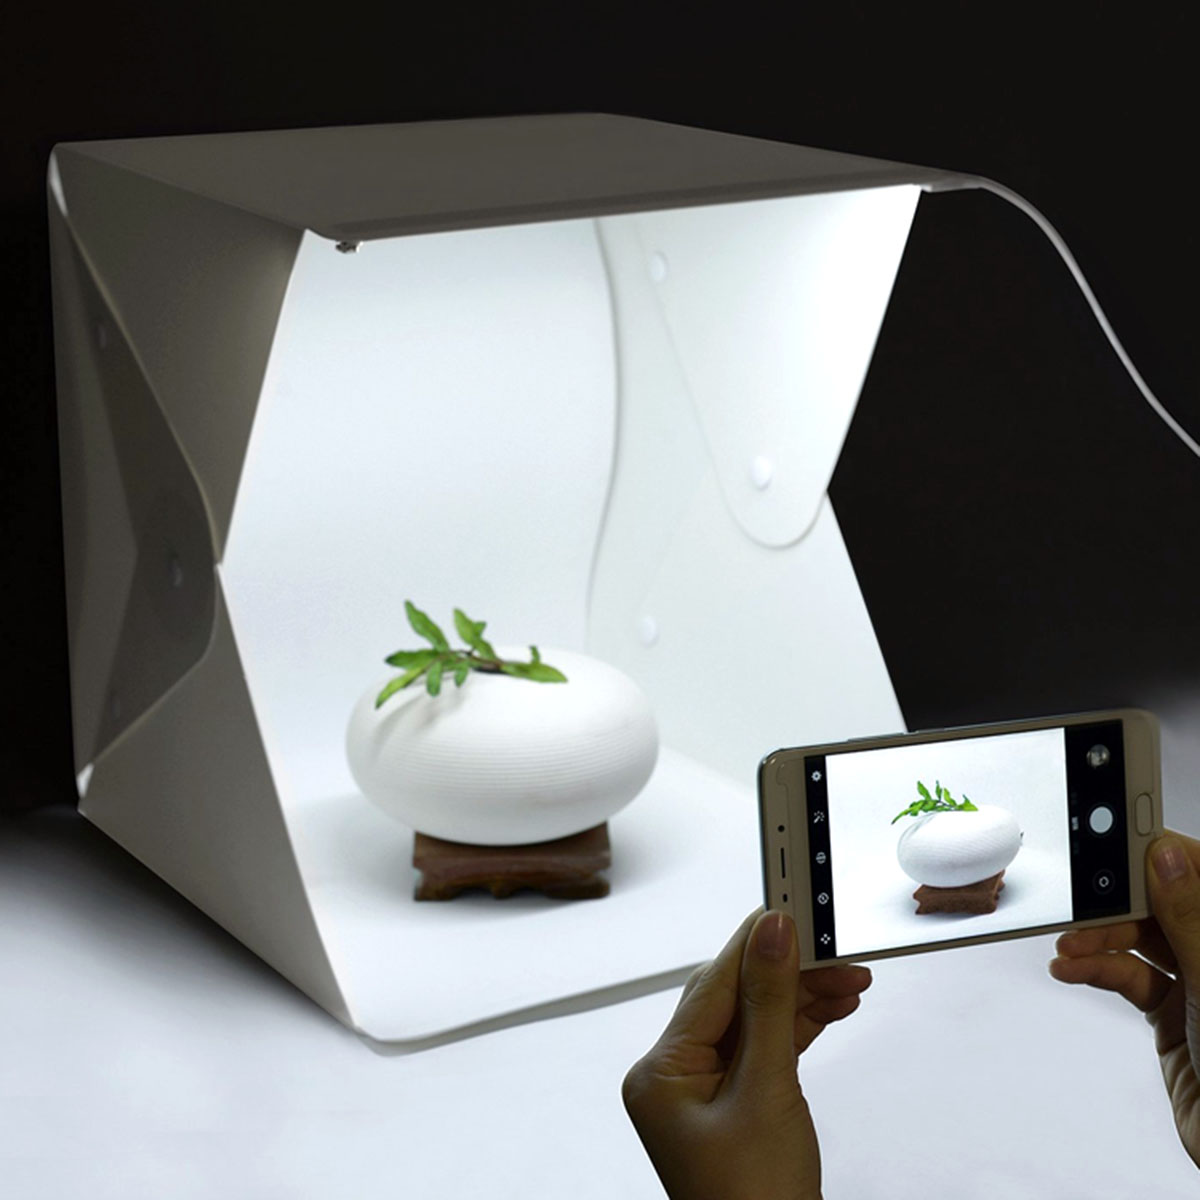
Image source: daraz.com.bd
Against a solid or white background, light tents produce shadow-free lighting. When it comes to product photography, a light tent is a must-have accessory. You can also make one yourself with a plastic storage container and white cloth or paper. Light tents come in a wide range of sizes and shapes. They’re great for product photography, studio lighting, and even as a photoshoot backdrop.
3. Product Photography Lighting
To achieve the desired results, professional studio lighting requires adequate lighting. Your product photography will be fine if your studio has good natural or artificial lighting. If your studio doesn’t get enough natural lighting (for example, all of your windows are dark), you’ll also need to invest in lighting.
4. Tripod
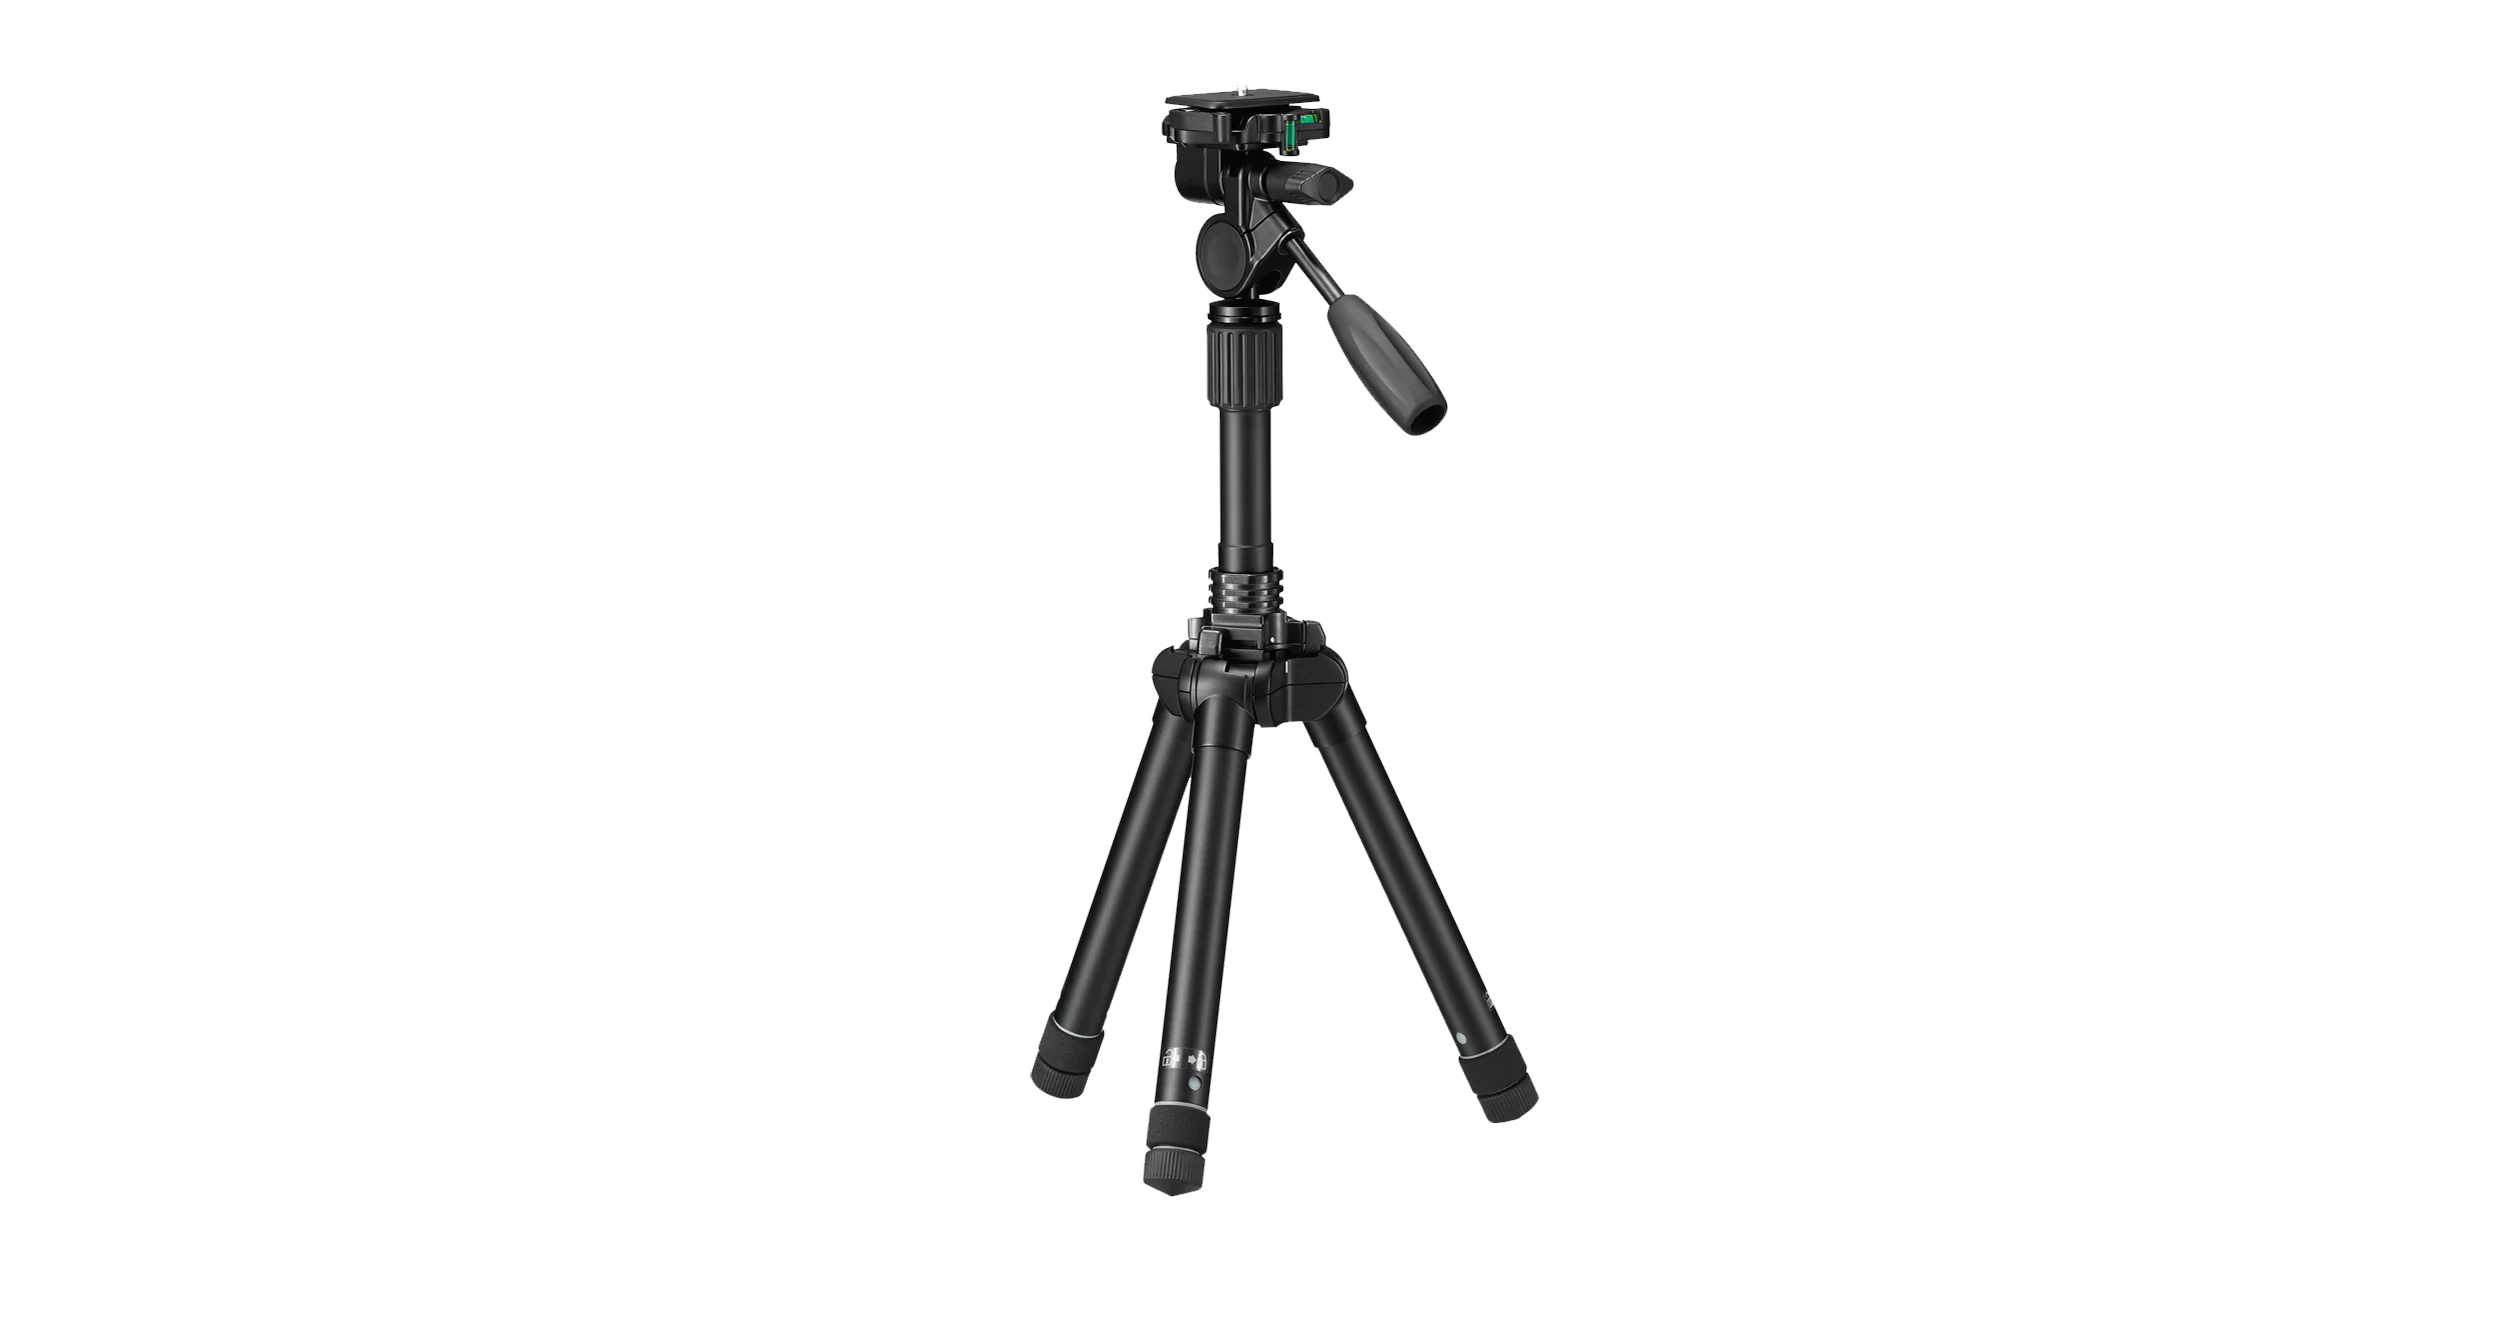
Image source: sony-asia.com
The tripod secures your camera, allowing for more consistent, clear, and focused product photos. It’s one of the significant processes of product photography.
It’s a lightweight product that you can take with you wherever you go, and it only costs $20 and will last for years. I’ve been using it for years and it’s never failed me. Anyone who wants to take great product pictures should get it.
5. Mobile grip.
As I previously stated, a tripod is one of the most important tools for balancing the camera position during product photography, but it is only useful when shooting with a camera. If you’re shooting with an iPhone or Android, you’ll need a mobile grip to keep your phone in place while you set up your tripod. A monopod or a tripod with a monopod adapter can also be used. A monopod adapter is a device that connects a monopod to a tripod.
6. Photo editing software
You’ll be able to take as many shots as you want once you have all of the necessary equipment for product photography. However, post-production processing is required to give your images a polished and professional appearance. There is a lot of software that can help you with this.
Adobe Photoshop (they also offer tons of free tutorials to help with all of your photo editing needs)
Pixlr.
Canva.
Fotor.
Snapseed.
Product Photography Tips and Step-by-Step Process
Product photography may appear intimidating, but it isn’t. Product photography is more straightforward today than it was previously. It’s best not to invest in expensive photography equipment if you’re just starting out.
You can take great photos with a mobile phone camera. For example, most of us already have a 12-megapixel iPhone camera in our pockets, and there are numerous software programs available that allow you to edit your photos without having any professional skills. It’s easier than you think to photograph products. Here are some helpful hints and step-by-step instructions for constructing your own DIY at-home product photography studio.
Set up your background
The most important factor in making your product more focused is the background. If you want to make your online store look more professional, the first thing you should do is remove the background. It’s not difficult to remove the background because there are numerous tools available that allow you to complete the task in a few clicks. Use a white or light backdrop in your product photography setup to make removing unwanted objects and retouching photos easier.
The white background is the most preferable when it comes to showing your products. Also, white background helps you to show your products in more detail.
To get the perfect shot, you don’t have to spend a small fortune on a fancy backdrop. There are a couple of inexpensive options that will suffice:
Shooting table
Setting up a photoshoot table will help you position your product correctly and get more consistent photos. If you have a large number of products to photograph, I recommend using a sweep, which can be horizontal or vertical.
Another option is to clamp the sweep to the top of the chair and drape the paper down the chair to achieve the same seamless effect.
When setting up the sweep, make sure your table is against the wall so you can secure it with the wall and table. Secure it between the wall and the table with tape.
Start shooting by placing your product in the center of the frame. To get the best quality images of your products, make sure you have enough lighting.
You may find it difficult to set up a larger sweep against larger products, such as furniture, so all you need to do is invest in a stand-mounted sweep.
Alternatively, you can tape white craft paper to the wall in the same way as the chair-mounted sweep.
Light tent
Finding strategic ways to make things more unique and appealing is what perfection is all about. You can make your own light tent or lightbox to make your backdrop work well. This is essentially a wireframe box with translucent walls that helps create an evenly distributed light around the object in focus.
You can make it yourself using some plastic storage containers stacked on their sides with the lids removed. Cover the bottom with white paper, as well as all the other sides if you want more evenly distributed light. Finally, either uses artificial lighting on either side of the container or natural lighting from a nearby window.
2. Set up your product.
Setting up your product in the proper position is an important skill to learn in product photography. It may appear simple, but it necessitates a few factors such as angle, lighting, and proper positioning.
When setting up the product, take your time to ensure that it is properly positioned.
Begin by positioning the product in front of the backdrop and ensuring that it is in the proper position, such as a flat surface, table, and chair. As we previously discussed in the table, it is best to place products on the table that have a flat surface.
Make sure the label type is centered if you’re working with a bottle. To get everything to line up perfectly, you must pay close attention to every last detail.
When photographing jewelry and other small items, more attention to detail is required. In this case, you may want to use a bust that better displays the product, and you may need to spend some time adjusting the product until it’s perfectly centered for items with labels or special designs.
Some of the necessary props to use product photography setup for more consistency and balance are:
- Keep small items in place with glue dots and tape, such as earrings and necklaces.
- Clothing and accessories mannequins
- For displaying products at different angles, use hangers or an eye-catching flat lay.
- Modeling clothes or creating fun lifestyle shots with a friend or team member
3. Adjust Your product photography lighting
Customers are more likely to buy products that appear appealing, and your product photos can be more appealing when a sufficient amount of light is produced during product photography. Although adjusting the light can be tedious, good lighting can make all the difference in an image. A light meter can be used to measure the amount of light in a room and then used to adjust your camera settings to get the proper amount of light for your photos. Natural light and artificial light are the two types of light sources available.
Natural light
natural light is the most common light source for product photography. it is the light that comes from the sun. it is also the light that is reflected off of the clouds and the sky.
The sun is a good source of light because the light it emits is soft and diffused. Because it is always present, the sun is also a good source of light. It also serves as a constant source of illumination. Seasons have no effect on it. It’s the same every time.
As I previously stated, shooting a lifestyle photo with a model or outdoor photos only requires natural light; otherwise, you will not be able to get amazing photos using artificial light.
You can also use sunlight to take photos indoors. Simply position your backdrop and table near a window that receives a lot of light, and if the light is too intense, try diffusing it with a light sheet of paper draped over the window.
Artificial Product Photography Lighting
Remember that due to weather changes, you will not always be able to get sunlight, but if you need to take a lot of shots during the day and night, artificial product photography lighting is an option you should consider. You should buy at least two softbox light setups to help soften shadows if you plan to do the entire photography process on a tight budget. On Amazon, you can get clip-on light clamps and strong bulbs for around $30, or if you have more money, there are plenty of higher-end options.
You can often achieve the desired look by combining natural and artificial light. Consider the positioning of your products as the best option. If the light is consistent, you’ll be able to get the shots you want.
Set up a key light in front of the product and fill light on the other side, back, or above it.
If the shadows are still too intense after using the lightbox, you can always use a sheet of white cardboard to further soften the light.
Once you’ve perfected your lighting setup, make a note of the positioning and camera settings so you can recreate the same look from shoot to shoot.
4. Use a tripod
Set up the camera on a tripod before taking a single shot. It aids the camera in establishing a stable position, reducing shake, and obtaining the desired results. Consider a mobile phone with the lens pointed at the subject; it’s difficult to hold it without your hands vibrating. As a result, the photo may have inconsistencies that you don’t want to put on your e-Commerce site. With a tripod, you can take multiple shots from various angles while maintaining consistency. One of the best product photography tips is using the tripod, so take it on your list.
5. Pick the right camera.
When it comes to photographing products or environments, the camera is the first thing that comes to mind, and it is also the most important aspect of product photography. You can start product photography with your smartphone if you want to make a DIY photography setup. If money isn’t an issue, spend it on a high-end DSLR camera that will produce professional-looking photos. You can also use lenses to get a better look at the products. If your products are jewelry or other small and expensive items, for example, you will need to show them in greater detail.
6. The right Camera Settings You will Need
Maintain the lowest ISO possible
Product photography requires a lot of strategic steps to stand out in product photography. If you are using a professional camera, you must go through the right camera settings.
The sensitivity of your camera’s sensor is measured in ISO. This is one of the three key elements of exposure control that allows your camera to gain light. In most cases, the lower the ISO, the better the image will turn out. If you take photos in low light, you can increase the ISO to add more light to your photo and make the image perfect, but start with the lowest ISO possible and gradually increase until your product photos appear properly.
The aperture should be as wide as possible
Aperture refers to the amount of light that passes through the camera lens and is measured in numbers ranging from F1 to F22. To represent the right apertures, the lower aperture passes more light to your camera, while the higher aperture passes less light. When you take multiple shots with different apertures, you will gain a better understanding. Because your product needs to be more focused, you should keep the aperture as high as possible (F16 or F22) when photographing product images.
On a tripod, keep the shutter speed slow and steady.
The shutter speed of your camera determines the exposure time, or how long the camera’s sensor is exposed to light while taking pictures. However, a faster shutter speed can cause your photo to freeze, whereas a slower shutter speed may allow motion blur.
All you need to do in product photography is use a tripod to better position the camera. It enables you to capture the correct exposure without motion blur or freezing. To capture more sharp and polite images, begin at a steady speed.
7. Take multiple pictures and evaluate.
One of the most useful methods of eCommerce product display is to show multiple images of a product. It is strongly advised that you include as many photos as possible. When it comes to visiting an online store, people are most concerned with compelling product photos. Taking multiple shots allows you to choose the best photos to upload on your eCommerce site. Eight or more images are recommended for your eCommerce store to depict the entire product from multiple perspectives. This will give your customers a good idea of how your product looks and compares to the competition.
Once you’ve taken enough photos, transfer them to a computer to see how they turned out, as the tiny screen on your camera won’t give you an accurate representation. To organize your photos and begin editing, a program like Adobe Lightroom may be useful.
8. Retouch your Images
Our discussion of the ideal eCommerce photography using DIY methods comes to a close. You won’t have to spend a lot of money on photography if you follow this guide. That’s perfectly fine. Because the camera cannot produce high-quality images for uploading to your eCommerce website, you may not be satisfied with the photos you took of your products. With image editing and retouching, your photos will appear more professional and vibrant.
Retouching images requires a significant amount of time and skill to achieve the best results. The most efficient way to go is to hire retouching services like ours to get the job done on time and on budget. Hire a professional ecommerce photo editing company rather than attempting to self-teach.
- Optimize images
Even if your image quality is excellent, it will be useless if you are unable to display it to your intended audience. Unfortunately, the larger the image on your eCommerce website, the longer it takes for the page to load. Customers are too busy these days to wait for a website to load, which is why it’s critical to optimize your images using image optimization tools.
Finally, make sure your product photos are properly named and include metadata and keywords to improve your search ranking.
Additional Product Photography Ideas For Beginners
Don’t Use Filters
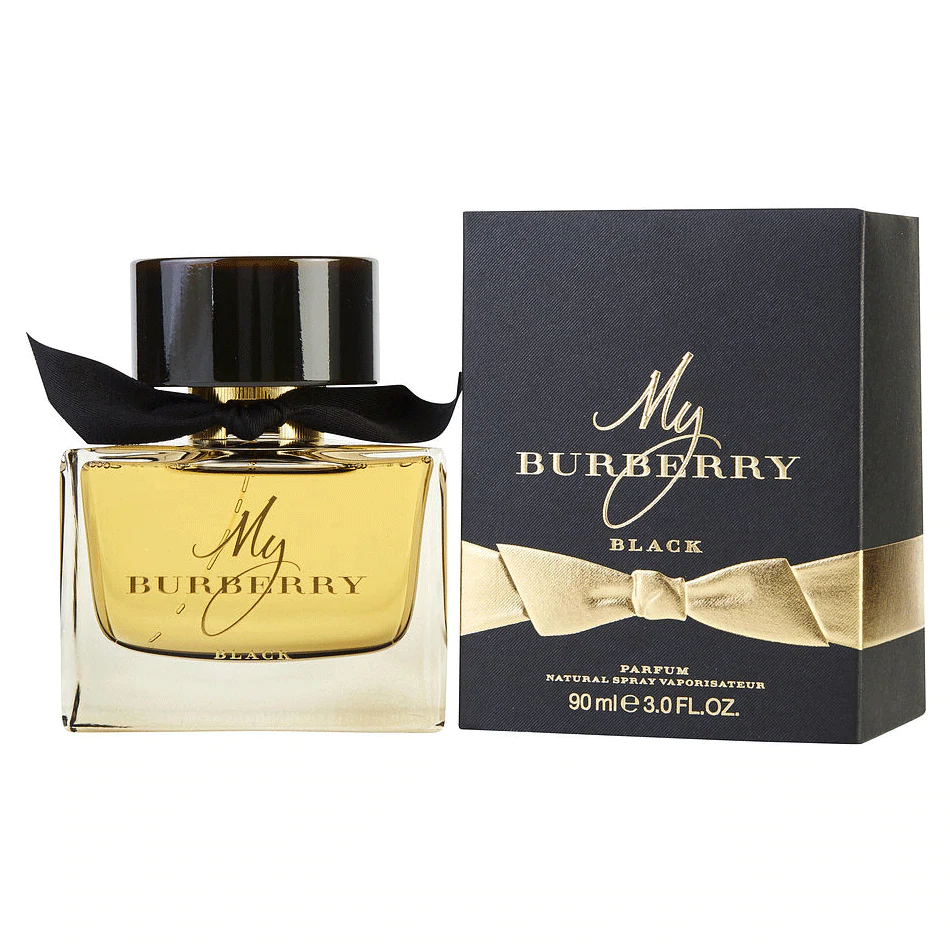
Image source: parfumenligne.ca
Customers nowadays are smarter than you think, and they can tell which product photos are genuine and which are not. Because of the filter, the product photo may appear to be fake. When it comes to preparing product photos, it is best to avoid using a filter. In the eyes of the customer, the original light and environment take precedence.
Use Color Psychology That Helps You Capture the Right Emotions
Color psychology is crucial for displaying your brand’s personality. Because color can evoke emotions and draw attention to your products. You may have noticed that most electronic devices, such as computers, phones, and tablets, have a sleek black background. This is because black is associated with sophistication and security. Using different colors can help customers feel more comfortable about making a purchase.
Use Props
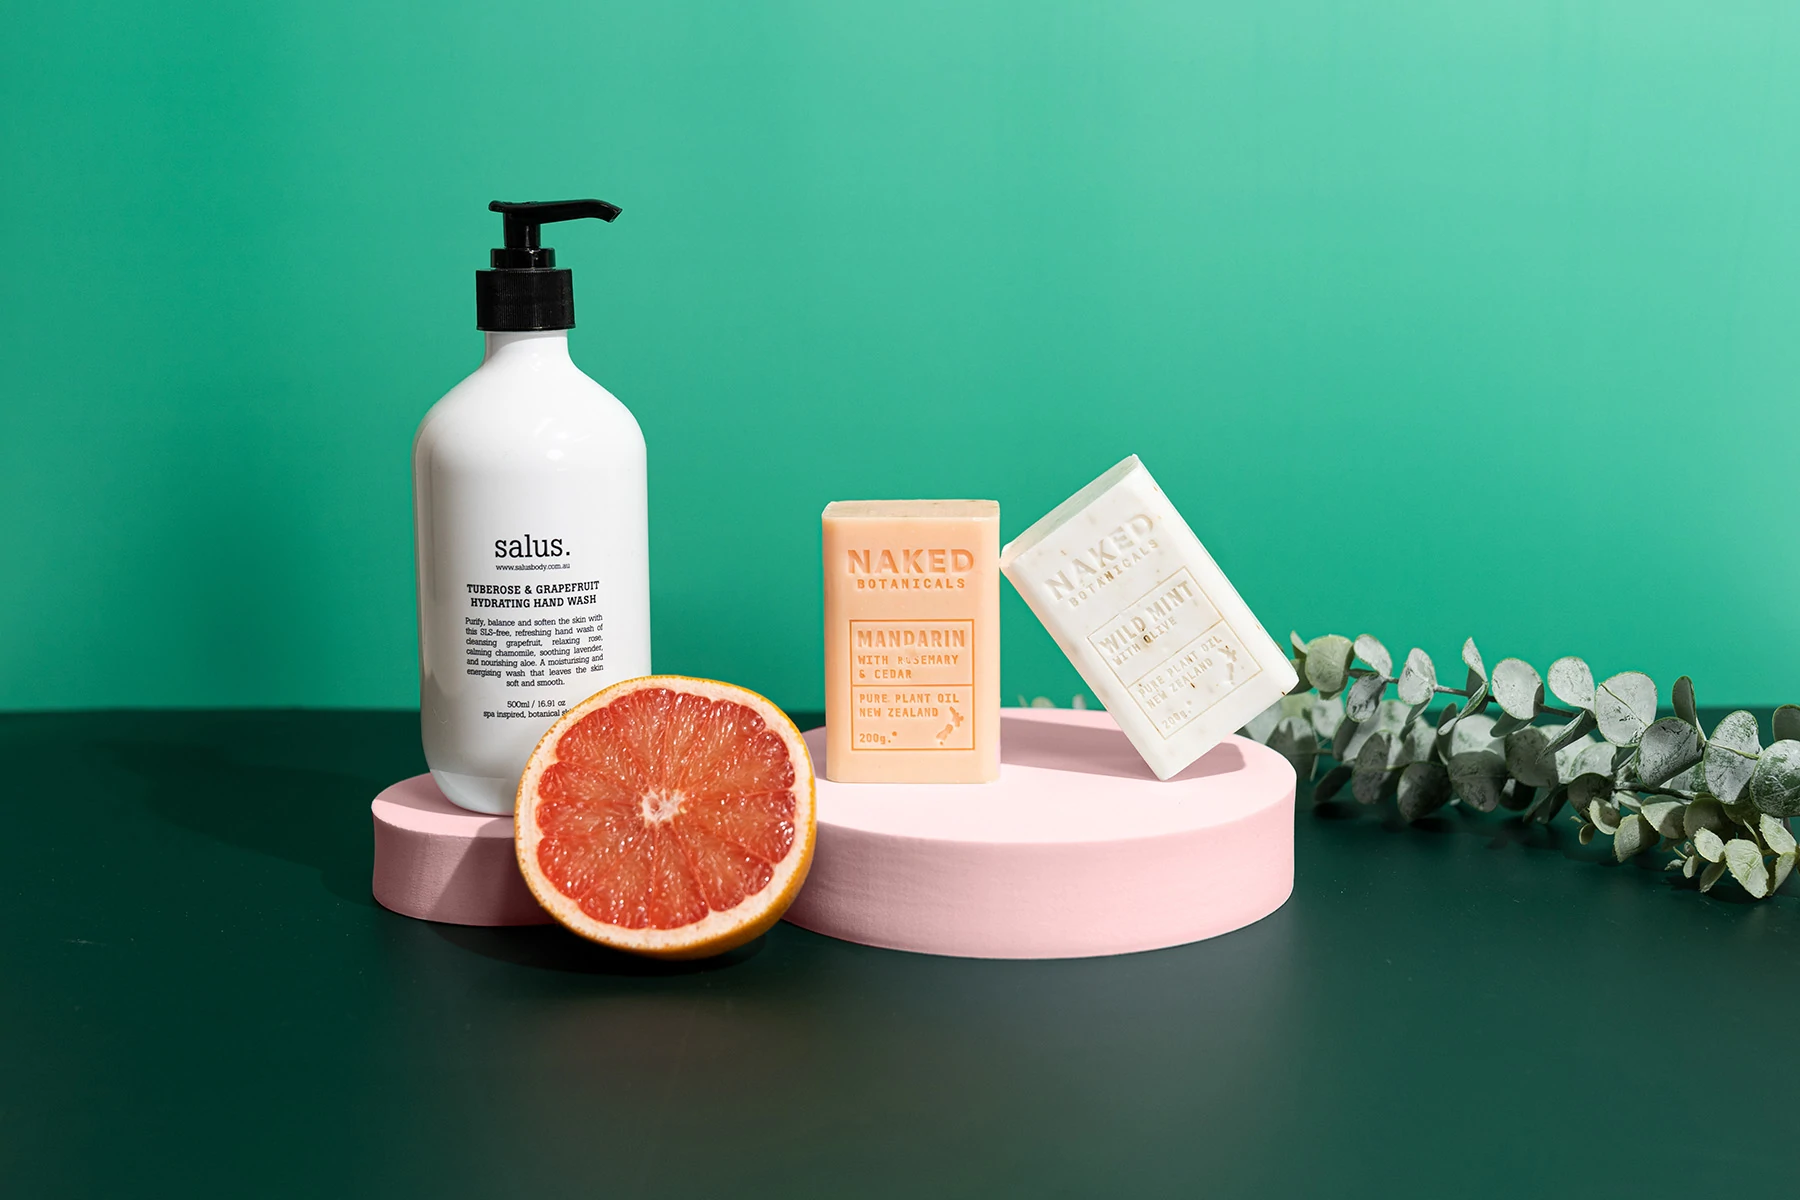
Image source: spectrum-brand.com
Adding props to your products can help them look better. When it comes to props, make sure they’re relevant, simple, and match the color scheme. Remember that props are used to enhance the appearance of your product, so the product should be the main focus of each product photograph.
Props can be used in a variety of ways in product photography. However, the best way to tap into your own creativity is to experiment with the props and take multiple shots from various angles.
Take Shots in Different Style
Styling is a skill that can be applied to product photography. Hanging your products for a unique perspective, positioning the product in the background of an image, showcasing people using your product, and more are all options. You can also experiment with different lighting settings for product photography. You can display your product in various settings, such as outdoors if it is related to the outdoors. You could even provide a 360-degree view of the product.
Learn Basic Photo Editing
Even if you are an excellent professional photographer, you will need to edit your images to make them more consistent. With editing, you can get rid of all the flaws, such as blemishes, dust, and unwanted objects or backgrounds.
If you don’t know how to do it, image editing can be tedious. Learning basic editing so you can edit your images without the help of others is the best idea.
You might be confused about where to learn all of this image editing stuff and who offers courses; don’t be. There are many courses on YouTube, and you can find plenty of free tutorials that will teach you the basics of the editing software of your choice. For some easy editing techniques check out this video below:
Wrapping Up
Product photography is not as difficult as you may believe; it is a simple skill that you can learn with the help of a few simple resources. This article is sufficient to help you become a DIY photographer, and all of the product photography tips discussed here will assist you greatly.
It goes without saying that you do not have to make all of these changes at once. Creating consistent, high-quality product photos does not happen overnight, so expect some trial and error to get the results you desire.
The best part of this process is that you will gain basic photography skills that you can apply to professional product photography in the future, which is very interesting.