Invisible Ghost Mannequin Service
Get your apparel looking its best with ghost mannequin effects. Outsource the ghost mannequin service and save your time.
Our clients
Leading, high street brands, and retailers we have proudly worked with.
Ghost mannequin effect for apparel
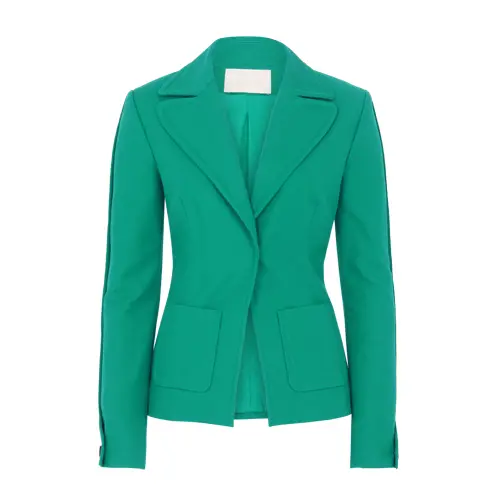
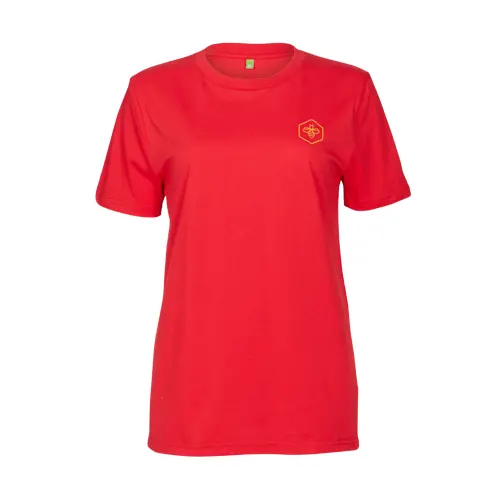
The invisible mannequin creates a floating appearance and makes the apparel attractive by keeping the focus on the product, its design, cut, and fit. 3D ghost mannequin editing involves removing the mannequin and adding the missing parts of the garment (such as the neck or collar, bottom, and sleeve) thus creating a hollow man effect. Post-production experts at UK Clipping Path use their years of experience, the right tools, and techniques to remove the mannequin to create seamless clothing images that make sales.


Our Works Tells Our Expertise


Benefits of ghost mannequin
- Realistic natural looking presentation of your product – a professional ghost mannequin helps highlight any specific feature of the apparel and highlight specific features of it.
- Create the illusion of someone wearing the clothing item – It helps online buyers make decisions by giving an idea of how the garment will look in real life.
- Showcasing the garment from a variety of angles – Clothing retailers can show intricate details of your apparel through an in-depth presentation of your products.
- Keeping the focus on the product, not the model – Neck joint edits help E-commerce shoppers keep their focus only on the product, not on the model.
- Showing the fit of a dress- Invisible mannequin image editing services help the retailer present the fit and style of the clothing product images through a three-dimensional view.
Happy Customers
Customers love to work with UCP, we’re always ready to answer your questions.


Types of Invisible Ghost Mannequin Service
Neck joint
When removing the mannequin from the RMG products, a hollow space is usually created near the neck area. An expert image editor uses a reference photo to replace the hollow area and make it realistic.

Bottom joint
Sometimes the image editors remove the hollow spaces from the bottom parts of garment products. They use multiple images of the apparel to find the best replacement for the bottom part that needs to be added.
Body joint
Some RMG products create different hollow spaces during mannequin photography. The back of a jacket, for example, becomes hollow and needs to be replaced with reference photos when applying a ghost mannequin on it.


3D mannequin effect
This is a three-dimensional appearance of apparel to make it more dynamic and engaging. Adding depth and dimension to the clothing image helps the viewers see it from different angles and perspectives.
Who need this service?
E-commerce retailers
E-commerce retailers can showcase the fitness and style of their garment products to the customers without the buyers practically trying on them thus increasing sales.
Professional photographer
Creating a ghost mannequin requires time and experience; meanwhile, photographers need to focus on their core job to get the perfect shot every time.
Freelancer or agency
Ghost mannequin services help agencies and freelancers to stand out from the crowd by making sure the apparel images they work with are realistic and polished.

Why us?
Transparent communication
We are transparent in our communication. You can track our progress live on the customer dashboard.
3step QC
99% of our image editing works get accepted by our clients without any revision, thanks to our 3-step quality control system.

Less turnaround time
Very few of our competitors can work faster than us, thanks to our fully automated operation process.
A complete photo editing solution
Invisible mannequin is just a piece of the puzzle. We are a complete photo editing service company offering all ranges of retouching and photo manipulation services.
FAQ
Most frequent questions and answers
What is invisible mannequin effect?
Invisible mannequin is a technique in Photoshop where the garment products are presented in such a way that it creates an illusion as if the product is worn by a person. This is a very common digital retouching technique for product photo editing that creates a realistic image of the product.
It involves taking multiple photos of a dress from different angles while it is being worn on a mannequin or live model. Then remove the mannequin or model and retouch it using software like Photoshop to create a hollowman effect.
How much does ghost mannequin service cost?
Ghost or invisible mannequin or neck joint service at UK Clipping Path starts at $0…../ per image. However, the cost depends on the complexity of the task and order volume. The price is also dependent on the addon services requested by our clients such as wrinkle removal or color correction.
When not to use the invisible mannequin?
Some garments products have intricate details, for example, laces or necklines. Representation of these products with the model is more appropriate to properly appreciate those details. In this case, product photography with the models are preferred for e-commerce websites.
Some RMG products are worn in a certain way that removal of the model will not make any sense. Scurf and belts are examples of such products which are usually presented with models rather than removing from the mannequin.
How do you apply ghost mannequin effect?
To achieve this, it is important to capture photos of the clothing using a mannequin from different angles. This photography technique is known as ghost mannequin photography. The photographer makes sure that he at least captures the area of the clothing item on a mannequin. Then the image editors will need to ghost the mannequin make a hollow area and also fix the photography with our detailed edits.
After the image editor has photos of the clothing from different angles, he starts combining these photos and removes the model or mannequin. The final result is a realistic clothing image with more detail and depth.
What is your turnaround time for delivering completed Ghost Mannequin images?
With our Photoshop ghost mannequin photo editing services you can expect to get your image in 6-48 hours. This depends on the number of images in a project and the complexity.
How it works? - It’s Simple
Step 1
Free trial or Request a quote
We’ll reply in 30 minutes
Step 2
Quotation approval
Confirm your order
Step 3
Upload the images
We’ll do the rest
